VBA Userforms - Browse SOLIDWORKS file(s)
Introduction
In this article, we learn how to browse SOLIDWORKS file(s) from a SOLIDWORKS VBA Userform.
In this article, I explain about 2 different methods which are listed below.
-
From
SldWorksobject directly. -
From Microsoft Excel externally.
Methods from these objects are updated methods, hence use any one of them for browsing SOLIDWORKS file(s).
Creating Userform
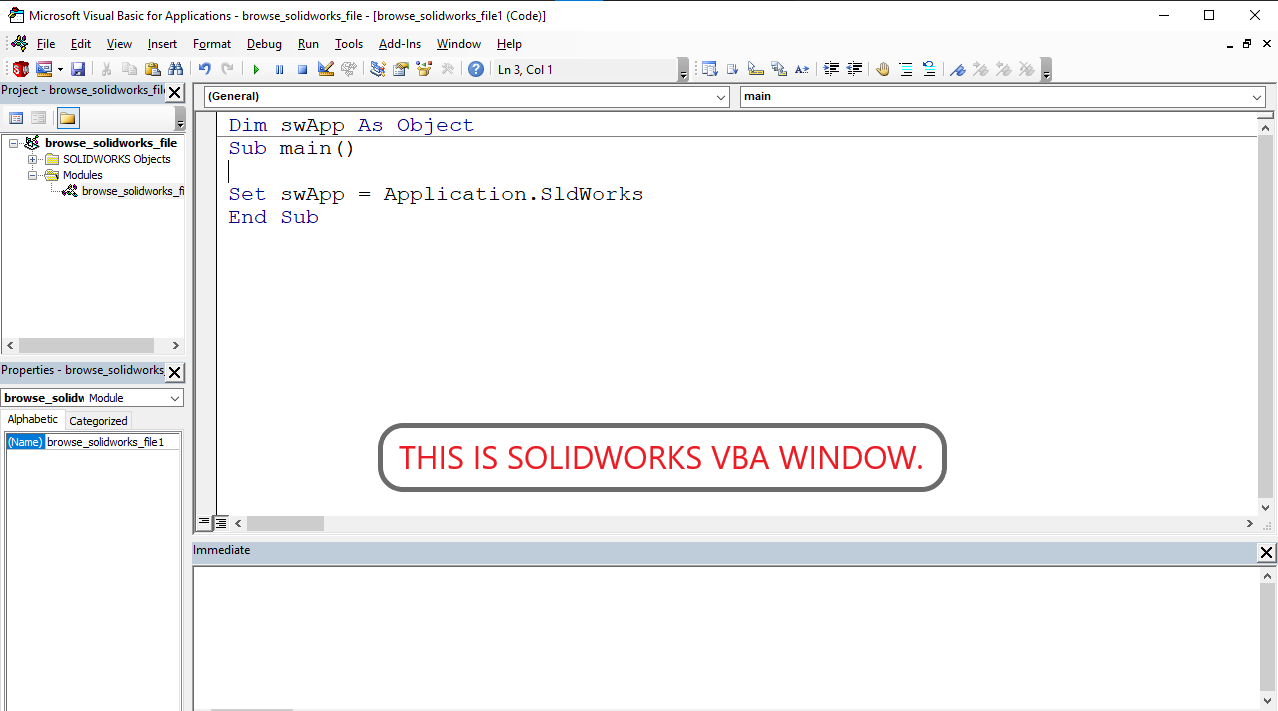
1st we need to create a new macro in SOLIDWORKS.
If you don’t know how to create a new macro in Solidworks, please go to VBA in Solidworks post for this.
This opens a Visual Basic Editor with some code as shown in below image.
After this we need to insert a userform in our macro.
For this, select the button shown in below image.
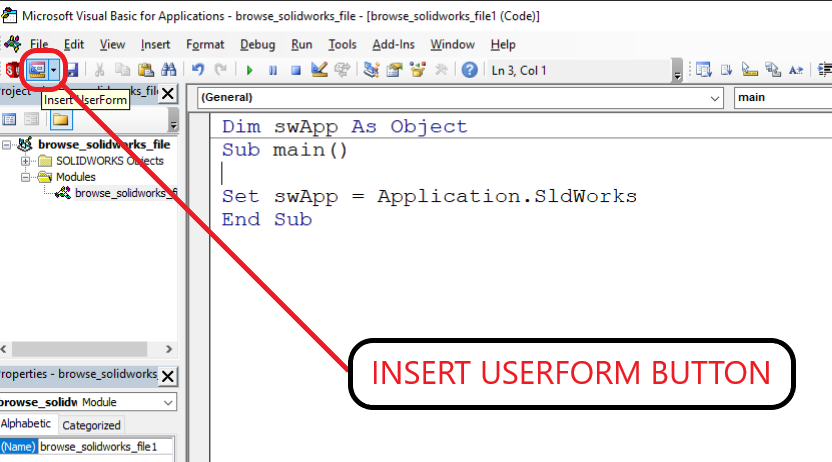
This button is called insert userform.
As the name suggest, function of this button is inserting a userform.
Please note that in a macro we can insert any number of userform as we like. But for this example we insert only 1 userform.
After clicking the insert userform button we get the userform window as shown in above image.
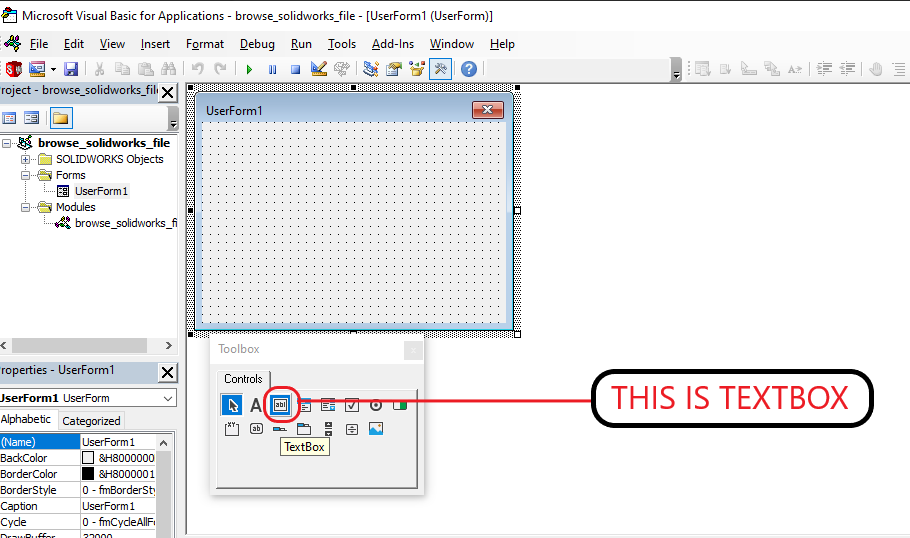
Adding Controls into Userform
Now in our userform window, we add following controls:
-
A TextBox
-
A CommandButton
Adding ComboBox
You can find TextBox option, as highlighted in Red Square in below image.
After adding ComboBox, we get window as shown in below image.
Adding CommandButton
You can find CommandButton option, as highlighted in Red Square in below image.
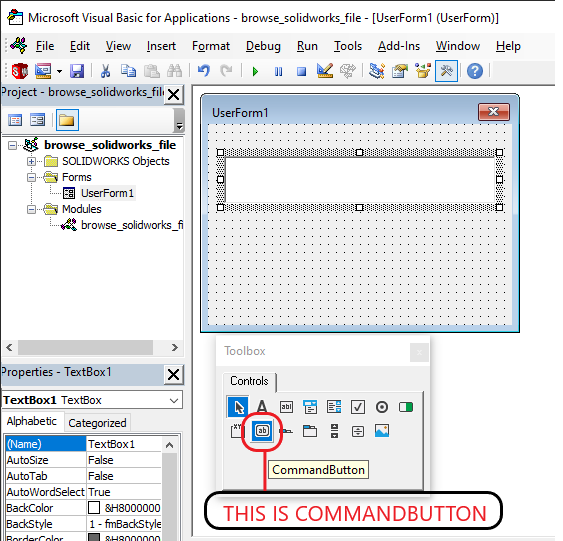
After adding CommandButton, we get window as shown in below image.

Updating Properties
Now we update some properties of following:
-
Userform
-
TextBox
-
CommandButton
Update Userform Properties
We update following properties of the Userform:
-
Name of Userform
-
Caption of Userform
In below image, I have shown the properties of Userform1 and update the properties:
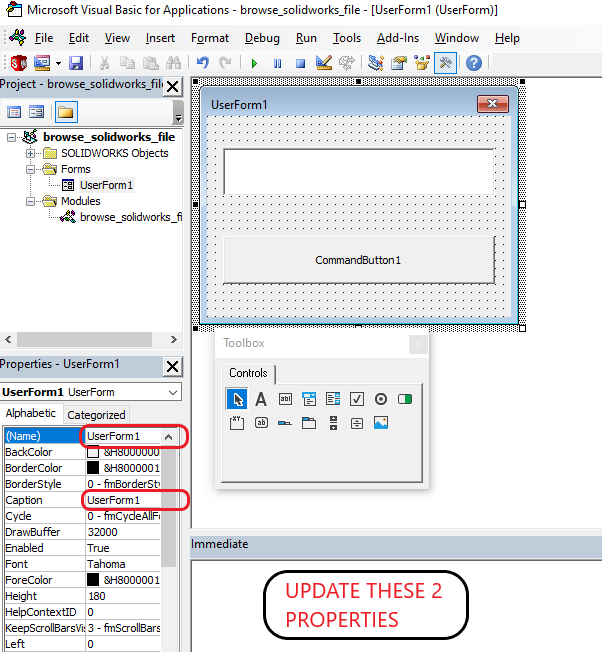
Update the value of Name property from UserForm1 to BrowseDocumentWindow.
- From Name property, we access the Userform.
Update the value of Caption property from UserForm1 to Browse Document.
- From Caption property, we update the text appears in the window of our Userform.
Please note that it is not necessary to update properties but it is a good habit to update them for our purpose.
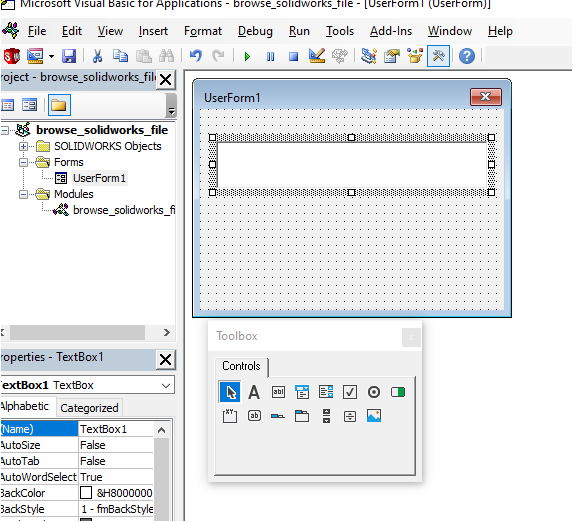
Update TextBox Properties
We update following property of the TextBox:
- Name of TextBox
In below image, I have shown the properties of TextBox and update the properties:
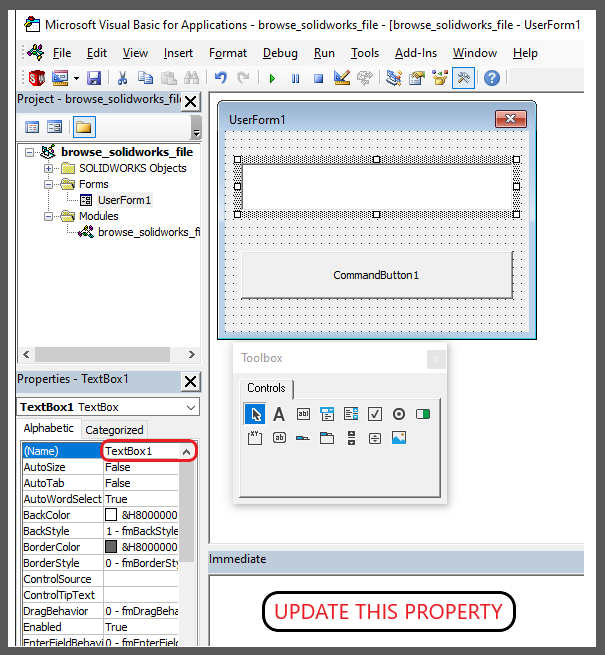
Update the value of Name property from TextBox to SelectedFileTextBox.
- From Name property, we access the TextBox properties like Text we want to show.
Update CommandButton Properties
We update following properties of the Command Button:
-
Name of Command Button
-
Caption of Command Button
In below image, I have shown the properties of CommandButton1 and update the properties:
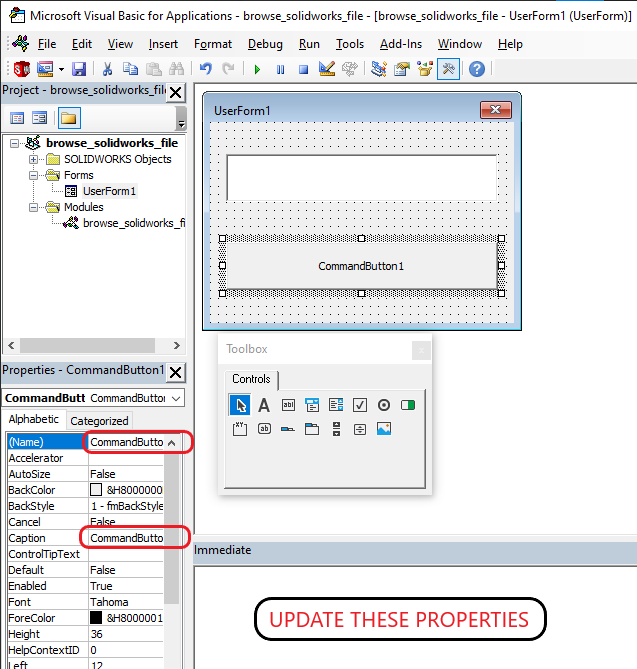
Update the value of Name property from CommandButton1 to BrowseDocumentButton.
From Name property, we access the Command Button.
Update the value of Caption property from CommandButton1 to Browse SOLIDOWRKS File(s).
From Caption property, we update the text appears in the Command Button of our Userform.
Call UserForm in Main Module
Now, we need to call the our Userform inside main module.
For this goto main Sub procedure inside the main Module.
Code inside the main Module is as given below.
Dim swApp As Object
Sub main()

Set swApp = Application.SldWorks
End Sub
To call our Userform, replace above code with below code:
' Main function of our VBA program
Sub main()
  ' Calling our window to show
  BrowseDocumentWindow.Show
End Sub
Above function call our window to appears on screen.
When the window appears on screen, we hit the Browse button to browse SOLIDWORKS File(s).
Add Functionality to Button
To add functionality in our BrowseDocumentButton, just double click the button.
This will add some code behind the designer.
Now open the code window of Userform designer.
Private Sub CommandButton1_Click()

End Sub
We need to update this code for opening new part after clicking the button.
Method 1 - From SldWorks object directly
For this replace all above code with below code.
Option Explicit

' Creating variable for Solidworks application
Dim swApp As SldWorks.SldWorks

' Private function of Open New Part Button
Private Sub BrowseDocumentButton_Click()

  ' Setting Solidworks variable to Solidworks application
  Set swApp = Application.SldWorks

  ' Solidworks file filter string
  Dim swFilter As String

  ' Method parameters
  Dim fileName As String
  Dim fileConfig As String
  Dim fileDispName As String
  Dim fileOptions As Long

  ' Set filters for different Solidworks files.
  swFilter = "SOLIDWORKS Files (*.sldprt; *.sldasm; *.slddrw)|*.sldprt;*.sldasm;*.slddrw"

  ' Browse and get the Selected file name
  fileName = swApp.GetOpenFileName("Browse Document", "", swFilter, fileOptions, fileConfig, fileDispName)

  ' Show the selected file's full path in text box
  SelectedFileTextBox.Text = fileName

End Sub
Understanding Method 1
Now let us walk through each line in the above code, and understand the meaning and purpose of every line.
I also give some link so that you can go through them if there are anything I explained in previous posts.
Option Explicit
This line forces us to define every variable we are going to use.
For more information please visit Solidworks Macros - Open new Part document post.
' Create variable for Solidworks application
Dim swApp As SldWorks.SldWorks
In this line, we create a variable which we named as swApp and the type of this swApp variable is SldWorks.SldWorks.
Next is our button click event BrowseDocumentButton_Click procedure.
This procedure hold all the statements (instructions) we give to computer.
' Set Solidworks variable to Solidworks application
Set swApp = Application.SldWorks
In this line, we set the value of our Solidworks variable swApp; which we define earlier; to Solidworks application.
' Solidworks file filter string
Dim swFilter As String

' Method parameters
Dim fileName As String
Dim fileConfig As String
Dim fileDispName As String
Dim fileOptions As Long
In above lines of code, we create SOLIDWORKS files filter string and Method parameters.
' Set filters for different Solidworks files.
Filter = "SOLIDWORKS Files (*.sldprt; *.sldasm; *.slddrw)|*.sldprt;*.sldasm;*.slddrw"
In above line of code, we set filters for different SOLIDWORKS files.
' Browse and get the Selected file name
fileName = swApp.GetOpenFileName("Browse Document", "", swFilter, fileOptions, fileConfig, fileDispName)
For “Browse and get the Selected file name”, we use GetOpenFileName method from Solidworks SldWorks object.
This GetOpenFileName method takes following parameters as explained:
-
DialogTitle : Title of the dialog.
-
InitialFileName : Path and file name of the file to open.
-
FileFilter : File name extension of the file to open.
-
OpenOptions : Not used.
-
ConfigName : Name of the configuration.
-
DisplayName : Recommended file name to use.
After the function complete following are the results:
Return Value:
- Path and file name of the file to open.
Below image shows our form in SOLIDWORKS.

Below image shows the opened window.

' Show the selected file's full path in text box
SelectedFileTextBox.Text = fileName
Now we set the value of text box to browsed file name.
Final window of method 1 is shown below/.

Method 2 - From Microsoft Excel externally
Prerequisite:
-
Office 365
-
Following below steps carefully
For this method we need to use Microsoft Excel from SOLIDWORKS.
For using Microsoft Excel, we need to add reference files.
Please see following steps for adding reference files:
- Select reference option as shown in below image.

- This open Reference window as shown in below image.

- Now select option given in below images and Press OK after selecting files..

Now, replace code in Add Functionality to Button with below code sample.
Option Explicit

' Private function of Open New Part Button
Private Sub BrowseDocumentButton_Click()

  ' Excel object
  Dim xlObj As Object

  ' File dialog object
  Dim fDialog As Object

  ' File name sting
  Dim strFile As String

  ' Create Excel object
  Set xlObj = CreateObject("Excel.Application")

  ' Create File dialog object by setting option 3
  Set fDialog = xlObj.FileDialog(3)

  ' Setting different properties of file dialog
  With fDialog
    .Title = "Browse Document"  ' Title of window
    .AllowMultiSelect = True    ' Allowing multiple select
    .Filters.Clear              ' Clear the filters
    .Filters.Add "SOLIDWORKS Files", "*.sldprt; *.sldasm; *.slddrw"       ' Add filters for Solidworks files
      If .Show Then
        strFile = .SelectedItems(1)
      Else
        strFile = vbNullString
      End If
  End With

  ' Show the selected file's full path in text box
  SelectedFileTextBox.Text = strFile

End Sub
Understanding Method 2
Now let us walk through each line in the above code, and understand the meaning and purpose of every line.
I also give some link so that you can go through them if there are anything I explained in previous posts.
Option Explicit
This line forces us to define every variable we are going to use.
For more information please visit Solidworks Macros - Open new Part document post.
Next is our button click event BrowseDocumentButton_Click procedure.
This procedure hold all the statements (instructions) we give to computer.
' Excel object
Dim xlObj As Object
In this line, we create object for Microsoft Excel Application.
' File dialog object
Dim fDialog As Object

' File name sting
Dim strFile As String
In above lines of code, we create objects for File Dialog and string for file name.
' Create Excel object
Set xlObj = CreateObject("Excel.Application")
In above line of code, we create Microsoft Excel Application and set the value of excel object.
' Create File dialog object by setting option 3
Set fDialog = xlObj.FileDialog(3)
In above line of code, we create File dialog and set the value of file dialog by FileDialog method.
FileDialog method take 1 parameter enum. Please see below links for more details about FileDialog
Application.FileDialog property (Excel)
MsoFileDialogType enumeration (Office)
' Setting different properties of file dialog
With fDialog
  .Title = "Browse Document"  ' Title of window
  .AllowMultiSelect = True    ' Allowing multiple select
  .Filters.Clear              ' Clear the filters
  .Filters.Add "SOLIDWORKS Files", "*.sldprt; *.sldasm; *.slddrw"       ' Add filters for Solidworks files
    If .Show Then
      strFile = .SelectedItems(1)     ' Select 3rd item from list
    Else
      strFile = vbNullString
    End If
End With
In above code we set different properties of File dialog object.
-
Title : Title of the dialog.
-
AllowMultiSelect : Allowing multi select of files.
-
FileFilter : File name extension of the file to open.
If statement shows that, if file dialog is shown then assign the first value to file name string object.
After the function complete following are the results:
Return Value:
- Path and file name of the selected file(s).
Below image shows our form in SOLIDWORKS.
Below image shows the opened window.

Below image shows the multi-selection in opened window.

' Show the selected file's full path in text box
SelectedFileTextBox.Text = fileName
Now we set the value of text box to browsed file name.
Final window of method 1 is shown below/.
Final window of both method is same.
Final words
This is it !!!
I hope my efforts will helpful to someone!
If you found anything to add or update, please let me know on my e-mail.
Hope this post helps you in Browsing SOLIDWORKS file(s) with Solidworks VBA Macros.
For more such tutorials on Solidworks VBA Macro, do come to this blog after sometime.
If you like the post then please share it with your friends also.
Do let me know by you like this post or not!
Till then, Happy learning!!!