
TUI Project Setup
This tutorial shows how to create a TUI (Terminal UI) for the “Edit Line UI” article.
The TUI provides a simple terminal-based interface for your application.
This approach lets you focus on Solidworks API development instead of building a graphical UI.
Demo Video
The video below demonstrates how to build the Edit Line TUI in Visual Studio 2022.
Edit Line TUI
Project Setup
Follow the steps below to create the project:
-
Open Visual Studio 2026
-
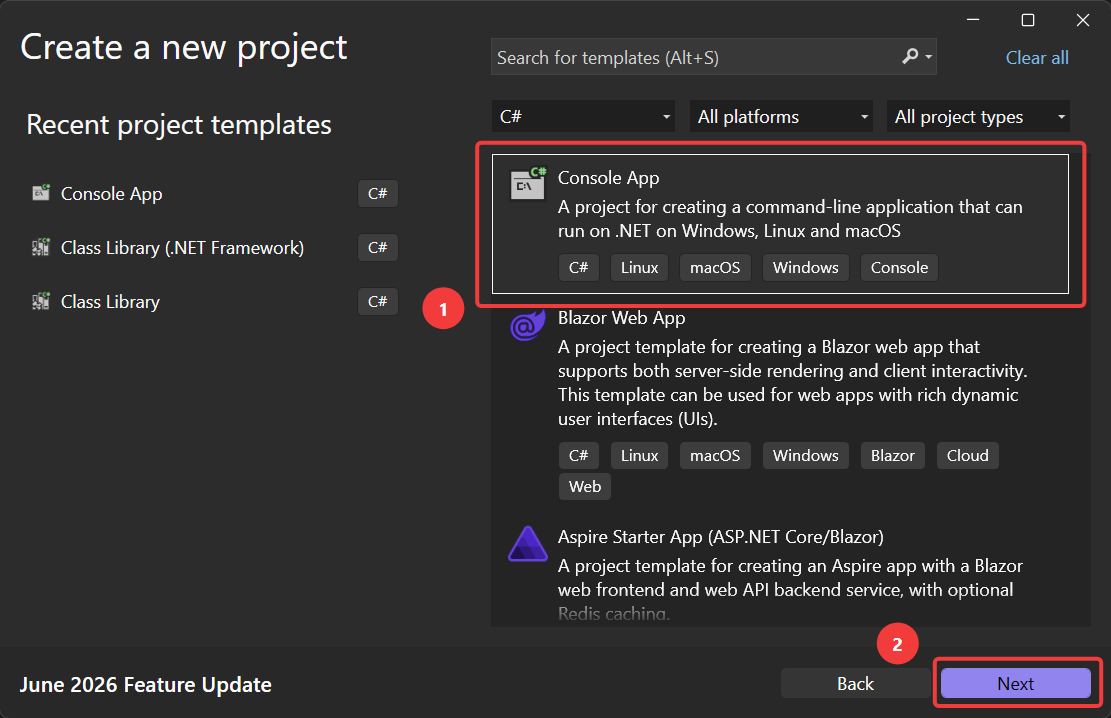
Select the Create a new project option.
-
Choose Console App and click Next.
-
Enter the following values and click Next:
-
Project Name
-
Location
-
Solution Name
-
The values used in this tutorial are shown in the table below:
| Property | Value |
|---|---|
| Project Name | SolidworksDemos |
| Location | D:\Dev |
| Solution Name | SolidworksDemos |
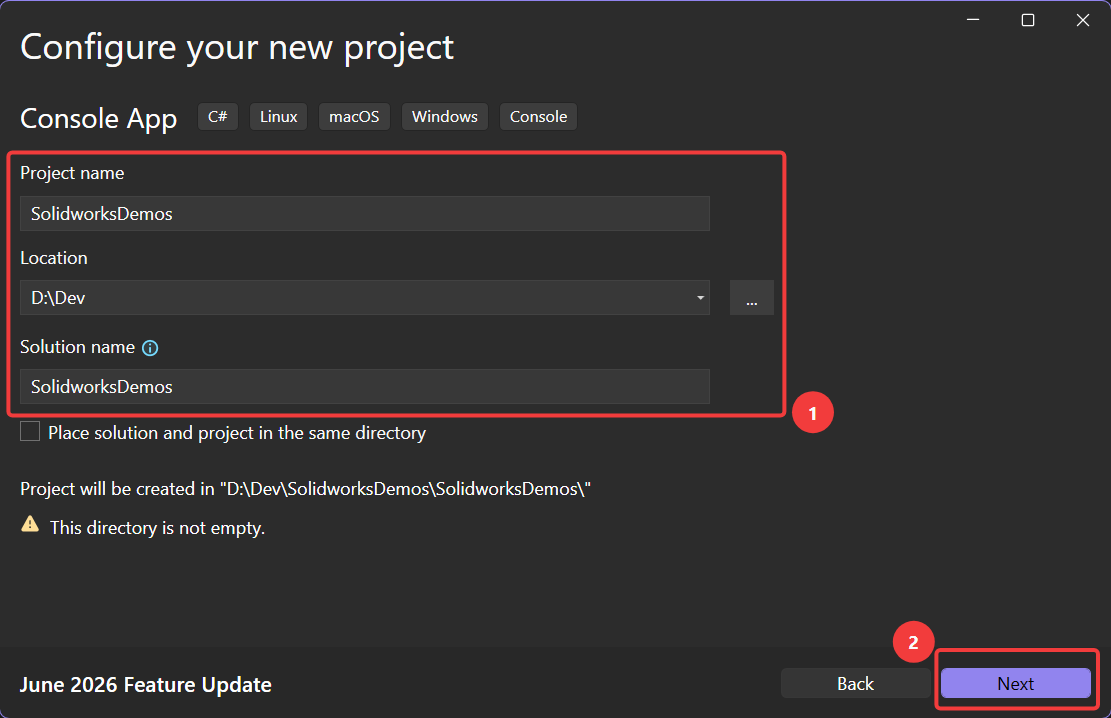
- In the Additional Information window, leave the defaults and click Next.
Visual Studio creates a new Console Application project.
You now have a basic Console App template. The next section customizes it for our needs.
Modify Project Settings
-
In Solution Explorer, double-click the project file.
-
Locate the first
<PropertyGroup>section and update it with the values below:
<PropertyGroup>
    <OutputType>Exe</OutputType>
    <TargetFramework>net48</TargetFramework>
    <ImplicitUsings>disable</ImplicitUsings>
    <Nullable>disable</Nullable>
    <LangVersion>latest</LangVersion>
</PropertyGroup>
.NET Framework 4.8 requires the corresponding Developer Pack to be installed. If you get build errors, download it from Microsoft.
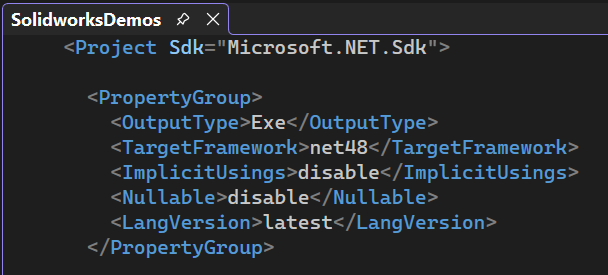
- The table below explains each property change:
| Property Name | Property Value | Remark |
|---|---|---|
| TargetFramework | net48 | Use the .NET Framework features available in this project. |
| ImplicitUsings + Nullable | disable | I generally do not use these options. |
| LangVersion | latest | I like to use the latest C# language features. |
NuGet Setup
Follow the steps below to add the required NuGet package:
-
In Solution Explorer, double-click the project file.
-
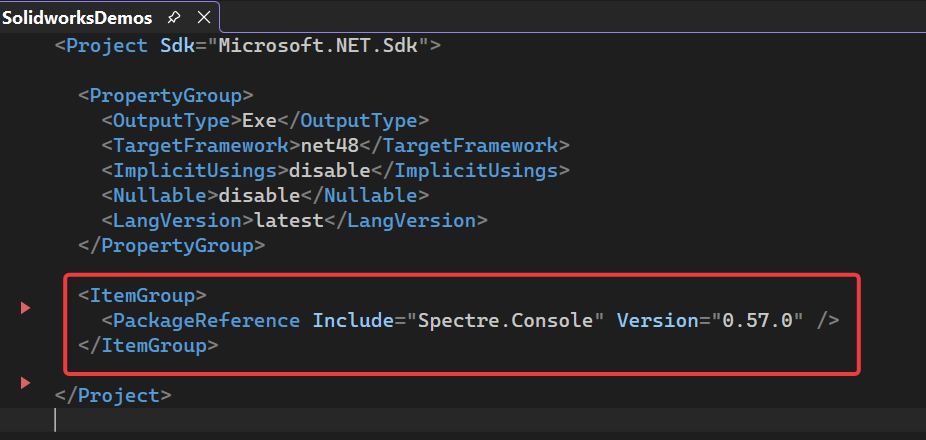
Add the following package reference inside an
<ItemGroup>element:
<ItemGroup>
    <PackageReference Include="Spectre.Console" Version="0.57.0" />
</ItemGroup>
- Rebuild the project.
dotnet build
MSBuild version 17.8.3+...
  SolidworksDemos -> D:\Dev\SolidworksDemos\bin\Debug\net48\SolidworksDemos.exe

Build succeeded.
    0 Warning(s)
    0 Error(s)
Solidworks References
To add Solidworks references to your project, click the link below and follow the steps on that page:
That is all for now.
I hope this guide is helpful to you.
If you find anything to add or update, please let me know by email.
If you found this post useful, please share it with others.
Happy coding!