Create Line UI - Part 1
I want to
- Create a UI for “Create Line UI” article.
Since I want to make the UI in modular way, hence I will create the UI in parts.
This is part 1 of Create Line UI.
Demo Video
Below 🎬 video shows how to Create Line UI - Part 1 in Visual Studio 2022.
Create Line UI - Part 1
Setting Project
We need to add some required UI changes as part of Project Setup.
Please follow below sections for this.
Add [Prism Project]
-
First, we add Prism Project for our requirement.
-
We already have an article where we add Prism Project.
-
Please see 🚀 Create Project section of 🚀 Open Syncfusion Chromeless Window article for creating New Prism project.
-
Name of our Project:
SolidworksTest
Add [Syncfusion Chromeless Window]
-
Now, we need to add “Syncfusion Chromeless Window” into our View.
-
We already have an article where we add “Syncfusion Chromeless Window” into our View.
-
Please see 🚀 Add Syncfusion Chromeless Window section of 🚀 Open Syncfusion Chromeless Window article for creating New Prism project.
Add [Design Time DataContext]
-
In previous 🚀 Add Design Time DataContext section of 🚀 Insert Solidworks Sketch UI article, this section is already explained.
-
Please visit 🚀 Add Design Time DataContext section of 🚀 Insert Solidworks Sketch UI article for more detail on this section.
Add [Syncfusion Busy Indicator]
-
Now, we need to add “Syncfusion Busy Indicator” into our View.
-
We already have an article where we add “Syncfusion Busy Indicator” into our View.
-
Please see 🚀 Add Syncfusion Busy Indicator article for adding “Syncfusion Busy Indicator”.
Add Message Services
-
Now, we need to “Add Message Services” into our application.
-
We already have an article where we “Add Message Services” into our application.
-
Please see 🚀 Add Service for Messaging in application section of 🚀 Add Message Service article for adding Message Services.
Register Message Services
-
Now, we need to “Register Message Services” into our application.
-
We already have an article where we “Register Message Services” into our application.
-
Please see 🚀 Register Services section of 🚀 Add Message Service article for adding Message Services.
Understand Message Services
-
If you want to “understand Message Services”, then please visit below article.
-
Reference Article: 🚀 Add Message Service
Add [Solidworks References]
-
Now, we need to “Add [Solidworks References]” into our application.
-
We already have an article where we “Add [Solidworks References]” into our application.
-
Please see 🚀 Add Solidworks References section of 🚀 SOLIDWORKS C# API - Edit Solidworks Sketch article for Adding Solidworks References.
Add Constructor
-
Now, we need to Add Constructor into our application.
-
We already have an article where we Add Constructor into our application.
-
Please see 🚀 Add Constructor section of 🚀 SOLIDWORKS C# API - Change Sketch Name article for Adding Constructor.
Add Private Fields
-
Now, we need to Add Private Fields into our application.
-
We already have an article where we Add Private Fields into our application.
-
Please see 🚀 Add Private Fields section of 🚀 SOLIDWORKS C# API - Change Sketch Name article for Adding Constructor.
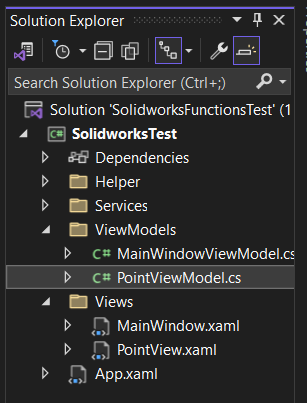
Add View [PointViewModel]
Now we need to add a [ViewModel] for [PointView] control.
ViewModel Name - PointViewModel
- Please see below 👇🏻 image for reference.
Add Properties
Now in [PointViewModel], we need to add properties.
We need below properties.
private string _header;
public string Header
{
    get { return _header; }
    set { SetProperty(ref _header, value); }
}

private double _xpoint;
public double XPoint
{
    get { return _xpoint; }
    set { SetProperty(ref _xpoint, value); }
}

private double _ypoint;
public double YPoint
{
    get { return _ypoint; }
    set { SetProperty(ref _ypoint, value); }
}

private double _zpoint;
public double ZPoint
{
    get { return _zpoint; }
    set { SetProperty(ref _zpoint, value); }
}
Below property we use for showing header of group box which we create in GroupBox.
private string _header;
public string Header
{
    get { return _header; }
    set { SetProperty(ref _header, value); }
}
Below properties we use for point co-ordinates.
private double _xpoint;
public double XPoint
{
    get { return _xpoint; }
    set { SetProperty(ref _xpoint, value); }
}

private double _ypoint;
public double YPoint
{
    get { return _ypoint; }
    set { SetProperty(ref _ypoint, value); }
}

private double _zpoint;
public double ZPoint
{
    get { return _zpoint; }
    set { SetProperty(ref _zpoint, value); }
}
Add Constructor
Now in [PointViewModel], we need to add constructor.
#region Constructor

public PointViewModel()
{

}

#endregion
In above code, first we create a region.
#region Constructor

#endregion
Then we add constuctor as shown below.
#region Constructor

public PointViewModel()
{

}

#endregion
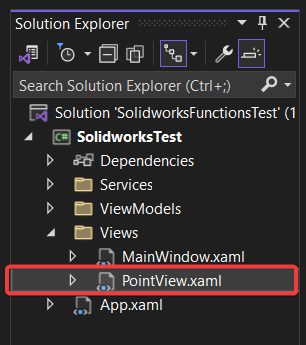
Add View [PointView]
Now we need to add a [WPF UserControl].
UserControl Name - PointView
- Please see below 👇🏻 image for reference.
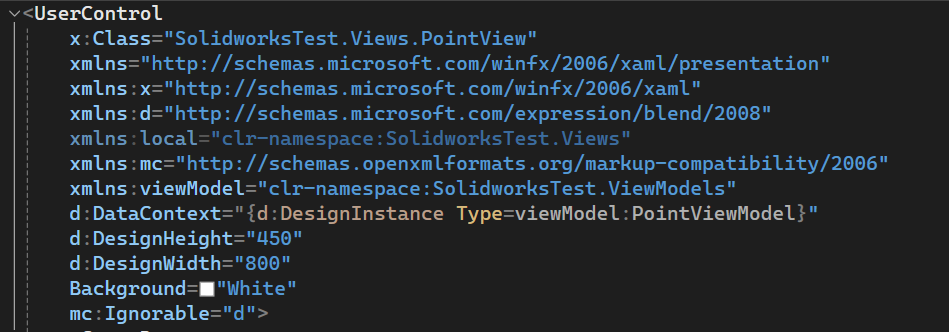
Add [Design Time DataContext]
-
In previous 🚀 Add Design Time DataContext section of 🚀 Insert Solidworks Sketch UI article, this section is already explained.
-
Please visit 🚀 Add Design Time DataContext section of 🚀 Insert Solidworks Sketch UI article for more detail on this section.
-
Design time Data context =
PointViewModel -
Please see below 👇🏻 image for reference.
Add [GroupBox]
-
Now we add
<GroupBox>tag inside<UserControl>tag. -
This GroupBox will hold controls for Points Co-ordinates.
-
Please see below 👇🏻 image for reference.
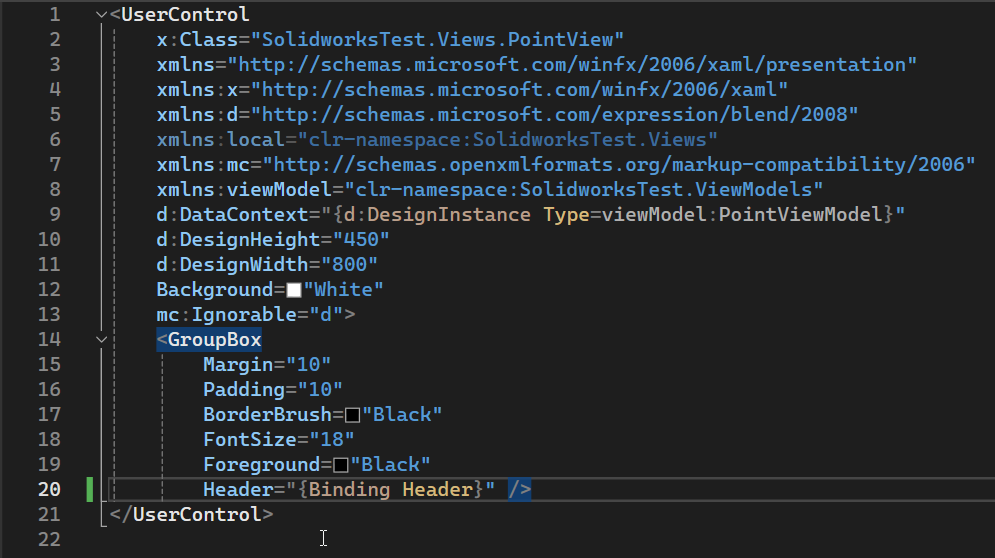
- Please see below 👇🏻 code sample for reference.
<UserControl
    x:Class="SolidworksTest.Views.PointView"
    xmlns="http://schemas.microsoft.com/winfx/2006/xaml/presentation"
    xmlns:x="http://schemas.microsoft.com/winfx/2006/xaml"
    xmlns:d="http://schemas.microsoft.com/expression/blend/2008"
    xmlns:local="clr-namespace:SolidworksTest.Views"
    xmlns:mc="http://schemas.openxmlformats.org/markup-compatibility/2006"
    xmlns:viewModel="clr-namespace:SolidworksTest.ViewModels"
    d:DataContext="{d:DesignInstance Type=viewModel:PointViewModel}"
    d:DesignHeight="450"
    d:DesignWidth="800"
    Background="White"
    mc:Ignorable="d">

    <GroupBox
        Margin="10"
        Padding="10"
        BorderBrush="Black"
        FontSize="18"
        Foreground="Black"
        Header="{Binding Header}" />

</UserControl>
-
In above code, we set values of following properties.
Margin=”10”Padding=”10”BorderBrush=”Black”FontSize=”18”Foreground=”Black”Headerproperty of<GroupBox>, we bind it withHeaderproperty in ourPointViewModelclass.
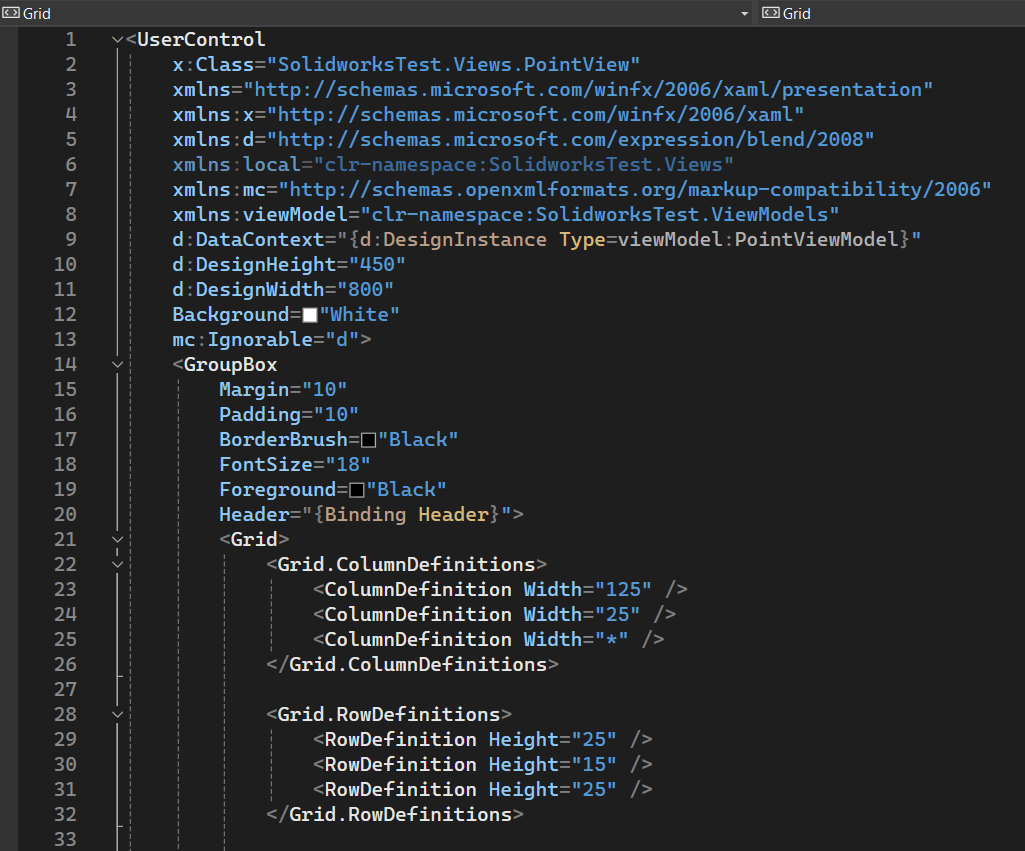
Add [Grid]
-
Now we add
<Grid>tag inside<GroupBox>tag. -
Below are the definition for
Grid Columns.
<Grid.ColumnDefinitions>
    <ColumnDefinition Width="125" />
    <ColumnDefinition Width="25" />
    <ColumnDefinition Width="*" />
</Grid.ColumnDefinitions>
- Below are the definition for
Grid Rows.
<Grid.RowDefinitions>
    <RowDefinition Height="25" />
    <RowDefinition Height="15" />
    <RowDefinition Height="25" />
</Grid.RowDefinitions>
- Please see below 👇🏻 image for reference.
- Please see below 👇🏻 code sample for reference.
<UserControl
    x:Class="SolidworksTest.Views.PointView"
    xmlns="http://schemas.microsoft.com/winfx/2006/xaml/presentation"
    xmlns:x="http://schemas.microsoft.com/winfx/2006/xaml"
    xmlns:d="http://schemas.microsoft.com/expression/blend/2008"
    xmlns:local="clr-namespace:SolidworksTest.Views"
    xmlns:mc="http://schemas.openxmlformats.org/markup-compatibility/2006"
    xmlns:viewModel="clr-namespace:SolidworksTest.ViewModels"
    d:DataContext="{d:DesignInstance Type=viewModel:PointViewModel}"
    d:DesignHeight="450"
    d:DesignWidth="800"
    Background="White"
    mc:Ignorable="d">

    <GroupBox
        Margin="10"
        Padding="10"
        BorderBrush="Black"
        FontSize="18"
        Foreground="Black"
        Header="{Binding Header}">

        <Grid>
            <Grid.ColumnDefinitions>
                <ColumnDefinition Width="125" />
                <ColumnDefinition Width="25" />
                <ColumnDefinition Width="*" />
            </Grid.ColumnDefinitions>

            <Grid.RowDefinitions>
                <RowDefinition Height="25" />
                <RowDefinition Height="15" />
                <RowDefinition Height="25" />
            </Grid.RowDefinitions>
        </Grid>

    </GroupBox>
</UserControl>
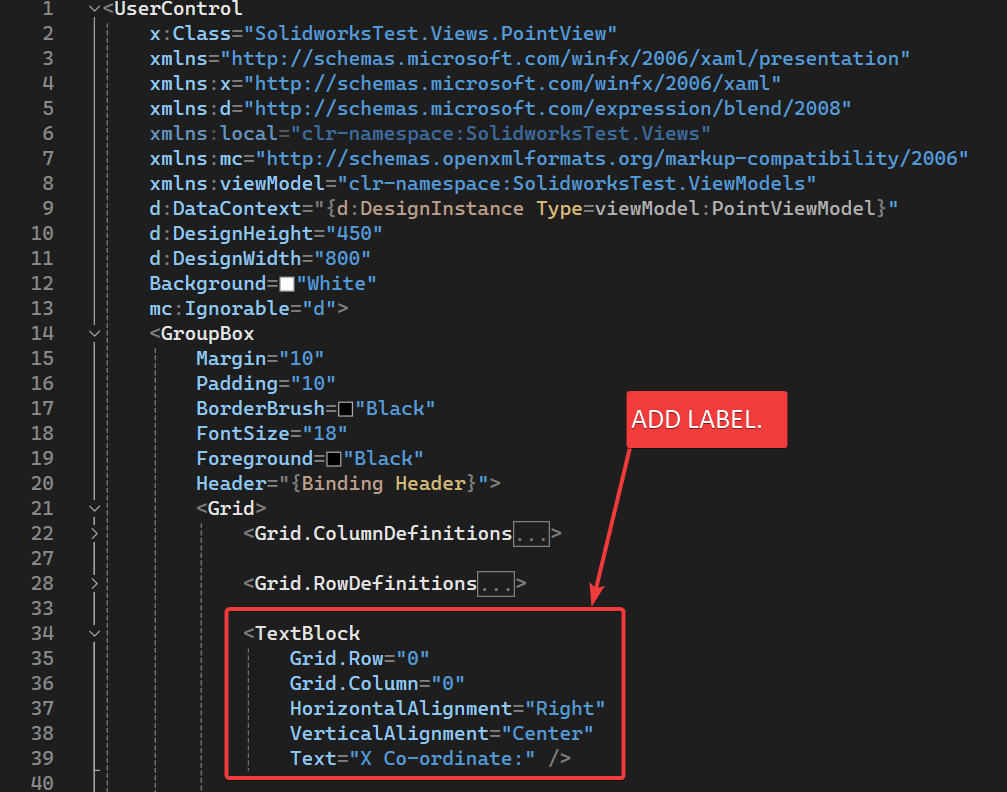
Add [XPoint] Label
-
Now we add
<TextBlock>tag inside<Grid>tag. -
<TextBlock>tag shows label for XPoint. -
Below 👇🏻 is code for
<TextBlock>tag.
<TextBlock
    Grid.Row="0"
    Grid.Column="0"
    HorizontalAlignment="Right"
    VerticalAlignment="Center"
    Text="X Co-ordinate:" />
-
In above code, we set values of following properties.
Grid.Row=”0”Grid.Column=”0”HorizontalAlignment=”Right”VerticalAlignment=”Center”Text=”X Co-ordinate:”
-
In above code,
Grid.RowandGrid.Columnare attached properties and they define the position of<TextBlock>inside<Grid>control. -
In above code,
HorizontalAlignmentandVerticalAlignmentdefine [Alignment] of control. -
In above code,
Textproperty define label of<TextBlock>control. -
Lable of
<TextBlock>control: [X Co-ordinate:] -
Please see below 👇🏻 image for reference.
- Please see below 👇🏻 code sample for reference.
<UserControl
    x:Class="SolidworksTest.Views.PointView"
    xmlns="http://schemas.microsoft.com/winfx/2006/xaml/presentation"
    xmlns:x="http://schemas.microsoft.com/winfx/2006/xaml"
    xmlns:d="http://schemas.microsoft.com/expression/blend/2008"
    xmlns:local="clr-namespace:SolidworksTest.Views"
    xmlns:mc="http://schemas.openxmlformats.org/markup-compatibility/2006"
    xmlns:viewModel="clr-namespace:SolidworksTest.ViewModels"
    d:DataContext="{d:DesignInstance Type=viewModel:PointViewModel}"
    d:DesignHeight="450"
    d:DesignWidth="800"
    Background="White"
    mc:Ignorable="d">

    <GroupBox
        Margin="10"
        Padding="10"
        BorderBrush="Black"
        FontSize="18"
        Foreground="Black"
        Header="{Binding Header}">

        <Grid>
            <Grid.ColumnDefinitions>
                <ColumnDefinition Width="125" />
                <ColumnDefinition Width="25" />
                <ColumnDefinition Width="*" />
            </Grid.ColumnDefinitions>

            <Grid.RowDefinitions>
                <RowDefinition Height="25" />
                <RowDefinition Height="15" />
                <RowDefinition Height="25" />
            </Grid.RowDefinitions>

            <TextBlock
                Grid.Row="0"
                Grid.Column="0"
                HorizontalAlignment="Right"
                VerticalAlignment="Center"
                Text="X Co-ordinate:" />

        </Grid>
    </GroupBox>
</UserControl>
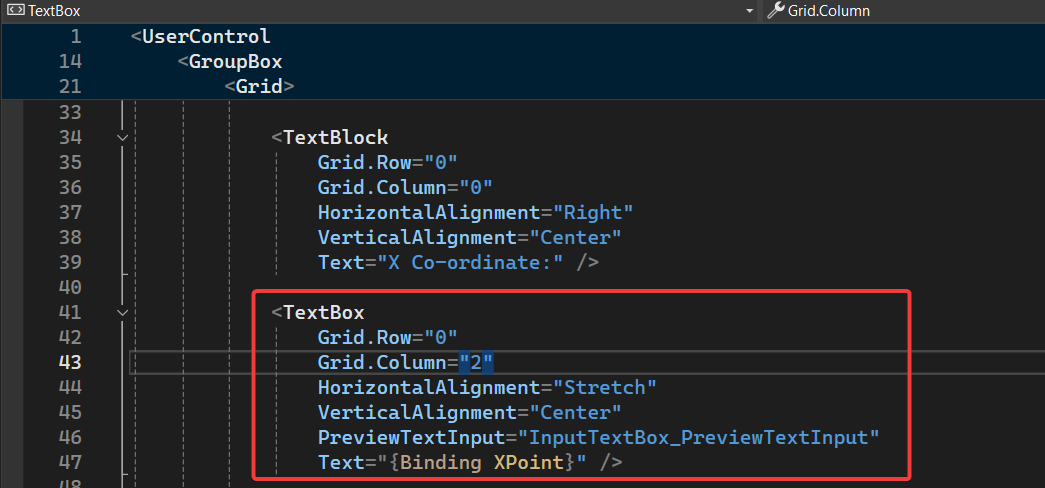
Add [XPoint] TextBox
-
Now we add
<TextBox>tag inside<Grid>tag. -
<TextBox>tag shows label for XPoint. -
Below 👇🏻 is code for
<TextBox>tag.
<TextBox
    Grid.Row="0"
    Grid.Column="2"
    HorizontalAlignment="Stretch"
    VerticalAlignment="Center"
    PreviewTextInput="InputTextBox_PreviewTextInput"
    Text="{Binding XPoint}" />
-
In above code, we set values of following properties.
Grid.Row=”0”Grid.Column=”2”HorizontalAlignment=”Stretch”VerticalAlignment=”Center”Text=”X Co-ordinate:”Textproperty of<TextBox>, we bind it withXPointproperty in ourPointViewModelclass.
-
Event method we define.
- In above code we define a method for
PreviewTextInputevent. - Name of method:
InputTextBox_PreviewTextInput - This
InputTextBox_PreviewTextInputmethod will enforce the user to input only Numbers. So that we avoid errors. - Implementation of
InputTextBox_PreviewTextInputmethod will discuss later.
- In above code we define a method for
-
Please see below 👇🏻 image for reference.
- Please see below 👇🏻 code sample for reference.
<UserControl
    x:Class="SolidworksTest.Views.PointView"
    xmlns="http://schemas.microsoft.com/winfx/2006/xaml/presentation"
    xmlns:x="http://schemas.microsoft.com/winfx/2006/xaml"
    xmlns:d="http://schemas.microsoft.com/expression/blend/2008"
    xmlns:local="clr-namespace:SolidworksTest.Views"
    xmlns:mc="http://schemas.openxmlformats.org/markup-compatibility/2006"
    xmlns:viewModel="clr-namespace:SolidworksTest.ViewModels"
    d:DataContext="{d:DesignInstance Type=viewModel:PointViewModel}"
    d:DesignHeight="450"
    d:DesignWidth="800"
    Background="White"
    mc:Ignorable="d">

    <GroupBox
        Margin="10"
        Padding="10"
        BorderBrush="Black"
        FontSize="18"
        Foreground="Black"
        Header="{Binding Header}">

        <Grid>
            <Grid.ColumnDefinitions>
                <ColumnDefinition Width="125" />
                <ColumnDefinition Width="25" />
                <ColumnDefinition Width="*" />
            </Grid.ColumnDefinitions>

            <Grid.RowDefinitions>
                <RowDefinition Height="25" />
                <RowDefinition Height="15" />
                <RowDefinition Height="25" />
            </Grid.RowDefinitions>

            <TextBlock
                Grid.Row="0"
                Grid.Column="0"
                HorizontalAlignment="Right"
                VerticalAlignment="Center"
                Text="X Co-ordinate:" />

            <TextBox
                Grid.Row="0"
                Grid.Column="2"
                HorizontalAlignment="Stretch"
                VerticalAlignment="Center"
                PreviewTextInput="InputTextBox_PreviewTextInput"
                Text="{Binding XPoint}" />

        </Grid>
    </GroupBox>
</UserControl>
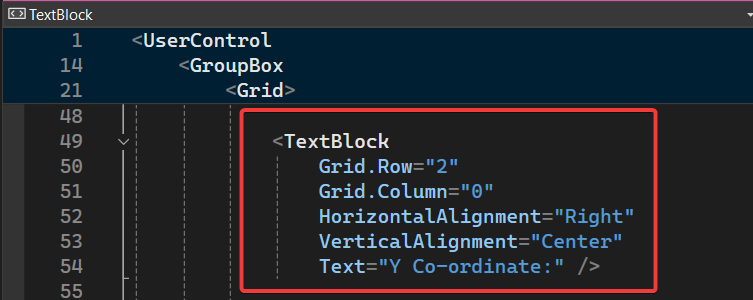
Add [YPoint] Label
-
Now we add
<TextBlock>tag inside<Grid>tag. -
<TextBlock>tag shows label for YPoint. -
Below 👇🏻 is code for
<TextBlock>tag.
<TextBlock
    Grid.Row="2"
    Grid.Column="0"
    HorizontalAlignment="Right"
    VerticalAlignment="Center"
    Text="Y Co-ordinate:" />
To understand above code, please visit 🚀 Add XPoint Label section of this article.
- Please see below 👇🏻 image for reference.
- Please see below 👇🏻 code sample for reference.
<UserControl
    x:Class="SolidworksTest.Views.PointView"
    xmlns="http://schemas.microsoft.com/winfx/2006/xaml/presentation"
    xmlns:x="http://schemas.microsoft.com/winfx/2006/xaml"
    xmlns:d="http://schemas.microsoft.com/expression/blend/2008"
    xmlns:local="clr-namespace:SolidworksTest.Views"
    xmlns:mc="http://schemas.openxmlformats.org/markup-compatibility/2006"
    xmlns:viewModel="clr-namespace:SolidworksTest.ViewModels"
    d:DataContext="{d:DesignInstance Type=viewModel:PointViewModel}"
    d:DesignHeight="450"
    d:DesignWidth="800"
    Background="White"
    mc:Ignorable="d">

    <GroupBox
        Margin="10"
        Padding="10"
        BorderBrush="Black"
        FontSize="18"
        Foreground="Black"
        Header="{Binding Header}">

        <Grid>
            <Grid.ColumnDefinitions>
                <ColumnDefinition Width="125" />
                <ColumnDefinition Width="25" />
                <ColumnDefinition Width="*" />
            </Grid.ColumnDefinitions>

            <Grid.RowDefinitions>
                <RowDefinition Height="25" />
                <RowDefinition Height="15" />
                <RowDefinition Height="25" />
            </Grid.RowDefinitions>

            <TextBlock
                Grid.Row="0"
                Grid.Column="0"
                HorizontalAlignment="Right"
                VerticalAlignment="Center"
                Text="X Co-ordinate:" />

            <TextBox
                Grid.Row="0"
                Grid.Column="2"
                HorizontalAlignment="Stretch"
                VerticalAlignment="Center"
                PreviewTextInput="InputTextBox_PreviewTextInput"
                Text="{Binding XPoint}" />

            <TextBlock
                Grid.Row="2"
                Grid.Column="0"
                HorizontalAlignment="Right"
                VerticalAlignment="Center"
                Text="Y Co-ordinate:" />

        </Grid>
    </GroupBox>
</UserControl>
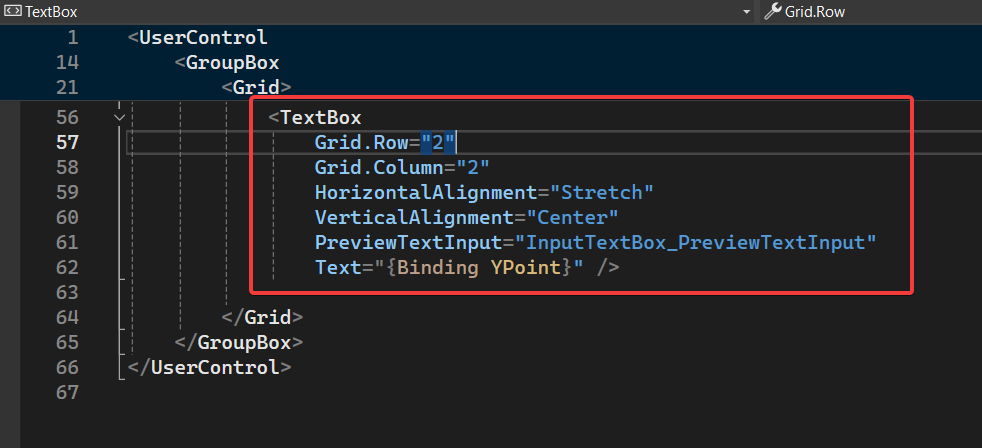
Add [YPoint] TextBox
-
Now we add another
<TextBox>tag inside<Grid>tag. -
<TextBox>tag shows label for YPoint. -
Below 👇🏻 is code for
<TextBox>tag.
<TextBox
    Grid.Row="2"
    Grid.Column="2"
    HorizontalAlignment="Stretch"
    VerticalAlignment="Center"
    PreviewTextInput="InputTextBox_PreviewTextInput"
    Text="{Binding YPoint}" />
To understand above code, please visit 🚀 Add XPoint TextBox section of this article.
- Please see below 👇🏻 image for reference.
- Please see below 👇🏻 code sample for reference.
<UserControl
    x:Class="SolidworksTest.Views.PointView"
    xmlns="http://schemas.microsoft.com/winfx/2006/xaml/presentation"
    xmlns:x="http://schemas.microsoft.com/winfx/2006/xaml"
    xmlns:d="http://schemas.microsoft.com/expression/blend/2008"
    xmlns:local="clr-namespace:SolidworksTest.Views"
    xmlns:mc="http://schemas.openxmlformats.org/markup-compatibility/2006"
    xmlns:viewModel="clr-namespace:SolidworksTest.ViewModels"
    d:DataContext="{d:DesignInstance Type=viewModel:PointViewModel}"
    d:DesignHeight="450"
    d:DesignWidth="800"
    Background="White"
    mc:Ignorable="d">

    <GroupBox
        Margin="10"
        Padding="10"
        BorderBrush="Black"
        FontSize="18"
        Foreground="Black"
        Header="{Binding Header}">

        <Grid>
            <Grid.ColumnDefinitions>
                <ColumnDefinition Width="125" />
                <ColumnDefinition Width="25" />
                <ColumnDefinition Width="*" />
            </Grid.ColumnDefinitions>

            <Grid.RowDefinitions>
                <RowDefinition Height="25" />
                <RowDefinition Height="15" />
                <RowDefinition Height="25" />
            </Grid.RowDefinitions>

            <TextBlock
                Grid.Row="0"
                Grid.Column="0"
                HorizontalAlignment="Right"
                VerticalAlignment="Center"
                Text="X Co-ordinate:" />

            <TextBox
                Grid.Row="0"
                Grid.Column="2"
                HorizontalAlignment="Stretch"
                VerticalAlignment="Center"
                PreviewTextInput="InputTextBox_PreviewTextInput"
                Text="{Binding XPoint}" />

            <TextBlock
                Grid.Row="2"
                Grid.Column="0"
                HorizontalAlignment="Right"
                VerticalAlignment="Center"
                Text="Y Co-ordinate:" />

            <TextBox
                Grid.Row="2"
                Grid.Column="2"
                HorizontalAlignment="Stretch"
                VerticalAlignment="Center"
                PreviewTextInput="InputTextBox_PreviewTextInput"
                Text="{Binding YPoint}" />

        </Grid>
    </GroupBox>
</UserControl>
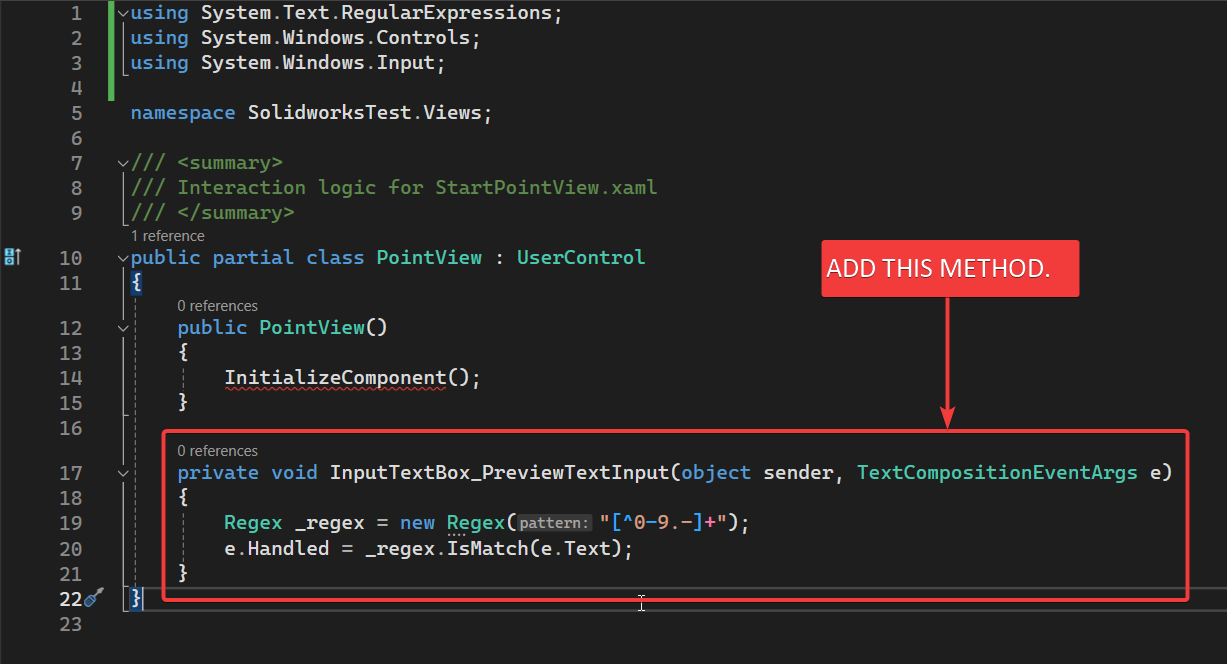
Add [InputTextBox_PreviewTextInput] Method
Now we need to add InputTextBox_PreviewTextInput method.
This method will allow only Numbers to add into <TextBox>.
For adding this method, first open [PointView.cs] file.
Add below code into [PointView.cs] file.
- Please see below 👇🏻 image for reference.
- Please see below 👇🏻 code sample for reference.
private void InputTextBox_PreviewTextInput(object sender, TextCompositionEventArgs e)
{
    Regex _regex = new Regex("[^0-9.-]+");
    e.Handled = _regex.IsMatch(e.Text);
}
In above code we create a Regex type variable.
Name of variable: _regex.
Sequence we want to match: [^0-9.-]+
e.Handled allow to enter the value.
_regex.IsMatch(e.Text) means, if input text match the sequence then only it will allow otherwise it won’t.
If sequence match in _regex.IsMatch(e.Text) , then return true, otherwise return false.
Register [PointViewModel]
Now we need to register our [PointViewModel] class into our DI container.
-
Open [
App.xaml.cs] class. -
In this class there is a function [
RegisterTypes]. -
We will register our class in this function.
-
Please see below 👇🏻 image for reference.

- Please see below 👇🏻 code sample for reference.
protected override void RegisterTypes(IContainerRegistry containerRegistry)
{
    containerRegistry.Register<PointViewModel>();
}
- In above code, we register [
PointViewModel] class incontainerRegistrythroughRegister()method.
This is it for now!!!
I hope my efforts will helpful to someone!
If you found anything to add or update, please let me know on my e-mail.
Hope this post helps you to Create Line UI in WPF application.
If you like the post then please share it with your friends also.
Do let me know by you like this post or not!
Till then, Happy learning!!!