Add Message Service
I want to:
-
Show Confirmation message to user before deleting browsed file.
-
After deleting file, show information message to user.
-
We will continue from previous article 🚀 Delete Browse Solidworks Document File .
Demo Video
Below 🎬 video shows how to Add Message Service in Visual Studio 2022.
Add Message Service
Add Service for Messaging in application
-
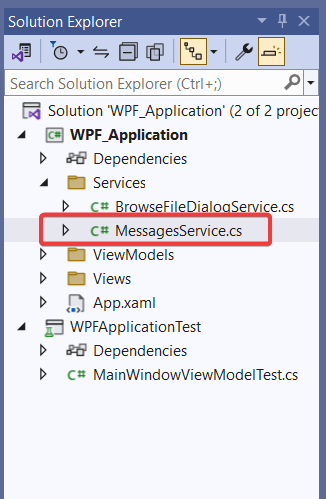
Now we add
MessagesServiceclass to “Service” folder. -
Please see below 👇🏻 image for reference.
For reference, how to add Service class, please visit 🚀 Add Service for Browsing File Dialog article.
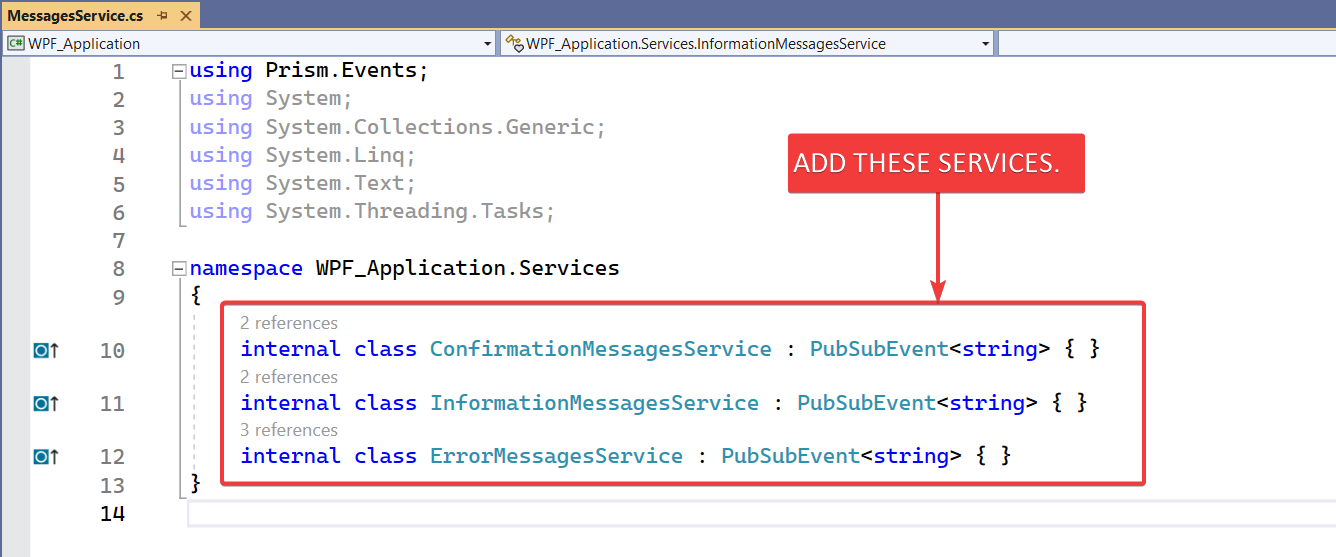
Now we will add following services to this newly created MessagesService class.
-
ConfirmationMessagesService -
InformationMessagesService -
ErrorMessagesService
Please see below 👇🏻 image for reference.
- Please see below 👇🏻 code sample for reference.
using Prism.Events;
using System;
using System.Collections.Generic;
using System.Linq;
using System.Text;
using System.Threading.Tasks;

namespace WPF_Application.Services
{
    internal class ConfirmationMessagesService : PubSubEvent<string> { }
    internal class InformationMessagesService : PubSubEvent<string> { }
    internal class ErrorMessagesService : PubSubEvent<string> { }
}
-
For more details on how to add Services, please visit 🚀 Add Service for Browsing File Dialog article.
-
In above line, we add
<string>to allPubSubEventclass. -
This indicate that, when we Publish our service, we need to give a
stringas passing parameter to Publish service. -
For example, we will pass a question as
stringwhen we PublishConfirmationMessagesServiceservice.
Register Services
-
Open
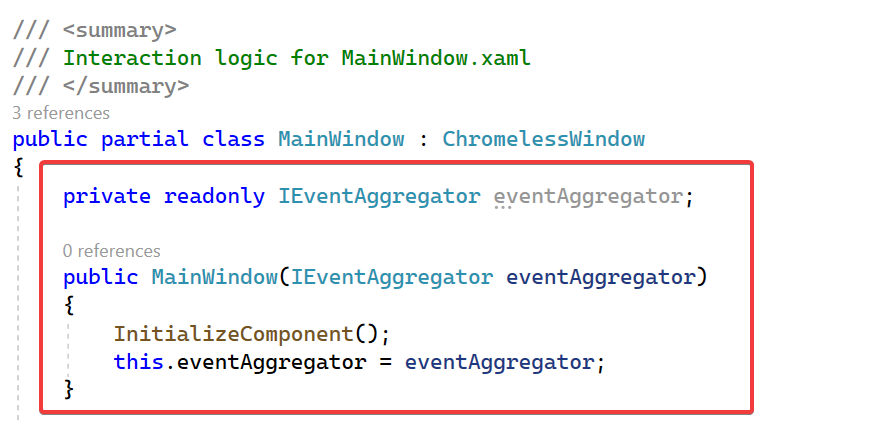
MainWindow.xaml.csfile. -
Pass
IEventAggregatorto constructor, and assigned it to private field. -
Please see below 👇🏻 image for reference.
- Please see below 👇🏻 code sample for reference.
using Microsoft.Win32;
using Prism.Events;
using Syncfusion.Windows.Shared;
using System;
using System.Windows;
using WPF_Application.Services;
using WPF_Application.ViewModels;

namespace WPF_Application.Views
{
    /// <summary>
    /// Interaction logic for MainWindow.xaml
    /// </summary>
    public partial class MainWindow : ChromelessWindow
    {
        private readonly IEventAggregator eventAggregator;

        public MainWindow(IEventAggregator eventAggregator)
        {
            InitializeComponent();
            this.eventAggregator = eventAggregator;
        }
    }
}
-
Now, we register our services.
-
When these service is called, some functions will gets executed.
-
These registration and execution is handle by
eventAggregatorfield. -
Please see below 👇🏻 code sample for reference.
using Microsoft.Win32;
using Prism.Events;
using Syncfusion.Windows.Shared;
using System;
using System.Windows;
using WPF_Application.Services;
using WPF_Application.ViewModels;

namespace WPF_Application.Views
{
    /// <summary>
    /// Interaction logic for MainWindow.xaml
    /// </summary>
    public partial class MainWindow : ChromelessWindow
    {
        private readonly IEventAggregator eventAggregator;

        public MainWindow(IEventAggregator eventAggregator)
        {
            InitializeComponent();
            this.eventAggregator = eventAggregator;

            this.eventAggregator.GetEvent<BrowseFileDialogService>().Subscribe(BrowseFile);
            this.eventAggregator.GetEvent<ConfirmationMessagesService>().Subscribe(ConfirmationMessages);
            this.eventAggregator.GetEvent<InformationMessagesService>().Subscribe(InformationMessages);
            this.eventAggregator.GetEvent<ErrorMessagesService>().Subscribe(ErrorMessages);
        }

        private void BrowseFile()
        {
            OpenFileDialog openFileDialog = new OpenFileDialog();
            openFileDialog.Filter = "Solidworks Part|*.sldprt|Solidworks Assembly|*.sldasm|Solidworks Drawing|*.slddrw";
            openFileDialog.DefaultExt = "*.sldprt";

            bool? result = openFileDialog.ShowDialog();

            if (result == false || string.IsNullOrEmpty(openFileDialog.FileName))
                return;

            var viewModel = DataContext as MainWindowViewModel;
            viewModel.FilePath = openFileDialog.FileName;
        }

        private void ConfirmationMessages(string messageToShow)
        {
            var result = MessageBox.Show(
                messageToShow,
                "Confirmation",
                MessageBoxButton.YesNo,
                MessageBoxImage.Question);

            var viewModel = DataContext as MainWindowViewModel;
            viewModel.DeleteFile = (result == MessageBoxResult.Yes);
        }

        private void InformationMessages(string messageToShow)
        {
            MessageBox.Show(
                messageToShow,
                "Information",
                MessageBoxButton.OK,
                MessageBoxImage.Information);
        }

        private void ErrorMessages(string messageToShow)
        {
            MessageBox.Show(
                messageToShow,
                "Error",
                MessageBoxButton.OK,
                MessageBoxImage.Error);
        }
    }
}
Understand Service Methods
-
In above code, we register 4 services. They are as follows:
BrowseFileDialogServiceConfirmationMessagesServiceInformationMessagesServiceErrorMessagesService
-
BrowseFileDialogServiceis already explained in 🚀 Understand Service Call Execute Function article. -
Please visit 🚀 Understand Service Call Execute Function article for more details.
-
In this section, we will understand remaining 3 service and their respective execution methods.
Understand ConfirmationMessages method
-
In
MainWindow.xaml.cscontructor, we registerConfirmationMessagesServiceservice. -
When we call for
ConfirmationMessagesServiceservice, we executeConfirmationMessagesmethod. -
Now let us understand
ConfirmationMessagesmethod as follows.
private void ConfirmationMessages(string messageToShow)
{
    var result = MessageBox.Show(
        messageToShow,
        "Confirmation",
        MessageBoxButton.YesNo,
        MessageBoxImage.Question);

    var viewModel = DataContext as MainWindowViewModel;
    viewModel.DeleteFile = (result == MessageBoxResult.Yes);
}
-
In
ConfirmationMessagesmethod, we pass astringas parameter.- Parameter Name:
messageToShow - Variable Type:
string - Return Type:
Void
- Parameter Name:
var result = MessageBox.Show(
    messageToShow,
    "Confirmation",
    MessageBoxButton.YesNo,
    MessageBoxImage.Question);
-
In above line, we create a variable as follows:
- Variable Name:
result - Variable Type:
var
- Variable Name:
-
In above line, we store result of
MessageBox.Showmethod intoresultvariable. -
This
MessageBox.Showmethod takes following parameters.- messageBoxText: A String that specifies the text to display.
- caption: A String that specifies the title bar caption to display.
- button: A
MessageBoxButtonsvalues that specifies which buttons to display in the message box. These buttons are as follows.
| Member | Description |
|---|---|
| AbortRetryIgnore |
2: The message box contains Abort, Retry, and Ignore buttons.
|
| CancelTryContinue |
6: Specifies that the message box contains Cancel, Try Again, and Continue buttons.
|
| OK |
0: The message box contains an OK button.
|
| OKCancel |
1: The message box contains OK and Cancel buttons.
|
| RetryCancel |
5: The message box contains Retry and Cancel buttons.
|
| YesNo |
4: The message box contains Yes and No buttons.
|
| YesNoCancel |
3: The message box contains Yes, No, and Cancel buttons.
|
- icon: A
MessageBoxImagevalue that specifies the icon to display. These buttons are as follows.
| Member | Description |
|---|---|
| Asterisk |
64: The message box contains a symbol consisting of a lowercase letter i in a circle.
|
| Error |
16: The message box contains a symbol consisting of white X in a circle with a red background.
|
| Exclamation |
48: The message box contains a symbol consisting of an exclamation point in a triangle with a yellow background.
|
| Hand |
16: The message box contains a symbol consisting of white X in a circle with a red background.
|
| Information |
64: The message box contains a symbol consisting of a lowercase letter i in a circle.
|
| None |
0: The message box contains no symbols.
|
| Stop |
16: The message box contains a symbol consisting of white X in a circle with a red background.
|
| Warning |
48: The message box contains a symbol consisting of an exclamation point in a triangle with a yellow background.
|
- Result Value: This
MessageBox.Showmethod returnMessageBoxResultvalue that specifies which message box button is clicked by the user as follows.
| Member | Description |
|---|---|
| Cancel |
2: The result value of the message box is Cancel.
|
| No |
7: The result value of the message box is No.
|
| None |
0: The message box returns no result.
|
| OK |
1: The result value of the message box is OK.
|
| Yes |
6: The result value of the message box is Yes.
|
- Parameter values we used in our code are as follows:
| Parameter Name | Value Used |
|---|---|
| messageBoxText |
messageToShow
|
| caption |
"Confirmation"
|
| button |
MessageBoxButton.YesNo
|
| icon |
MessageBoxImage.Question
|
- Please visit 🚀 MessageBox.Show Method article for more details.
var viewModel = DataContext as MainWindowViewModel;
-
In above line of code, we create a variable as follows:
- Variable Name:
viewModel - Variable Type:
MainWindowViewModel - Value:
DataContextproperty ofMainWindow.
- Variable Name:
viewModel.DeleteFile = (result == MessageBoxResult.Yes) ? true : false;
-
In above line, we set the value of
DeleteFileproperty. -
This property is part of
viewModelvariable.
Please note that we still not created this property, so Visual Studio will show an error.
- We set the value of
DeleteFileproperty totrueorfalse, based on condition.- Condition:
(result == MessageBoxResult.Yes) - If above condition is
true, then final value istrue. - If above condition is
false, then final value isfalse.
- Condition:
Understand InformationMessages method
- Now let us understand
InformationMessagesmethod as follows.
private void InformationMessages(string messageToShow)
{
    MessageBox.Show(
        messageToShow,
        "Information",
        MessageBoxButton.OK,
        MessageBoxImage.Information);
}
-
In above line of code, we show a
MessageBoxto user. -
For this, we use
MessageBox.Showmethod. -
For more details on
MessageBox.Showmethod please read previous section of this article. -
Parameter values we used in our code are as follows:
| Parameter Name | Value Used |
|---|---|
| messageBoxText |
messageToShow
|
| caption |
"Information"
|
| button |
MessageBoxButton.OK
|
| icon |
MessageBoxImage.Information
|
Understand ErrorMessages method
- Now let us understand
ErrorMessagesmethod as follows.
private void ErrorMessages(string messageToShow)
{
    MessageBox.Show(
        messageToShow,
        "Error",
        MessageBoxButton.OK,
        MessageBoxImage.Error);
}
-
In above line of code, we show a
MessageBoxto user. -
For this, we use
MessageBox.Showmethod. -
For more details on
MessageBox.Showmethod please read previous section of this article. -
Parameter values we used in our code are as follows:
| Parameter Name | Value Used |
|---|---|
| messageBoxText |
messageToShow
|
| caption |
"Error"
|
| button |
MessageBoxButton.OK
|
| icon |
MessageBoxImage.Error
|
Update MainWindowViewModel For Message Service
-
Open
MainWindowViewModel.csfile. -
Add
DeleteFileproperty as shown below.
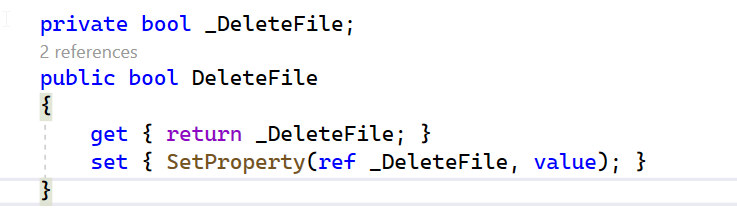
- Please see below code for adding
DeleteFileproperty.
private bool _DeleteFile;
public bool DeleteFile
{
    get { return _DeleteFile; }
    set { SetProperty(ref _DeleteFile, value); }
}
Show message for Empty FilePath property
-
Show error message to user if we browsed a file or not.
-
Please see below 👇🏻 image for how to add code for showing error message.
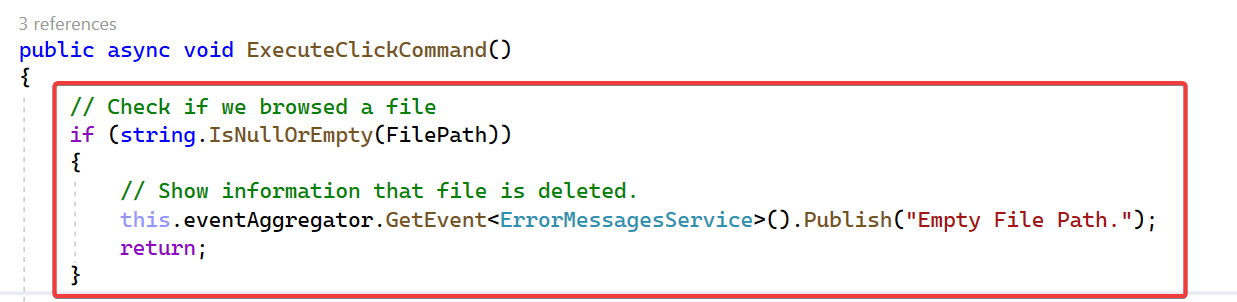
- Please see below code for showing error message on empty browsed file.
// Check if we browsed a file
if (string.IsNullOrEmpty(FilePath))
{
    // Show information that file is deleted.
    this.eventAggregator
        .GetEvent<ErrorMessagesService>()
        .Publish("Empty File Path.");
    return;
}
- In above code, we check condition, if
FilePathproperty is empty or not.- Condition:
if (string.IsNullOrEmpty(FilePath))
- Condition:
- If
FilePathproperty is empty, then we show error message to user.- Error Message: Empty File Path.
- We show this message by publishing
ErrorMessagesServiceservice as shown below 👇🏻.
this.eventAggregator
    .GetEvent<ErrorMessagesService>()
    .Publish("Empty File Path.");
- Please see below 👇🏻 image for error message.
-
After showing message, we exit the
ExecuteClickCommand()method. -
Please visit 🚀 Understand ErrorMessages method section of this article for more details.
Show message if browsed file exist or not
-
Show error message to user if browsed file exist or not.
-
Please see below 👇🏻 image for how to add code for showing error message.

- Please see below code for showing error message on empty browsed file.
// Check if browsed file exist or not
if (File.Exists(FilePath) == false)
{
    // Show information that file is deleted.
    this.eventAggregator
        .GetEvent<ErrorMessagesService>()
        .Publish($"[{FilePath}] did not exist.");
    return;
}
- In above code, we check condition, if selected file in
FilePathproperty exist or not.- Condition:
File.Exists(FilePath) == false
- Condition:
- If selected file in
FilePathproperty does not exist, then we show error message to user.- Error Message: [
{FilePath}] did not exist.
- Error Message: [
- We show this message by publishing
ErrorMessagesServiceservice as shown below 👇🏻.
this.eventAggregator
    .GetEvent<ErrorMessagesService>()
    .Publish($"[{FilePath}] did not exist.");
- Please see below 👇🏻 image for error message.
-
After showing message, we exit the
ExecuteClickCommand()method. -
Please visit 🚀 Understand ErrorMessages method section of this article for more details.
Get Confirmation From User
- Please see below code for Get confirmation from user.
// Get confirmation from user
this.eventAggregator
    .GetEvent<ConfirmationMessagesService>()
    .Publish($"Do you want to delete [{FilePath}]?");
- We get confirmation by publishing
ConfirmationMessagesServiceservice. - This will show a confirmation message to user and ask his confimation as shown in below 👇🏻 image.
- Confirmation Message: Do you want to delete [
{FilePath}]?
- Confirmation Message: Do you want to delete [
- Please visit 🚀 Understand ConfirmationMessages method section of this article for more details.
When User Declined Confirmation
- In this section, we check, if user
not give confirmationfor deleting file.
// Not confirmed then clear data and exit function.
if (!DeleteFile)
{
    ClearData();
    return;
}
- In code sample, we check if value of
DeleteFileproperty is set tofalse.- Condition:
!DeleteFile
- Condition:
- This if above condition is
true, we call a function namedClearData()method. - Code for
ClearData()method is given below.
/// <summary>
/// Method for clearing <see cref="FilePath"/> property.
/// </summary>
void ClearData() => FilePath = string.Empty;
- In above code, we create an expression method.
- Since there is only 1 line of statement, we create expression method.
- In
ClearData()method, we set the value of FilePath property to string.Empty. - By setting this value, we empty the textblock value.

When User Give Confirmation for Deleting File
// Show busy indicator
IsBusy = true;

await Task.Run(() =>
{
    // Delete selected file
    File.Delete(FilePath);
});

// Hide busy indicator
IsBusy = false;
-
Above code sample is already explained in 🚀 Update MainWindowViewModel section of this article.
-
Please visit 🚀 Update MainWindowViewModel section of this article.
Show Success Message To User
- Please see below code for Show information that file is deleted.
// Show information that file is deleted.
this.eventAggregator
    .GetEvent<InformationMessagesService>()
    .Publish("File successfully deleted.");
- We show information by publishing
InformationMessagesServiceservice. - This will show a information message to user
File sucessfully deleted.as shown in below 👇🏻 image.- Information Message: File sucessfully deleted.
- Please visit 🚀 Understand InformationMessages method section of this article for more details.
Final Result
Now we run the application as shown in below 👇🏻 image.
Now we are able to delete browsed file in MVVM pattern successfully.
This is it !!!
I hope my efforts will helpful to someone!
If you found anything to add or update, please let me know on my e-mail.
Hope this post helps you to show message services to users in WPF Prism application.
If you like the post then please share it with your friends also.
Do let me know by you like this post or not!
Till then, Happy learning!!!