SOLIDWORKS C# API - Setup Test Project
Objective
I want to:
- Setup Test Project for our Unit test cases.
- We will use xUnit as test runner and Moq for mocking the objects.
- I will not explain each line, since they are already explained in previous articles.
Demo Video
Watch the video below to learn how to Setup Test Project.
Please note that there are no explanation in the video.
Explanation of each step and why we write code this way is given in this post.
Add [xUnit] Project
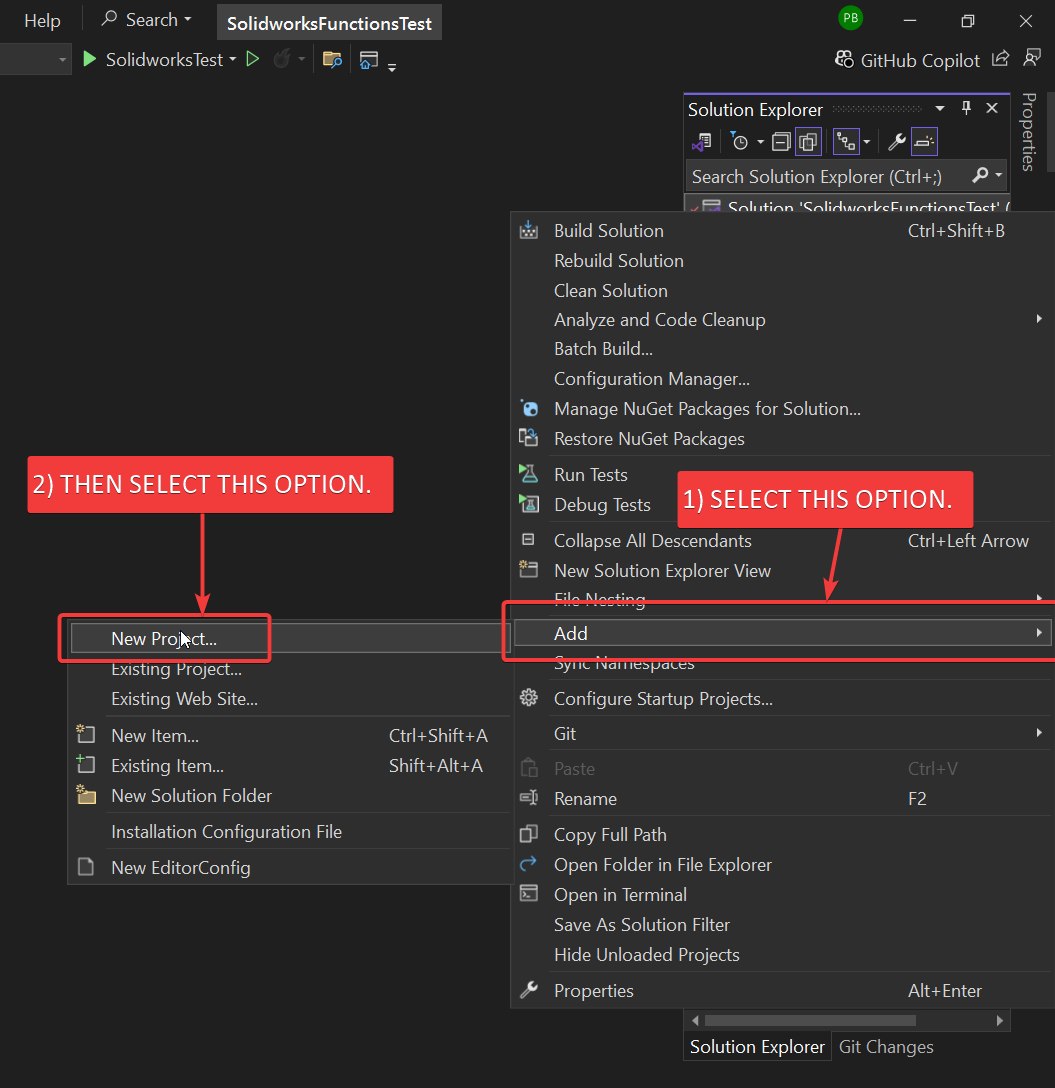
First, we need to add xUnit project to our solution.
Look at the picture below 👇🏻 for help.
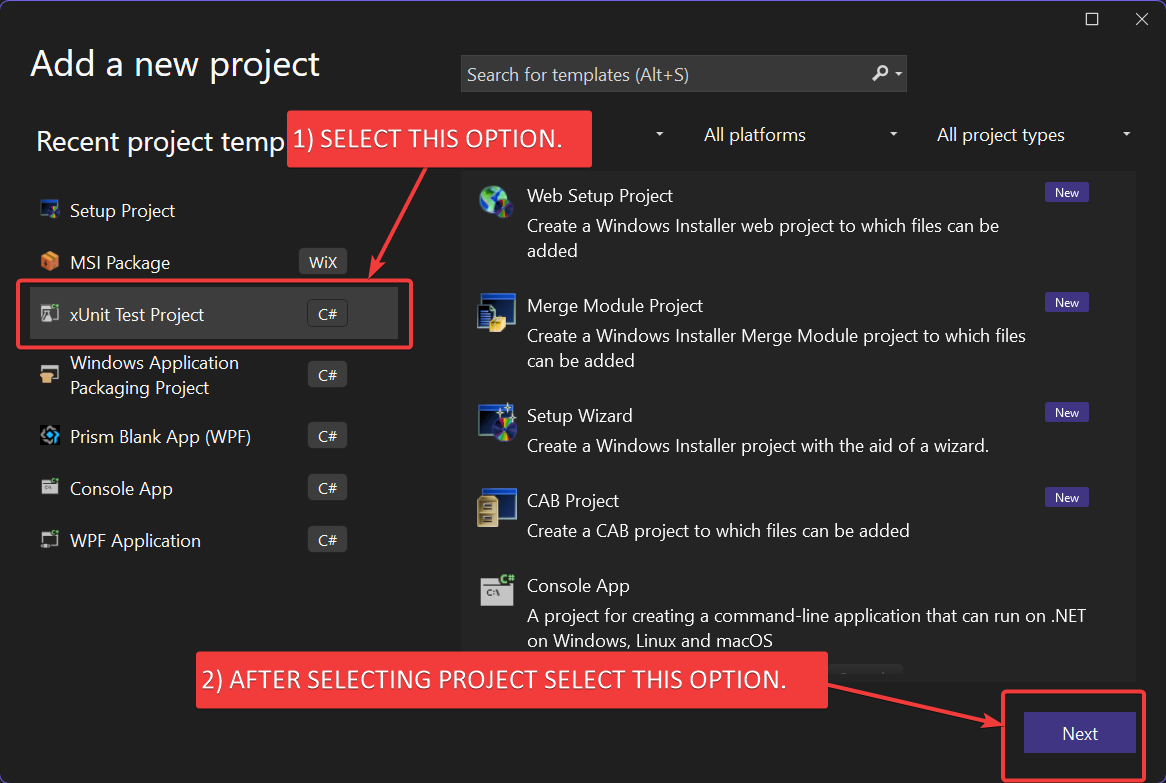
When you do this, a new window will open.
Next, choose “xUnit Test Template” and then click the “Next” button. See the picture below 👇🏻.
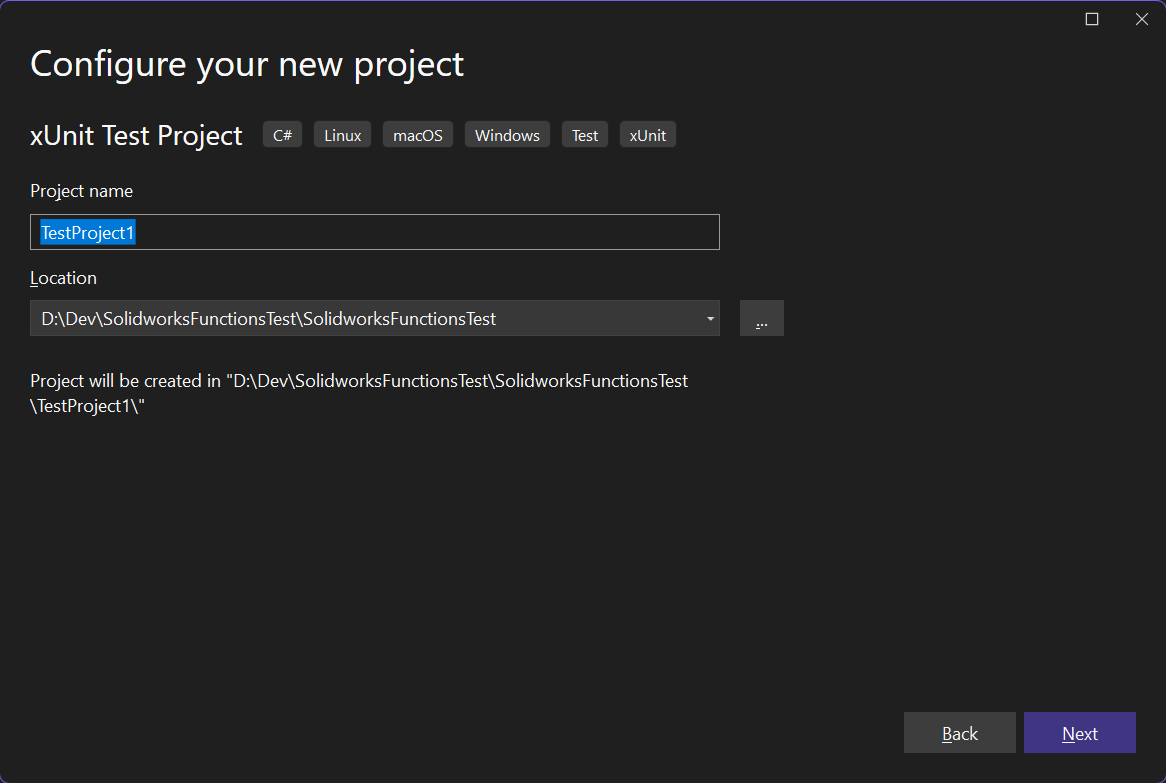
When you click the “Next” button, another new window will open.
This window will help us set up our project.
Please see below 👇🏻 image for reference.
In this window, fill in the Project Name as “SolidworksDemo.Test” then click the “Next” button.
This will open a new screen called the Additional information page.
On this page, do nothing and click the “Create” button.
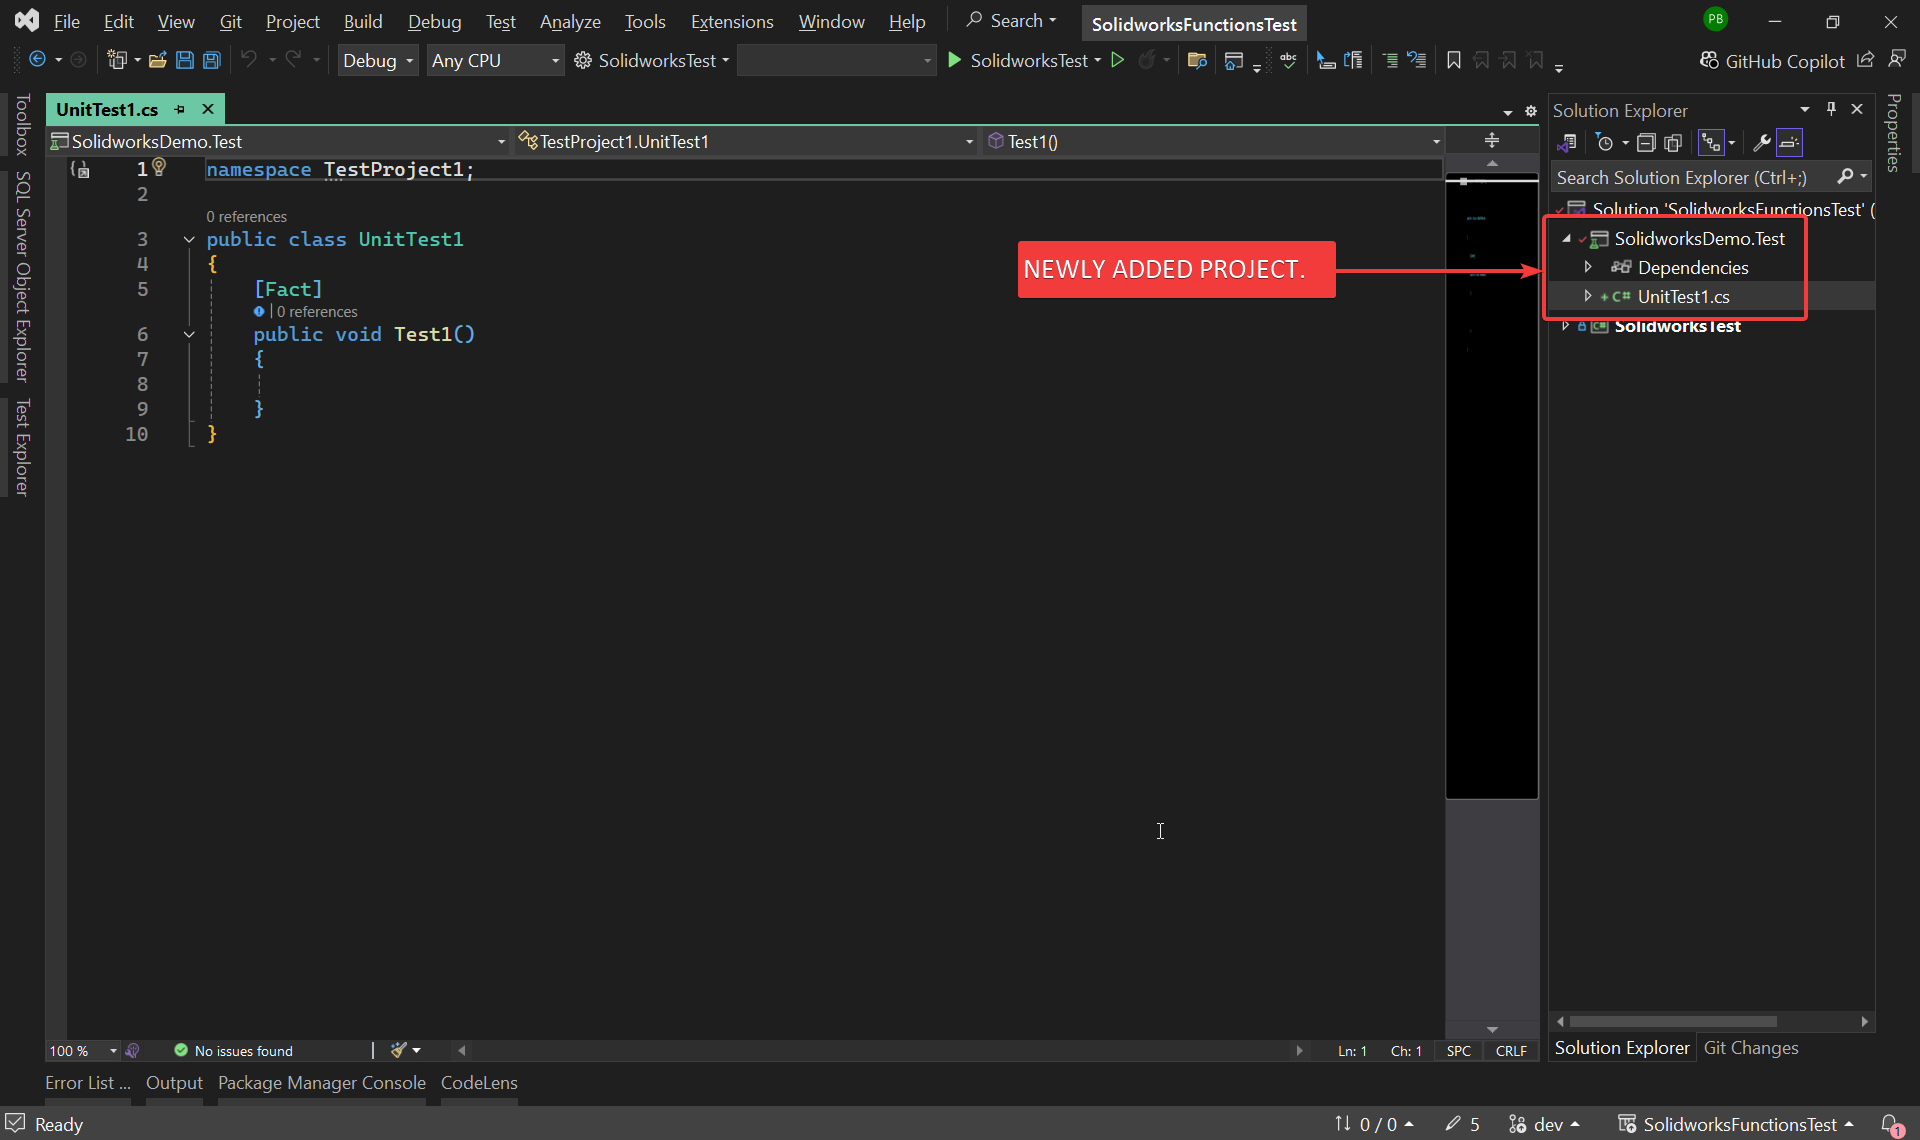
This will add a new project in our solution.
Please see the image below of the new unit test project.
Add [MainWindowViewModelTests]
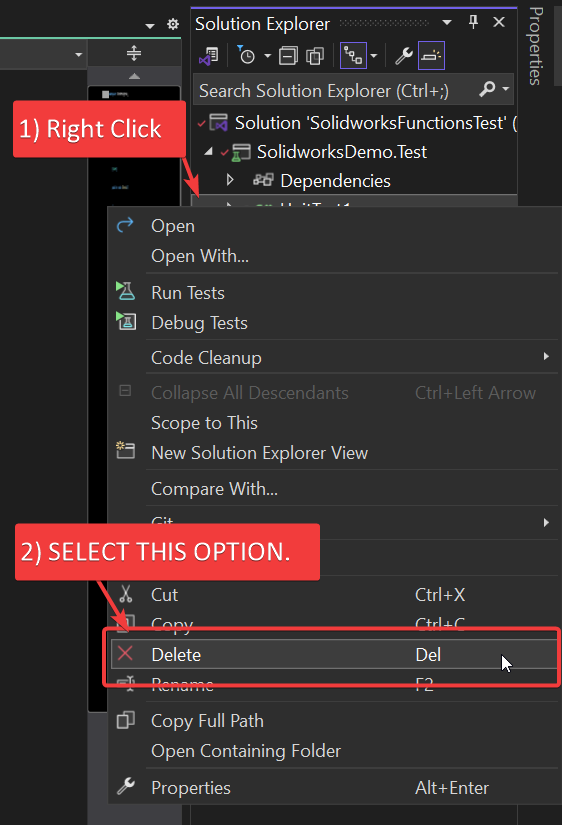
Now we need to delete this auto-generated “UnitTest1” file.
For this operation, select the UnitTest1 file and open the context menu by right-clicking on this UnitTest1 file.
See the image below of the Context Menu.
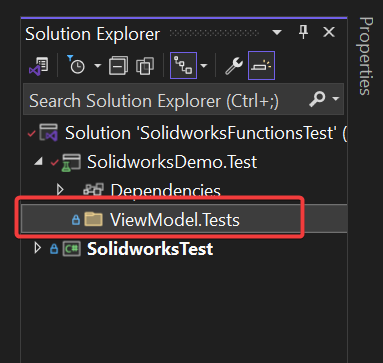
Now add a new folder in our test project.
Name of the folder = “ViewModel.Tests”
See the image below for reference.
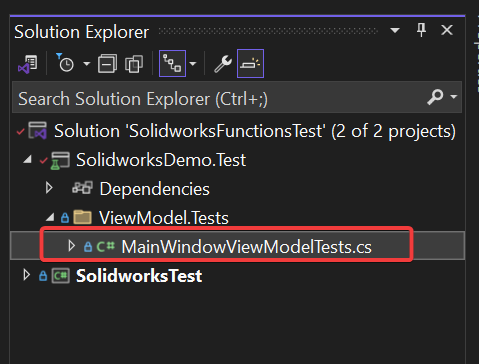
After this we need to add a class.
Name of class: “MainWindowViewModelTests”
See the image below for reference.
Add [Solidworks References]
Now, we need to “Add [Solidworks References]” into our application.
We already have an article where we “Add [Solidworks References]” into our application.
Please see 🚀 Add [Solidworks References] section of 🚀 SOLIDWORKS C# API - Edit Solidworks Sketch article for Adding [Solidworks References].
Add [Moq]
Now we need to add Moq.
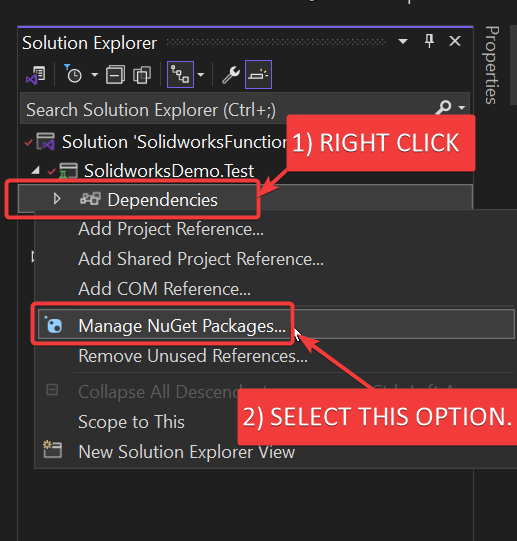
For this select “Dependencies” and open Context Menu.
After this select “Manage NuGet Packages”.
See below for reference.
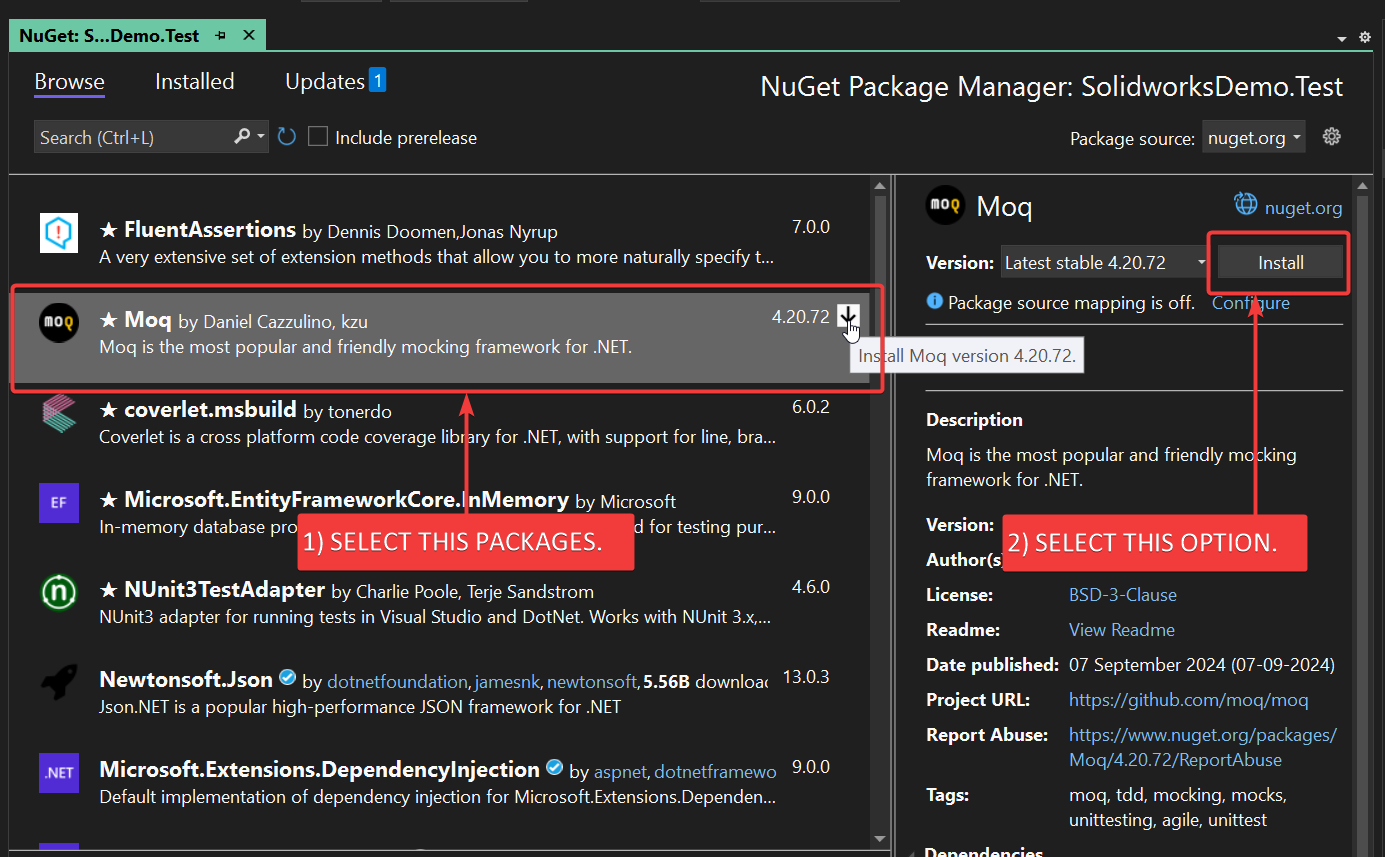
Now a new tab open.
In this tab, select Moq NuGet package and install it.
See below for reference.
Add [Project]
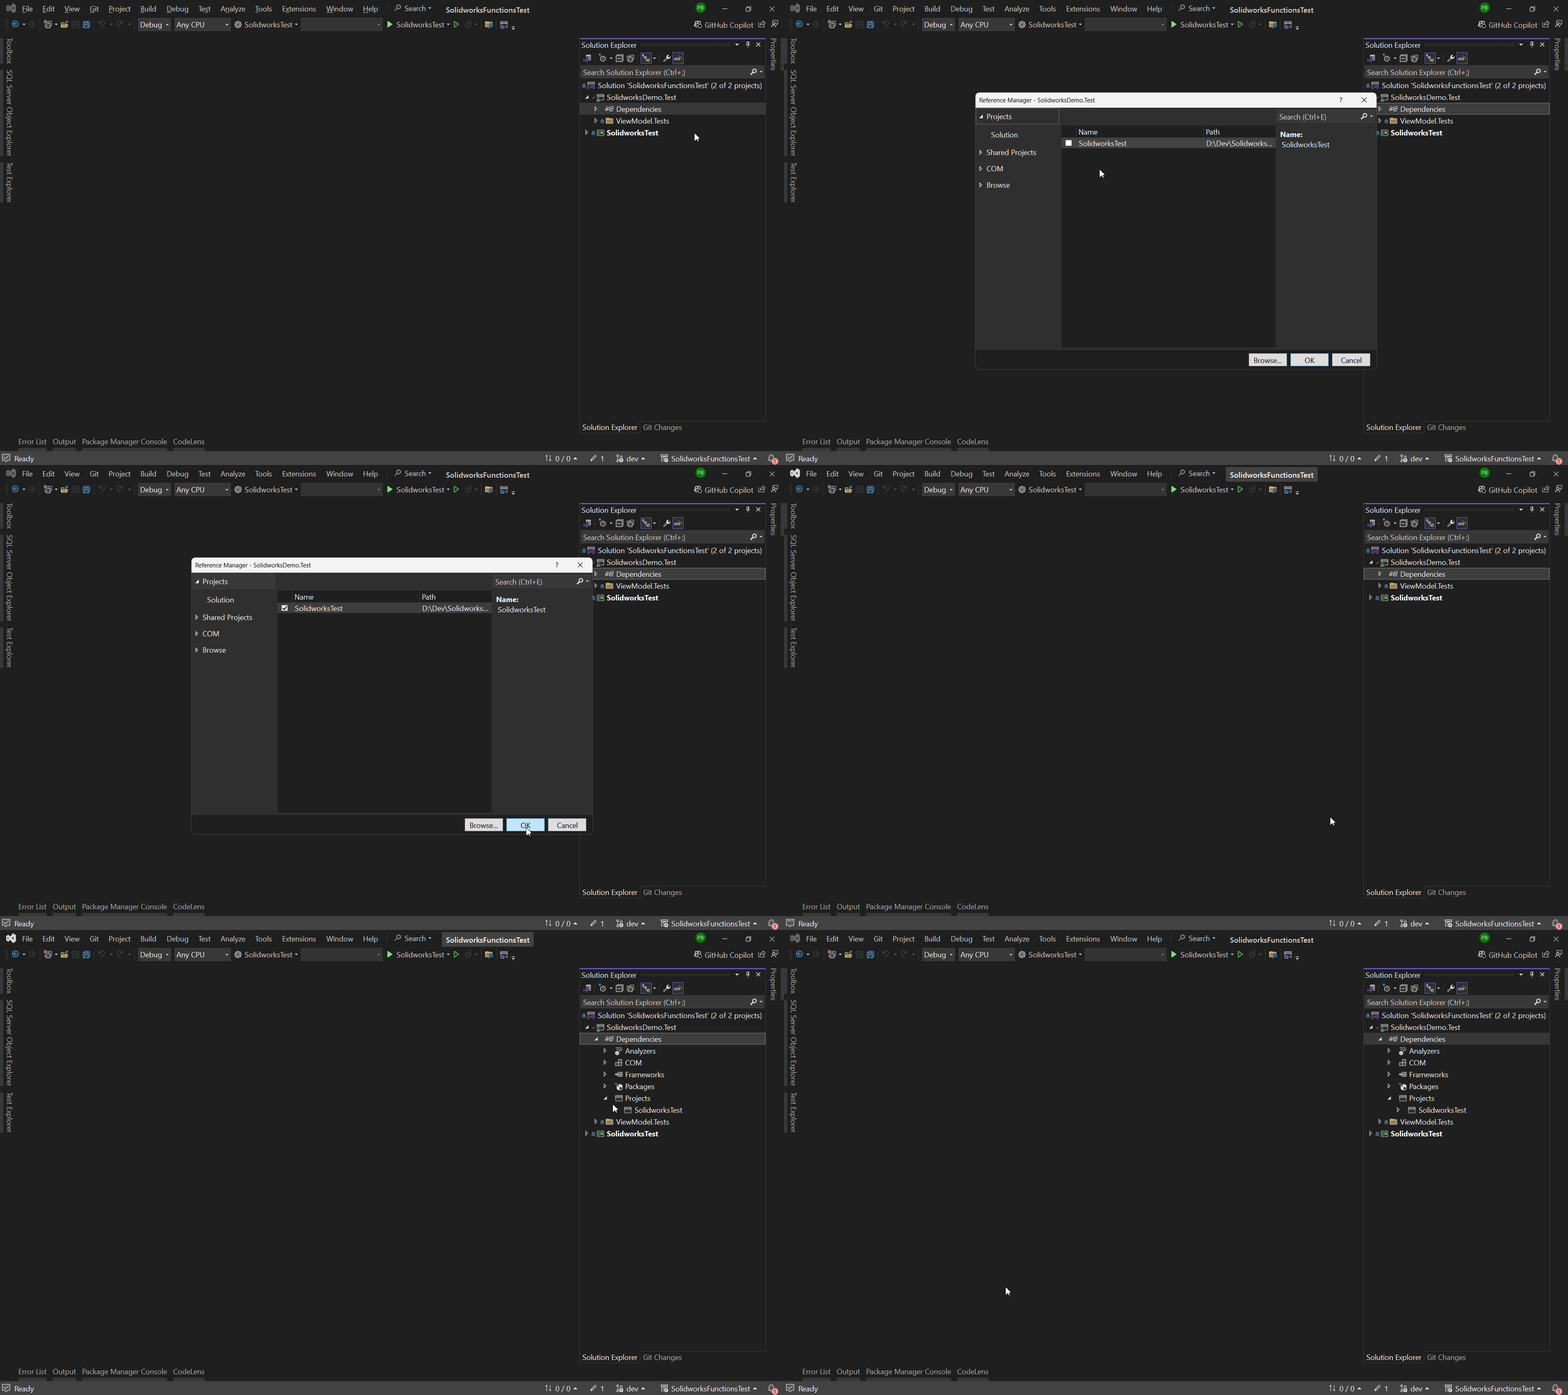
Now we need to add reference of Project we want to test.
In our case, project we want to test is [SolidworksTest]
Select “Add Project Reference” as shown below.
Change Framework
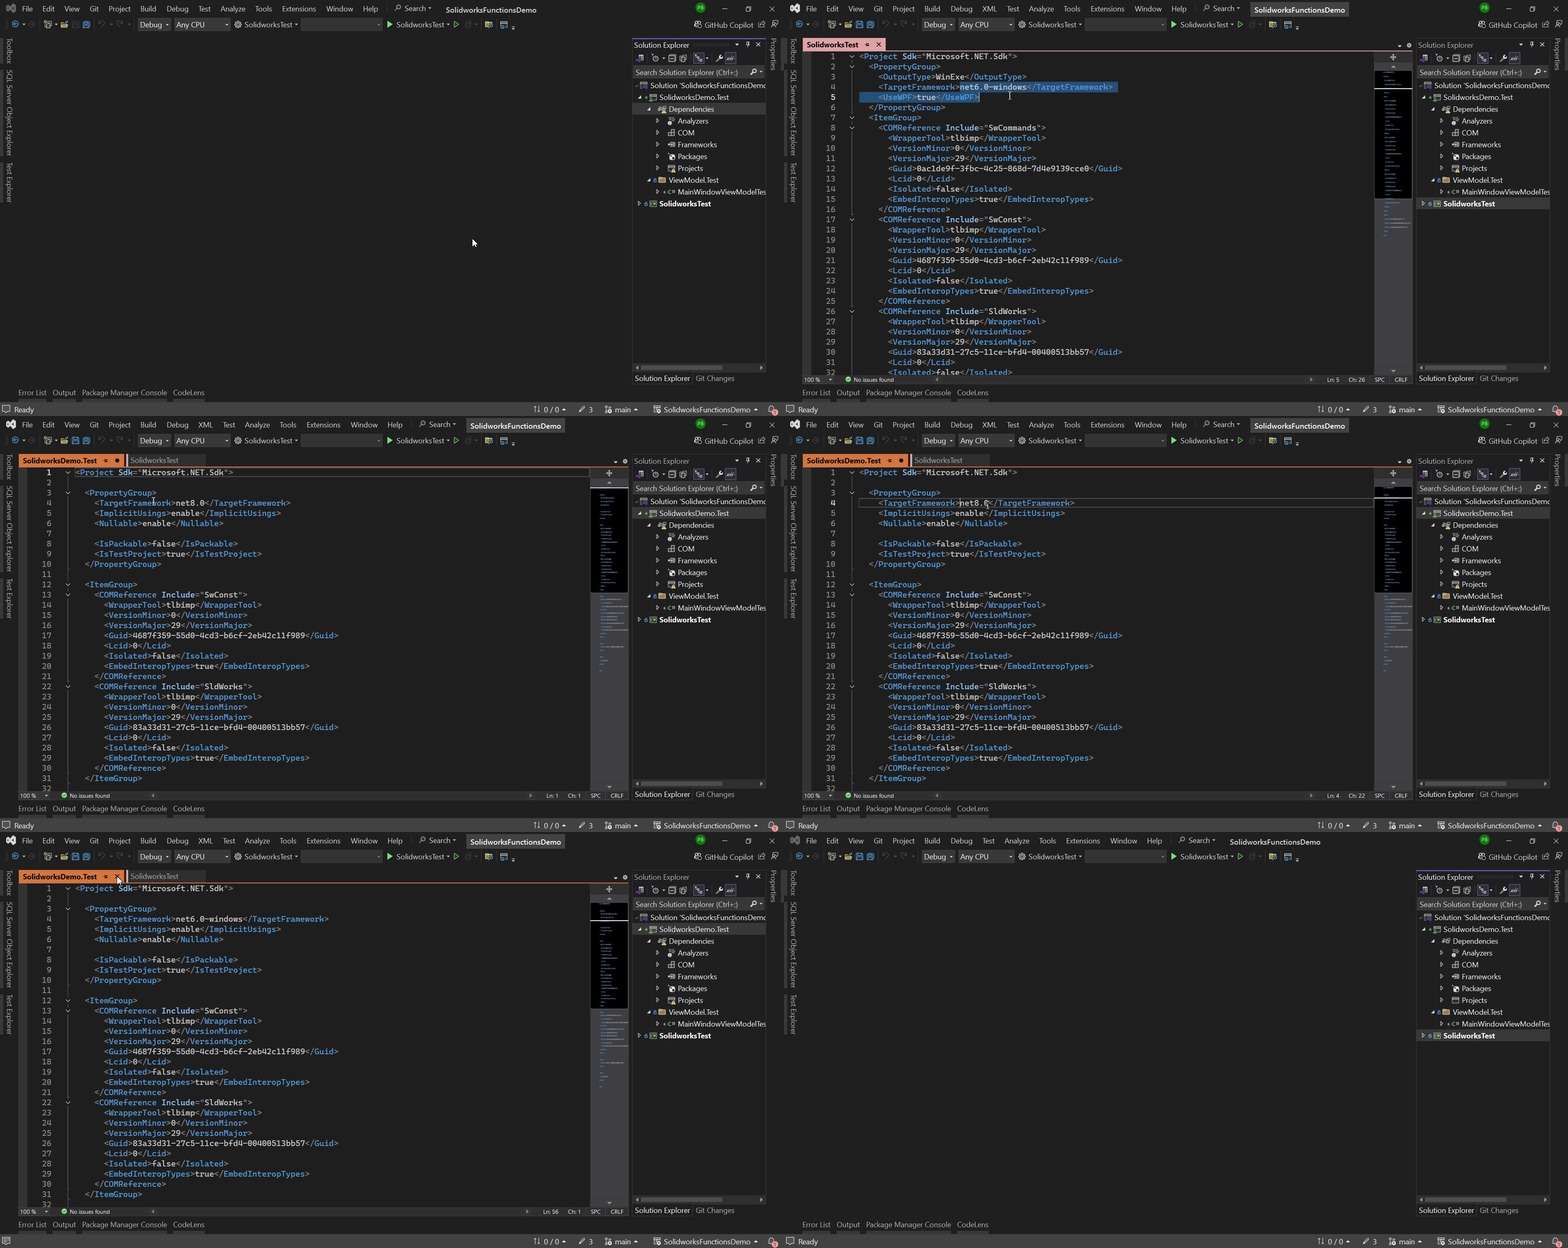
After adding the project, if you see any warnings ⚠️, you need to match the framework of the test project with the project it is referencing.
In our case, our main project is on the “net8.0” framework and the test project is on the “net6.0-windows” framework.
To fix this, copy the framework from the main project and paste it into the test project framework.
This should solve the issue.
For reference, see below.
This is it !!!
I hope my efforts will helpful to someone!
If you found anything to add or update, please let me know on my e-mail.
Hope this post helps you to Setup Unit Test Project.
If you like the post then please share it with your friends also.
Do let me know by you like this post or not!
Till then, Happy learning!!!
