SOLIDWORKS C# API - Browse/Open SOLIDWORKS Document
I want to:
-
Open browsed SOLIDWORKS Document using Solidworks C# API
-
We will continue from previous article 🚀 Browse Solidworks Document UI .
-
Extend article by adding Solidworks C# API to previous code.
RESULT WE GET
Below image shows the result we get.

To get the correct result, please follow the steps correctly.
DEMO VIDEO
Please see below video on how to “Open browsed SOLIDWORKS Document” using SOLIDWORKS C# API from WPF Application.
Open browsed SOLIDWORKS Document
Please note that there are no explanation in the video.
Explanation of each step and why we write code this way is given in this post.
ADD SOLIDWORKS REFERENCES
-
For opening SOLIDWORKS we need to add some references into our project.
-
Please see below image for how to add SOLIDWORKS reference.
CHECK BEFORE OPEN DOCUMENT
In this section we apply some checks.
-
First, we check if we have a file path, which we browsed.
-
Please see below 👇🏻 image for reference.
- Please see below 👇🏻 code sample for reference.
// Check if we browsed a file
if (string.IsNullOrEmpty(FilePath))
    return;
-
In above code, we are checking, if we browsed a file.
-
Condition:
string.IsNullOrEmpty(FilePath)-
Browsed file path is saved into
FilePathvariable. -
Please see previous article 🚀 Browse Solidworks Document UI for more details.
-
If we don’t browse any file, then
FilePathvariable did not have any value. -
We check if value of
FilePathvariable isnulloremptybyIsNullOrEmpty()method. -
When this condition is
true, means we don’t have any file path, we exit the function from here.
-
-
Now we check if browsed file is exist in at said location.
-
Please see below 👇🏻 image for reference.

- Please see below 👇🏻 code sample for reference.
// Check if browsed file exists or not
if (File.Exists(FilePath) == false)
    return;
-
Condition:
File.Exists(FilePath) == false-
Browsed file path is saved into
FilePathvariable. -
Please see previous article 🚀 Browse Solidworks Document UI for more details.
-
We check if browsed file is exist or not.
-
We do this by
Existsmethod. ThisExistsmethod is part ofFileclass. -
This
Existsmethod take path of file as parameter. -
If file exist, then it returns
true. If file does not exis, then returnfalse. -
We are comparing that return value
Existsmethod equals tofalse. -
When this condition is
true, means we don’t have browsed file hence we exit the function from here.
-
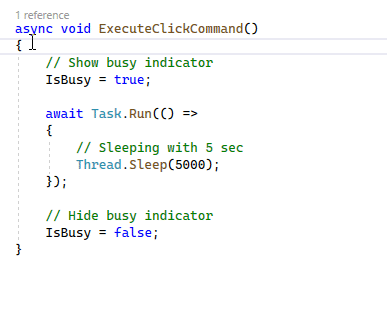
OPEN SOLIDWORKS DOCUMENT
In this section, we open browsed Solidworks document.
-
Create a new function
OpenSolidworksDocument(). -
Please see below 👇🏻 image for reference.

- Please see below 👇🏻 code sample for reference.
private void OpenSolidworksDocument()
{

}
-
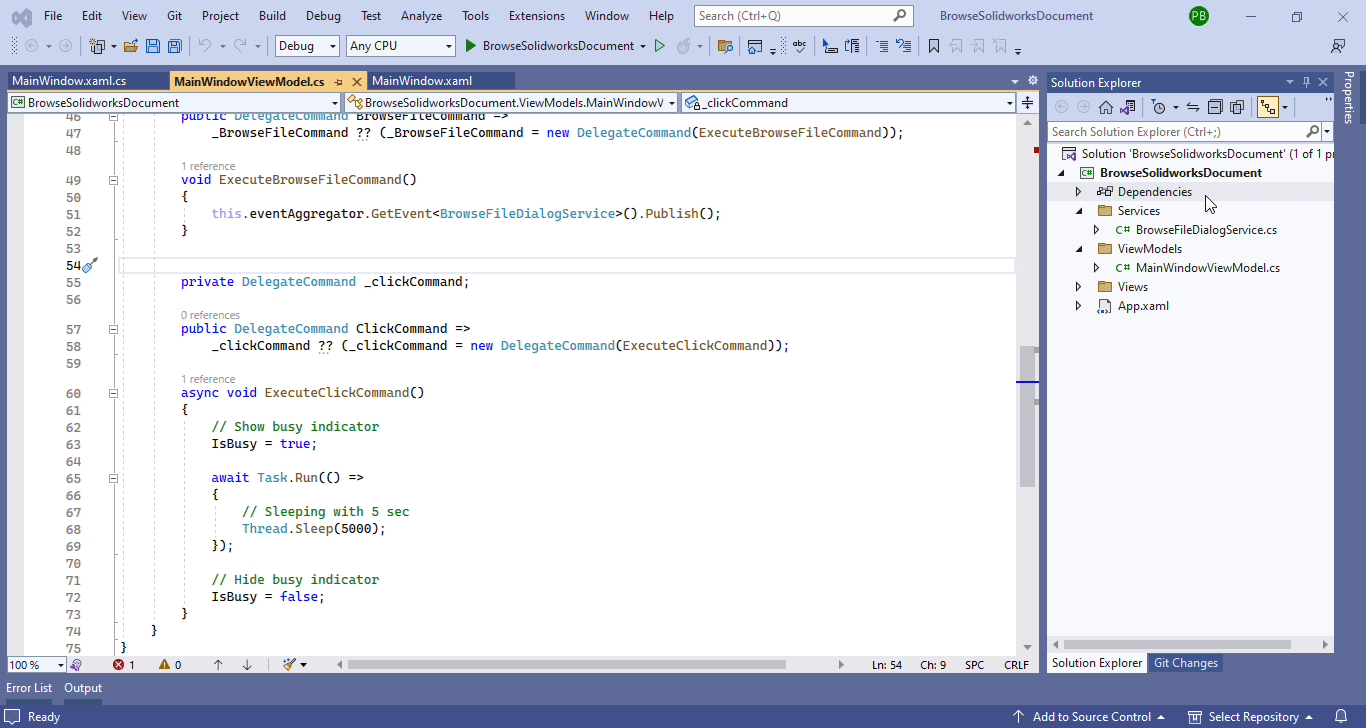
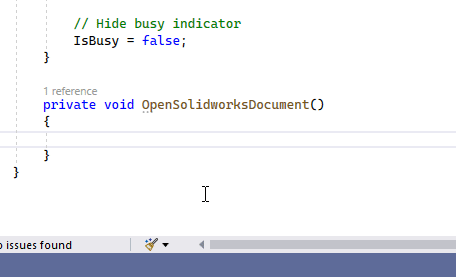
Now we call this
OpenSolidworksDocument()function inExecuteClickCommand()method. -
Please see below 👇🏻 image for reference.

- Please see below 👇🏻 code sample for reference.
async void ExecuteClickCommand()
{
    // Show busy indicator
    IsBusy = true;

    await Task.Run(() =>
    {
        OpenSolidworksDocument();
    });

    // Hide busy indicator
    IsBusy = false;
}
-
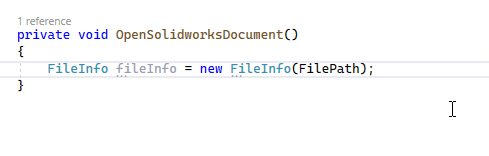
Now, we get browsed file extension.
-
Please see below 👇🏻 image for reference.
- Please see below 👇🏻 code sample for reference.
private void OpenSolidworksDocument()
{
    FileInfo fileInfo = new FileInfo(FilePath);
}
-
In above line, we store file information in
fileInfovariable. -
Type of
fileInfovariable isFileInfo. -
When we create
fileInfovariable, we pass browsed file path. -
We want to get information of this browsed file.
-
Now we want to get the file extension from this
fileInfovariable. -
Then we store this file extension in a
stringtype variable. -
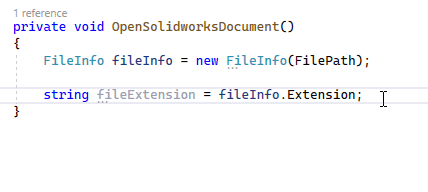
Please see below 👇🏻 image for reference.
- Please see below 👇🏻 code sample for reference.
private void OpenSolidworksDocument()
{
    FileInfo fileInfo = new FileInfo(FilePath);

    string fileExtension = fileInfo.Extension;
}
-
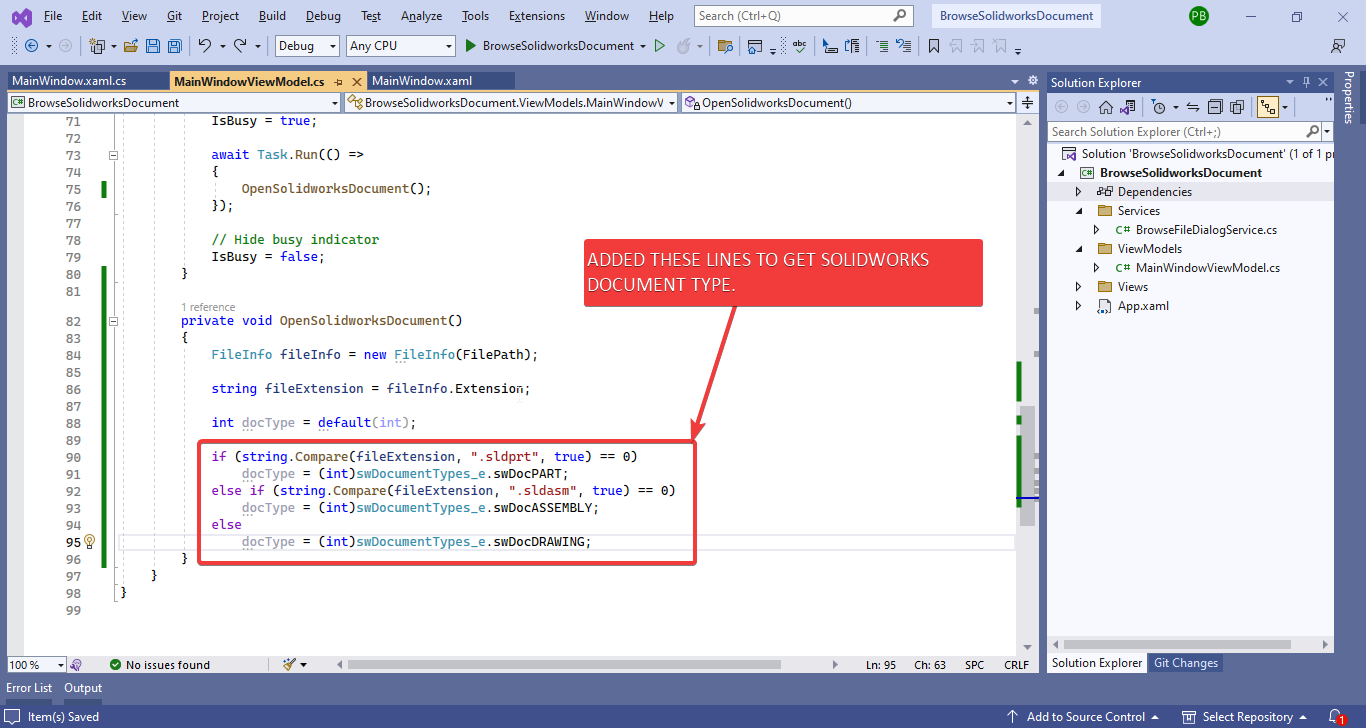
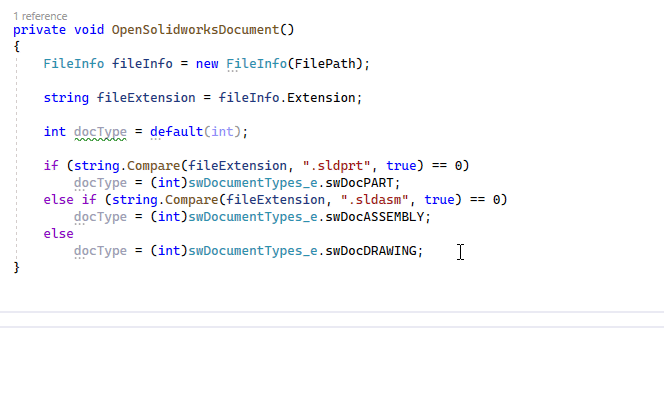
Now we will get the document type of selected file.
-
For this we will check the file extension, we get previously in
fileExtensionvariable. -
For this, first we create a new variable
docTypeofintdata type. -
Please see below 👇🏻 image for reference.
- Please see below 👇🏻 code sample for reference.
private void OpenSolidworksDocument()
{
    FileInfo fileInfo = new FileInfo(FilePath);

    string fileExtension = fileInfo.Extension;

    int docType = default(int);
}
-
We set the value of
docTypevariable to Solidworks Document type we have browsed. -
Please see below 👇🏻 image for reference.
- Please see below 👇🏻 code sample for reference.
if (string.Compare(fileExtension, ".sldprt", true) == 0)
    docType = (int)swDocumentTypes_e.swDocPART;
else if (string.Compare(fileExtension, ".sldasm", true) == 0)
    docType = (int)swDocumentTypes_e.swDocASSEMBLY;
else
    docType = (int)swDocumentTypes_e.swDocDRAWING;
-
In above code sample, we check for 3 different conditions as follows.
-
First we check if fileExtension is
.sldprt. If this condition is true, then we set the value ofdocTypevariable to(int)swDocumentTypes_e.swDocPART. -
After that we check if fileExtension is
.sldasm. If this condition is true, then we set the value ofdocTypevariable to(int)swDocumentTypes_e.swDocASSEMBLY. -
Lastly if above any codition did not get
true, then we set the value ofdocTypevariable to(int)swDocumentTypes_e.swDocASSEMBLY.
-
-
Now we open browsed file in Solidworks.
-
Please see below 👇🏻 image for reference.
- Please see below 👇🏻 code sample for reference.
SldWorks.SldWorks swApp = new SldWorks.SldWorks();

swApp.OpenDoc(FilePath, docType);

swApp.Visible = true;
-
In above code, we create Solidworks application variable.
-
Then, we open browsed document.
-
After opening document, we make Solidworks visible.
FINAL RESULT
Now, we have done everything needed to Open SOLIDWORKS Document through our application.
Please see below image for final result of our work.
This is it !!!
I hope my efforts will helpful to someone!
If you found anything to add or update, please let me know on my e-mail.
Hope this post helps you to Open SOLIDWORKS Documents from WPF PRISM Application.
If you like the post then please share it with your friends also.
Do let me know by you like this post or not!
Till then, Happy learning!!!