Wix4 Visual Studio Extension
In this article we
- Install Wix4 Visual Studio Extension
This extension help us to create Wix4 project.
Demo Video
Please see below video on how to “Install Wix4 Visual Studio Extension”.
Please see below video on how to Install Wix4 Visual Studio Extension
Please note that there are no explanation in the video.
Explanation of each step and why we write code this way is given in this post.
Open Visual Studio
IDE: 🚀 Visual Studio 2026 Community
Click above link to download 🚀 Visual Studio 2026 Community
-
Open Visual Studio 2026 Community
-
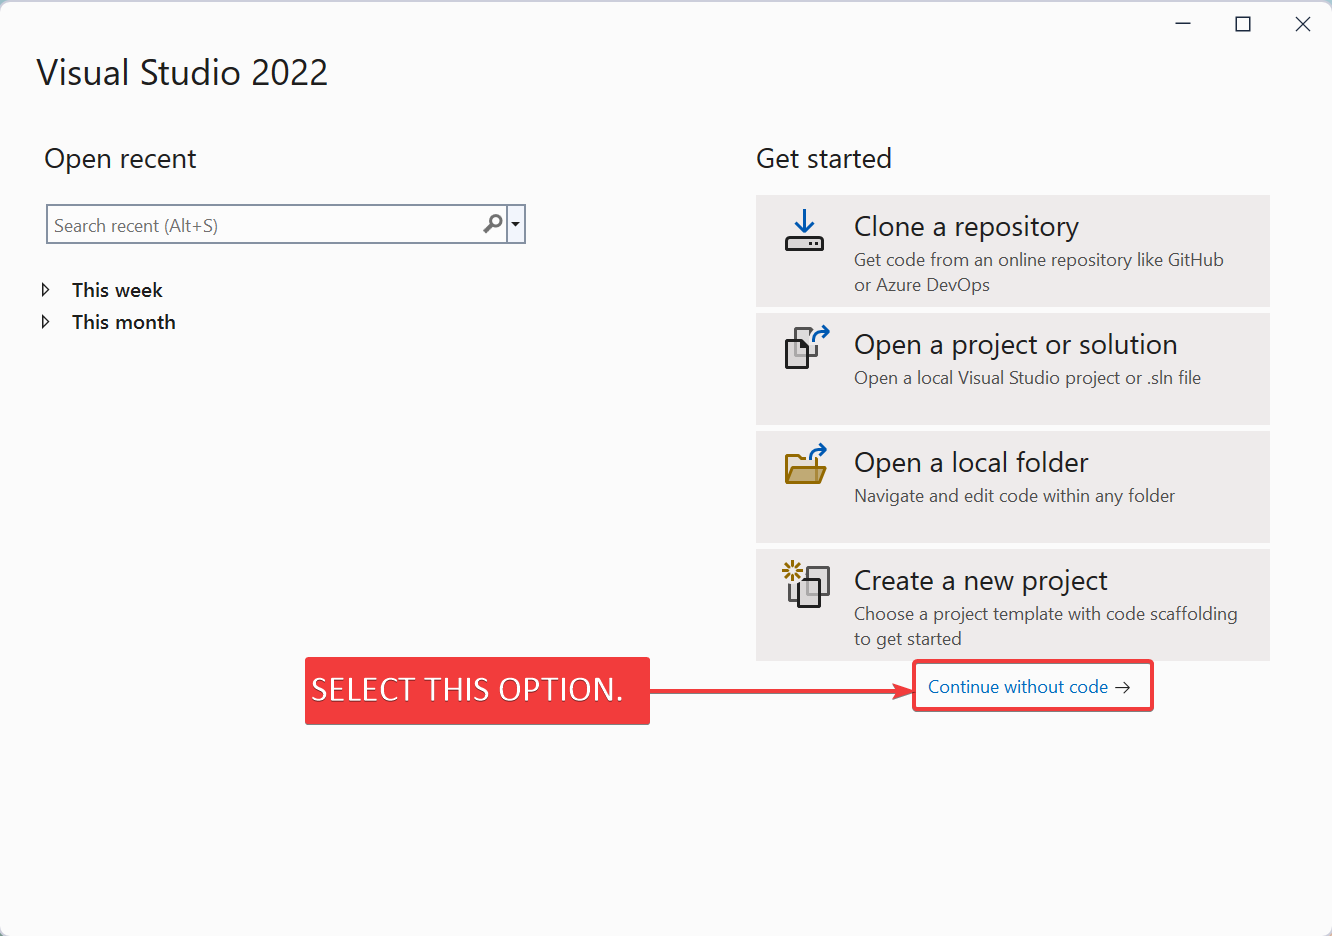
In “Home” screen of Visual Studio, select “Continue without code” option as shown in below 👇🏻 image.
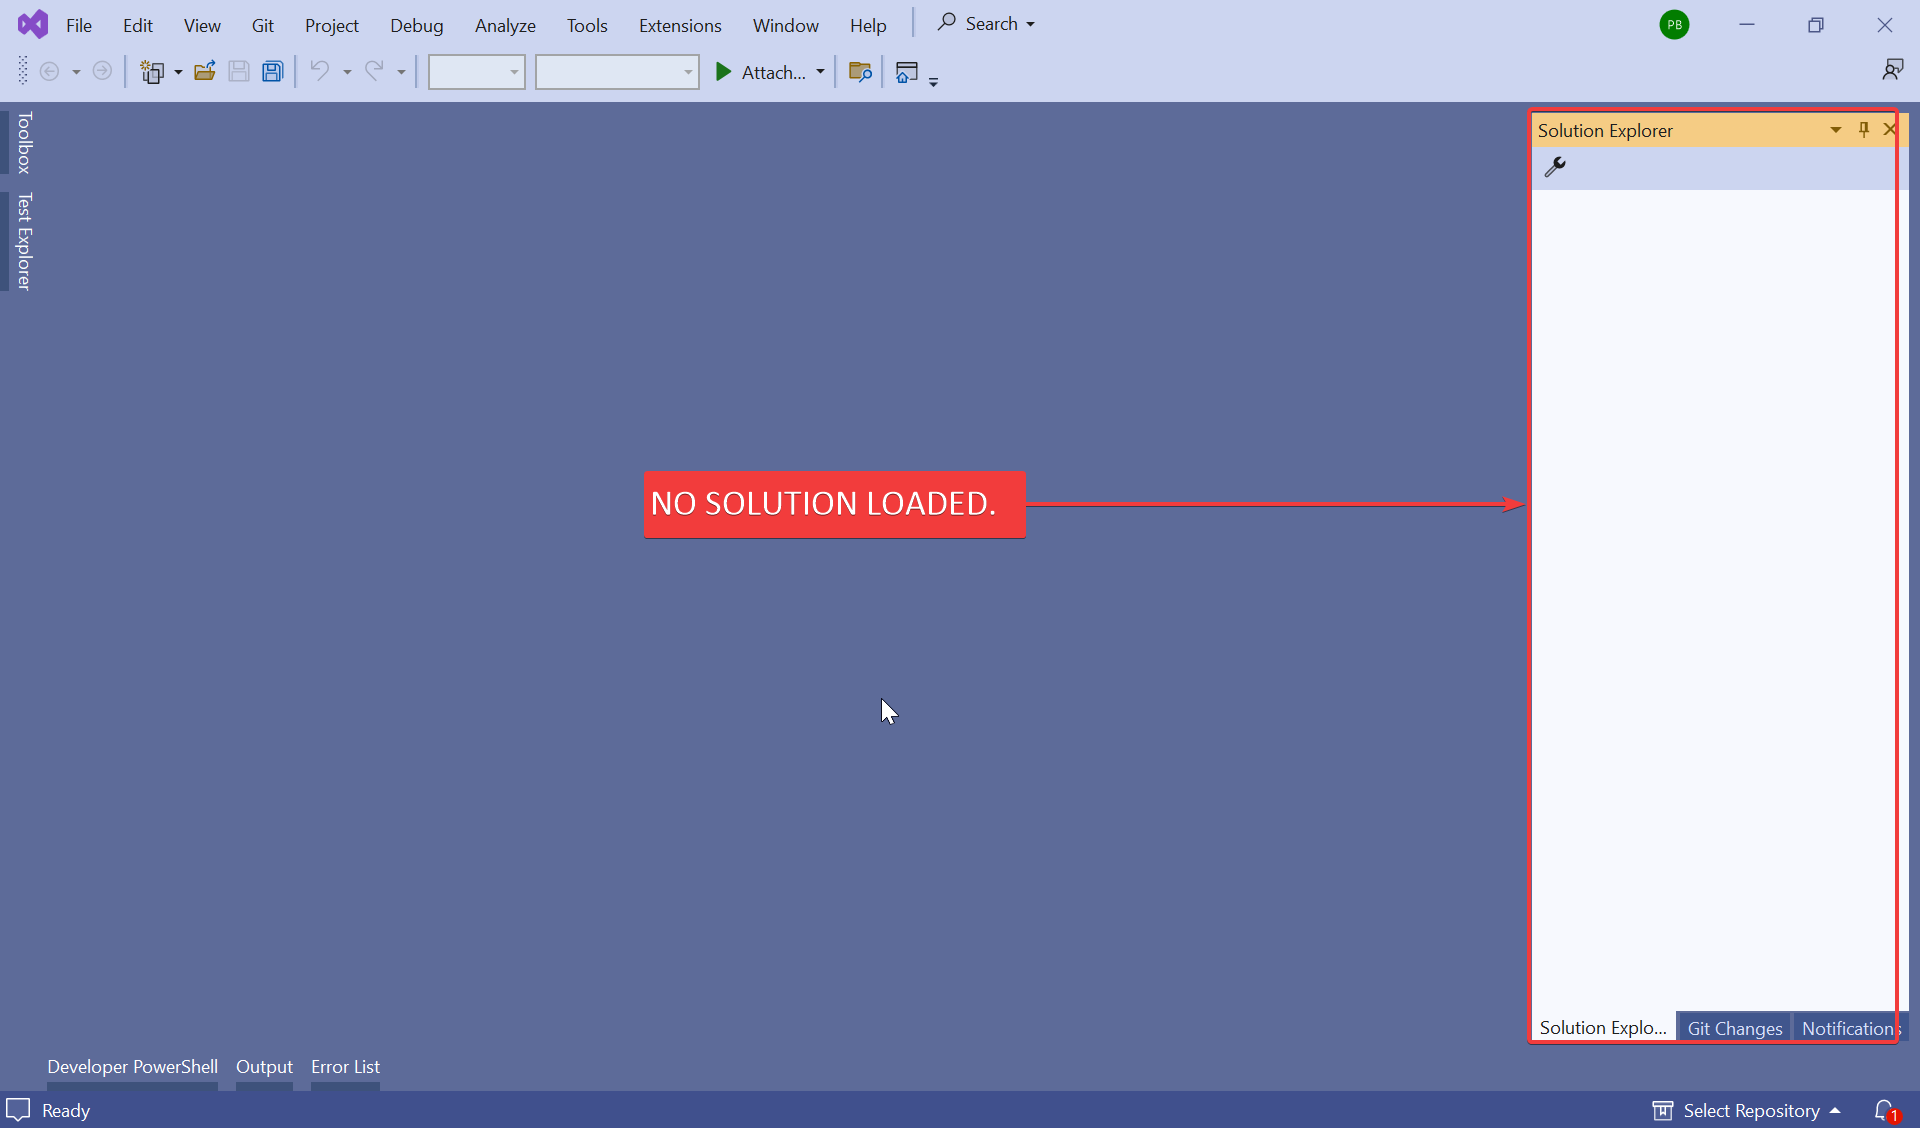
- This open Visual Studio without any project/solution as shown in below 👇🏻 image.
Install Extension
Extension Name: HeatWave for VS2022
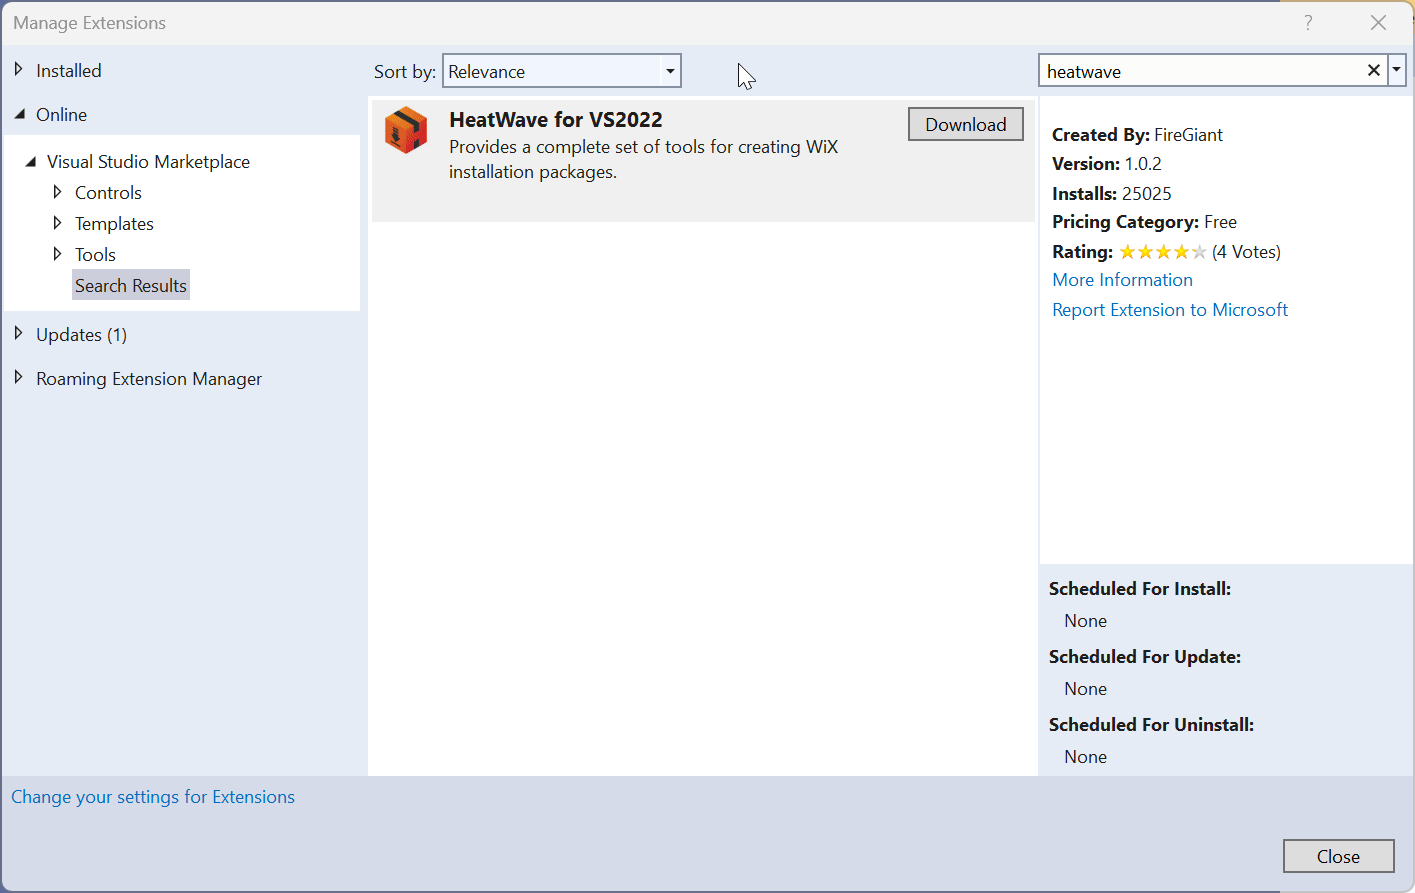
- Open Extension window in Visual Studio 2022 and search for HeatWave for VS2022 as shown in below 👇🏻 image.
- Now select “Download” option as shown in below 👇🏻 image.
-
After download close Visual Studio.
-
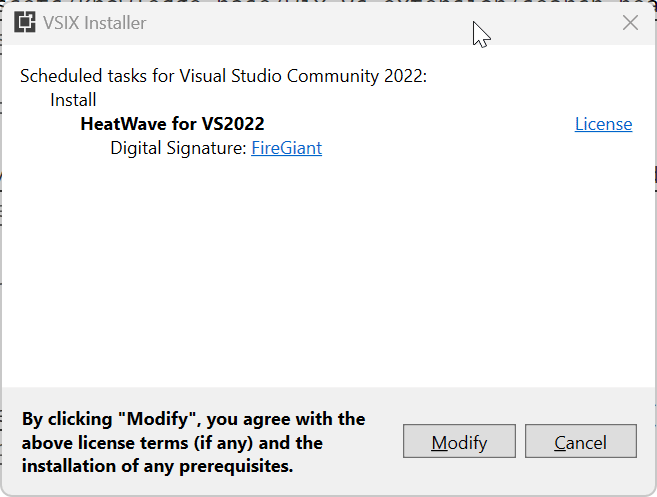
When we close Visual Studio, a pop-up of VSIX Installer will come as shown in below 👇🏻 image.
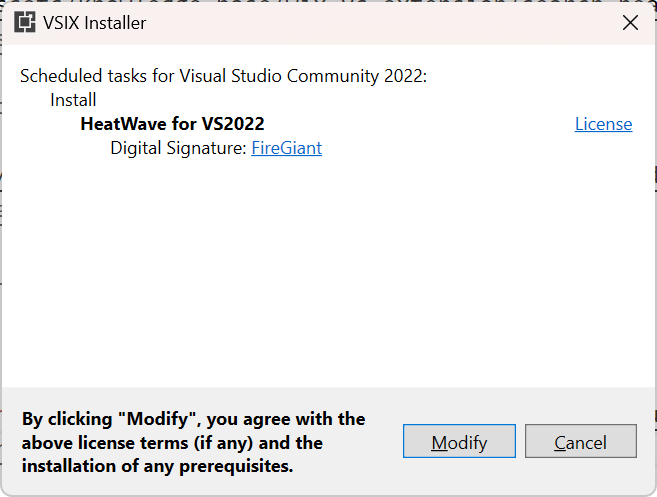
- Now select “Modify” button, this will install extension as shown in below 👇🏻 image.
Check Wix Project Template
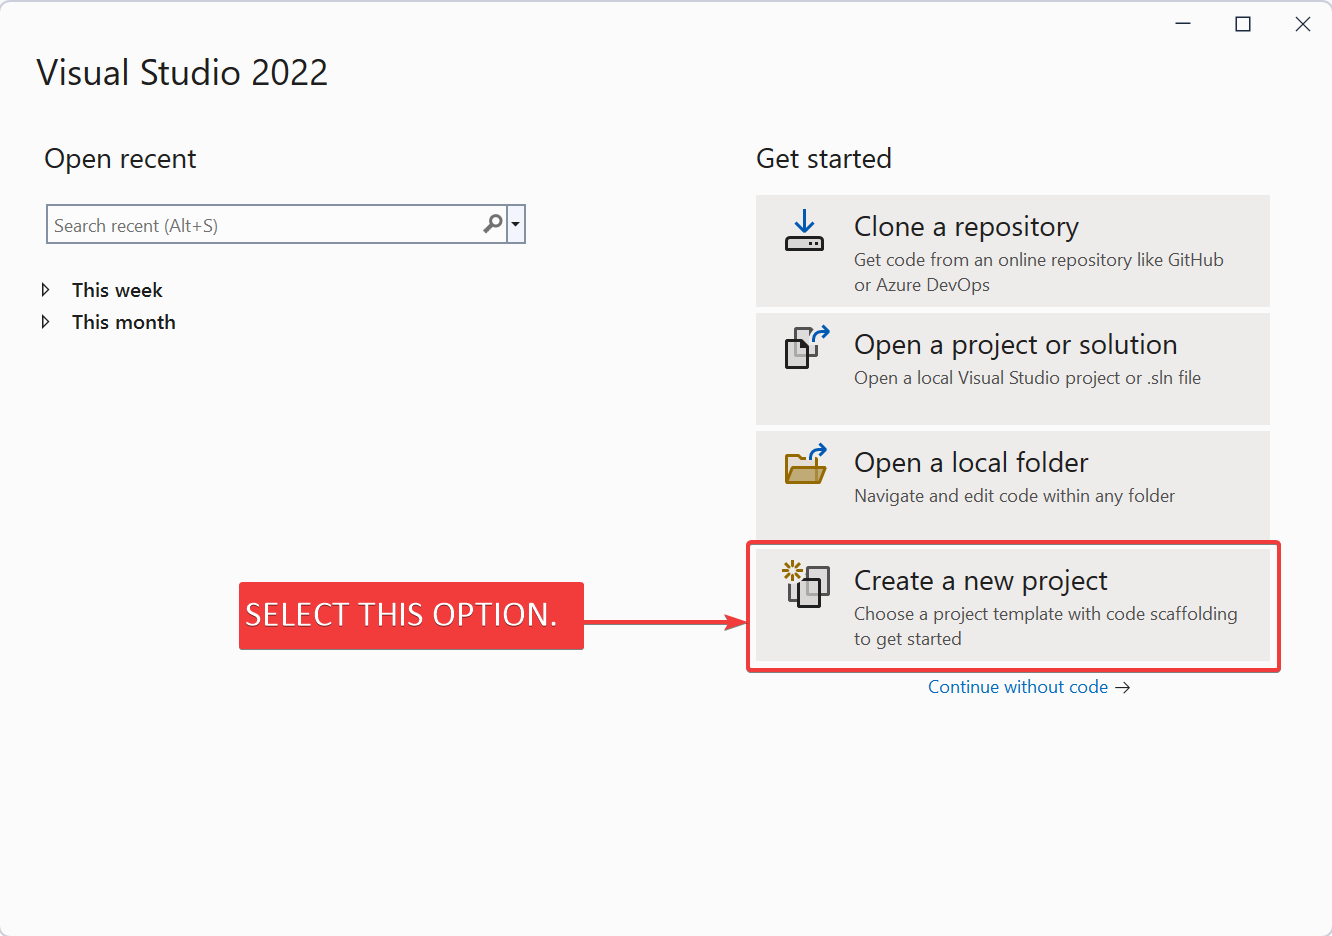
- Now open Visual Studio and select Create New Solution option as shown in below 👇🏻 image.
- This will open a new screen which shows Wix options as shown in below 👇🏻 image.
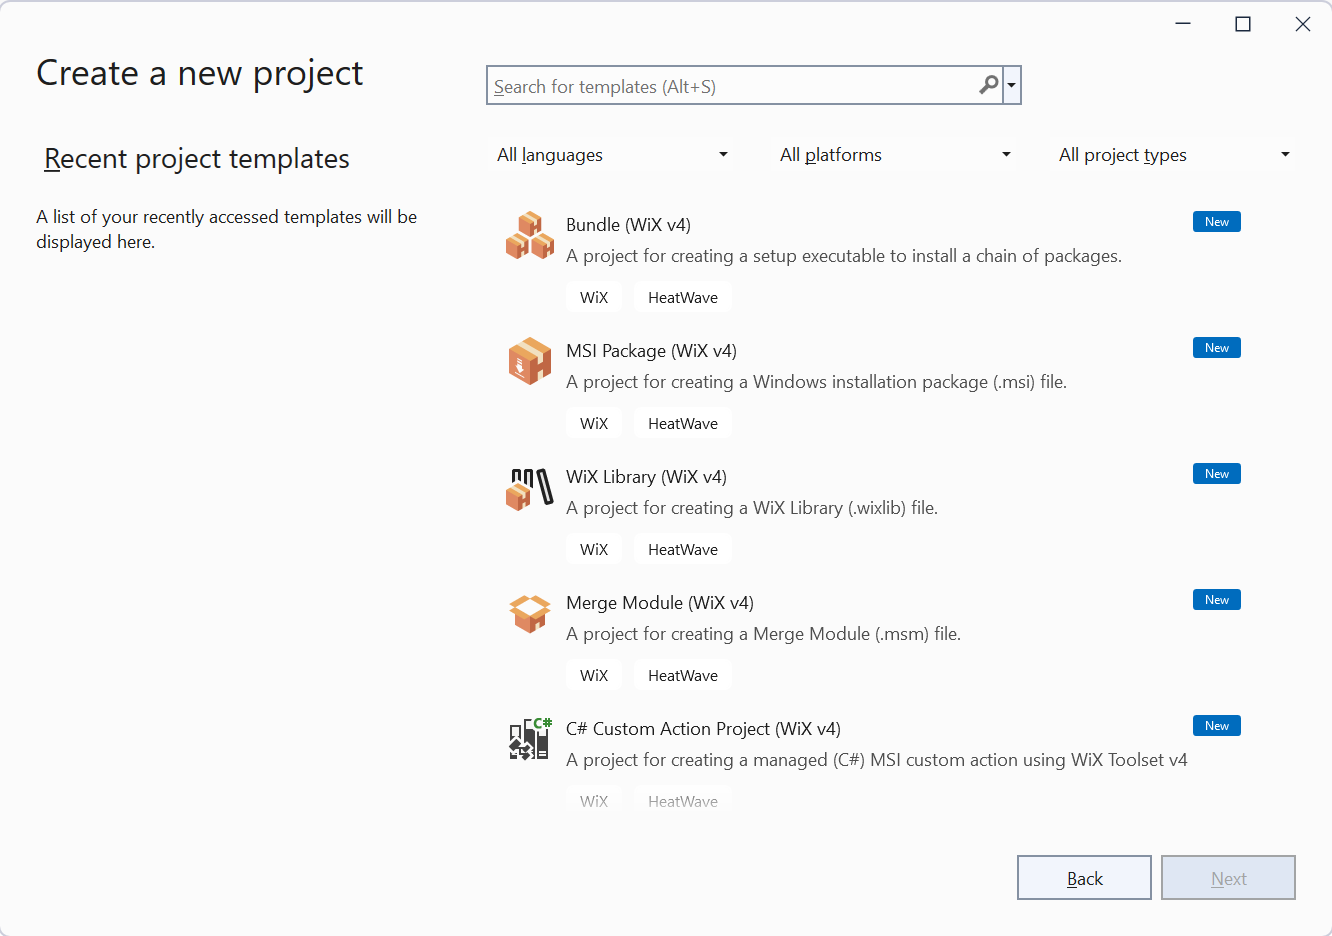
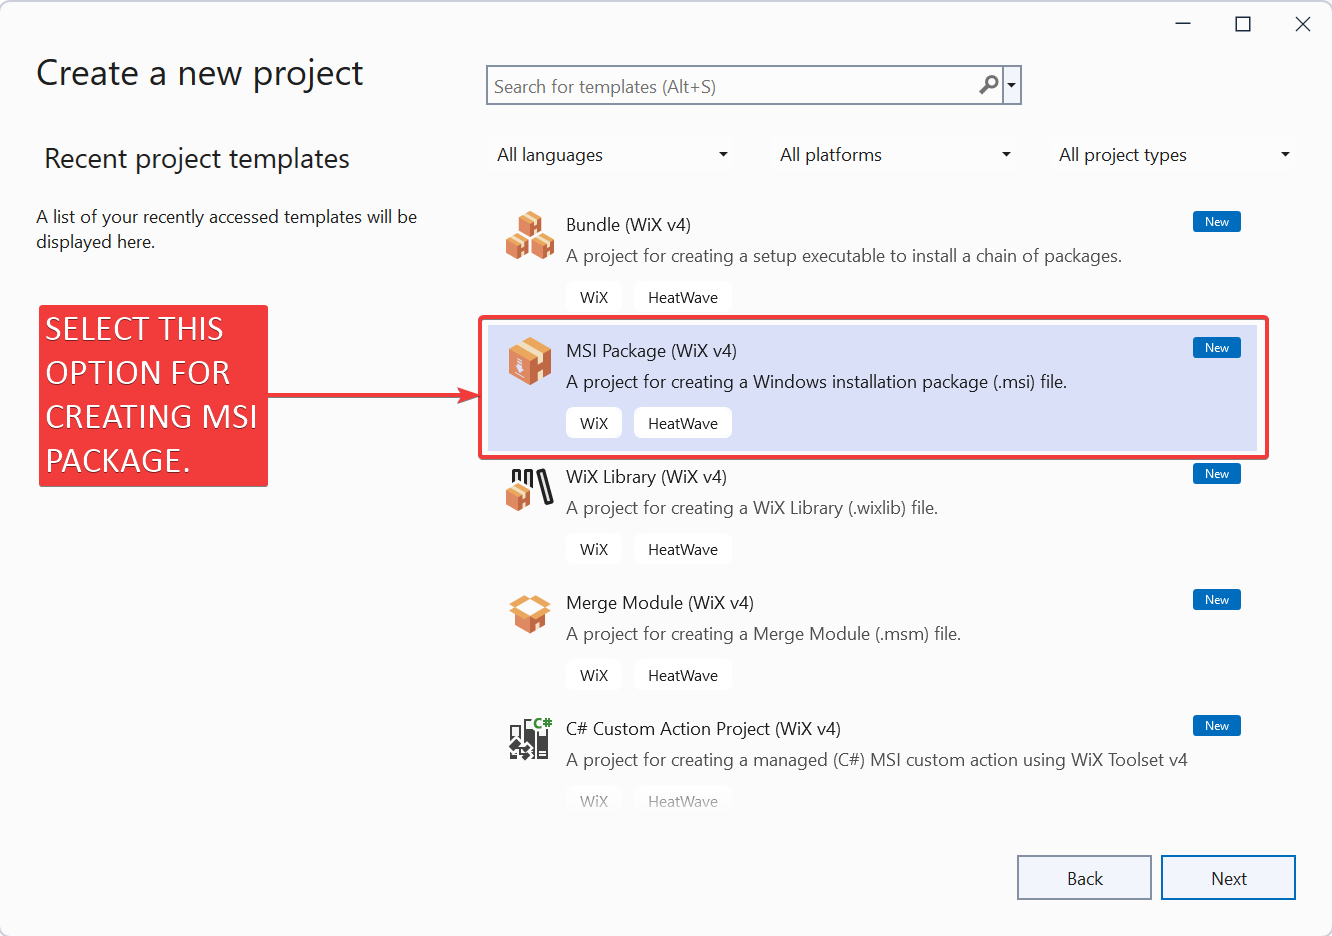
- In this screen, we select MSI Package (Wix v4) option for creating MSI package as shown in below 👇🏻 image.
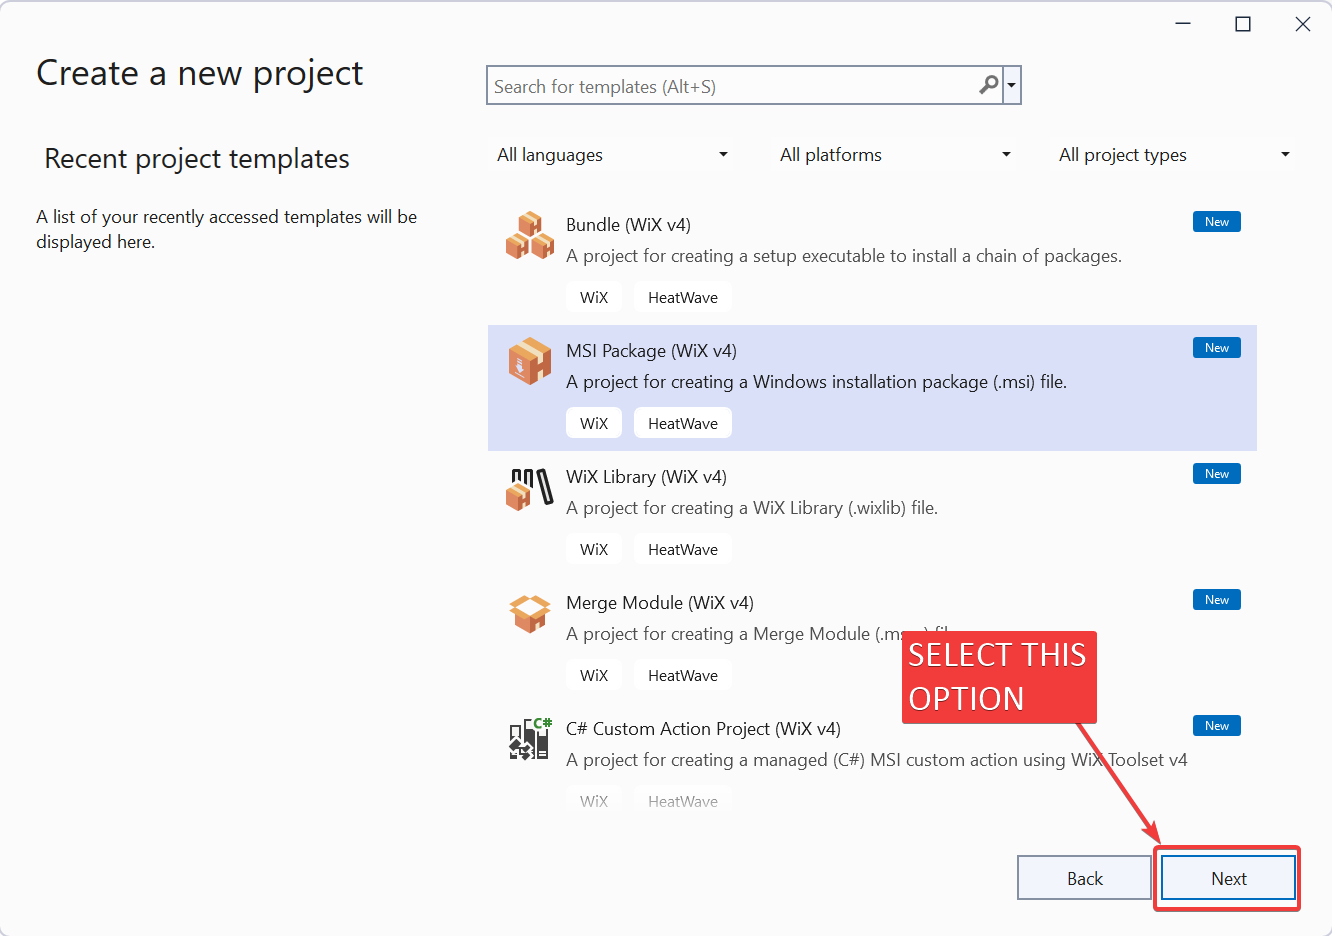
- Now select “Next” option as shown in below 👇🏻 image.
-
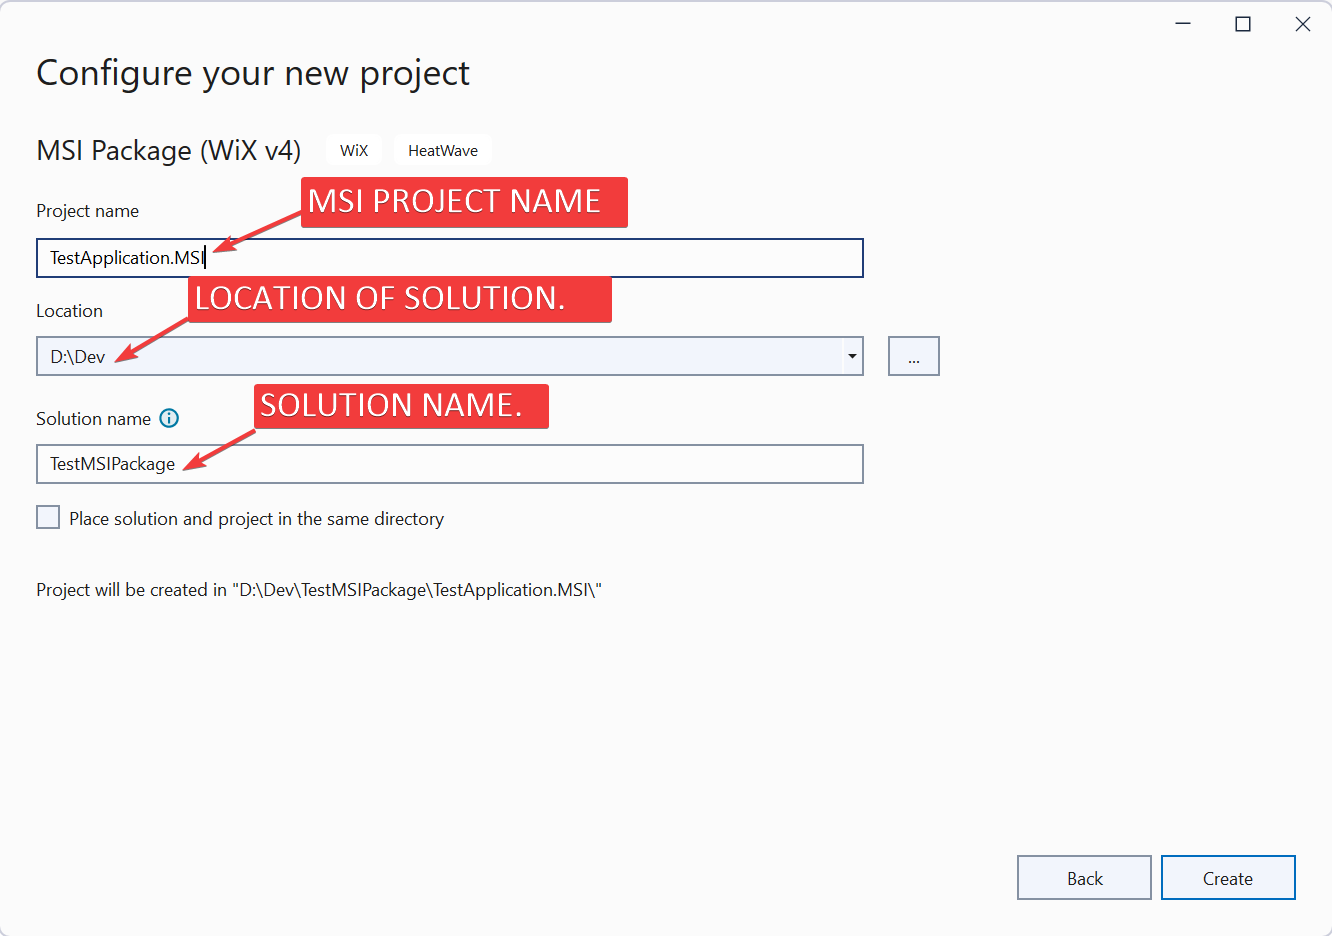
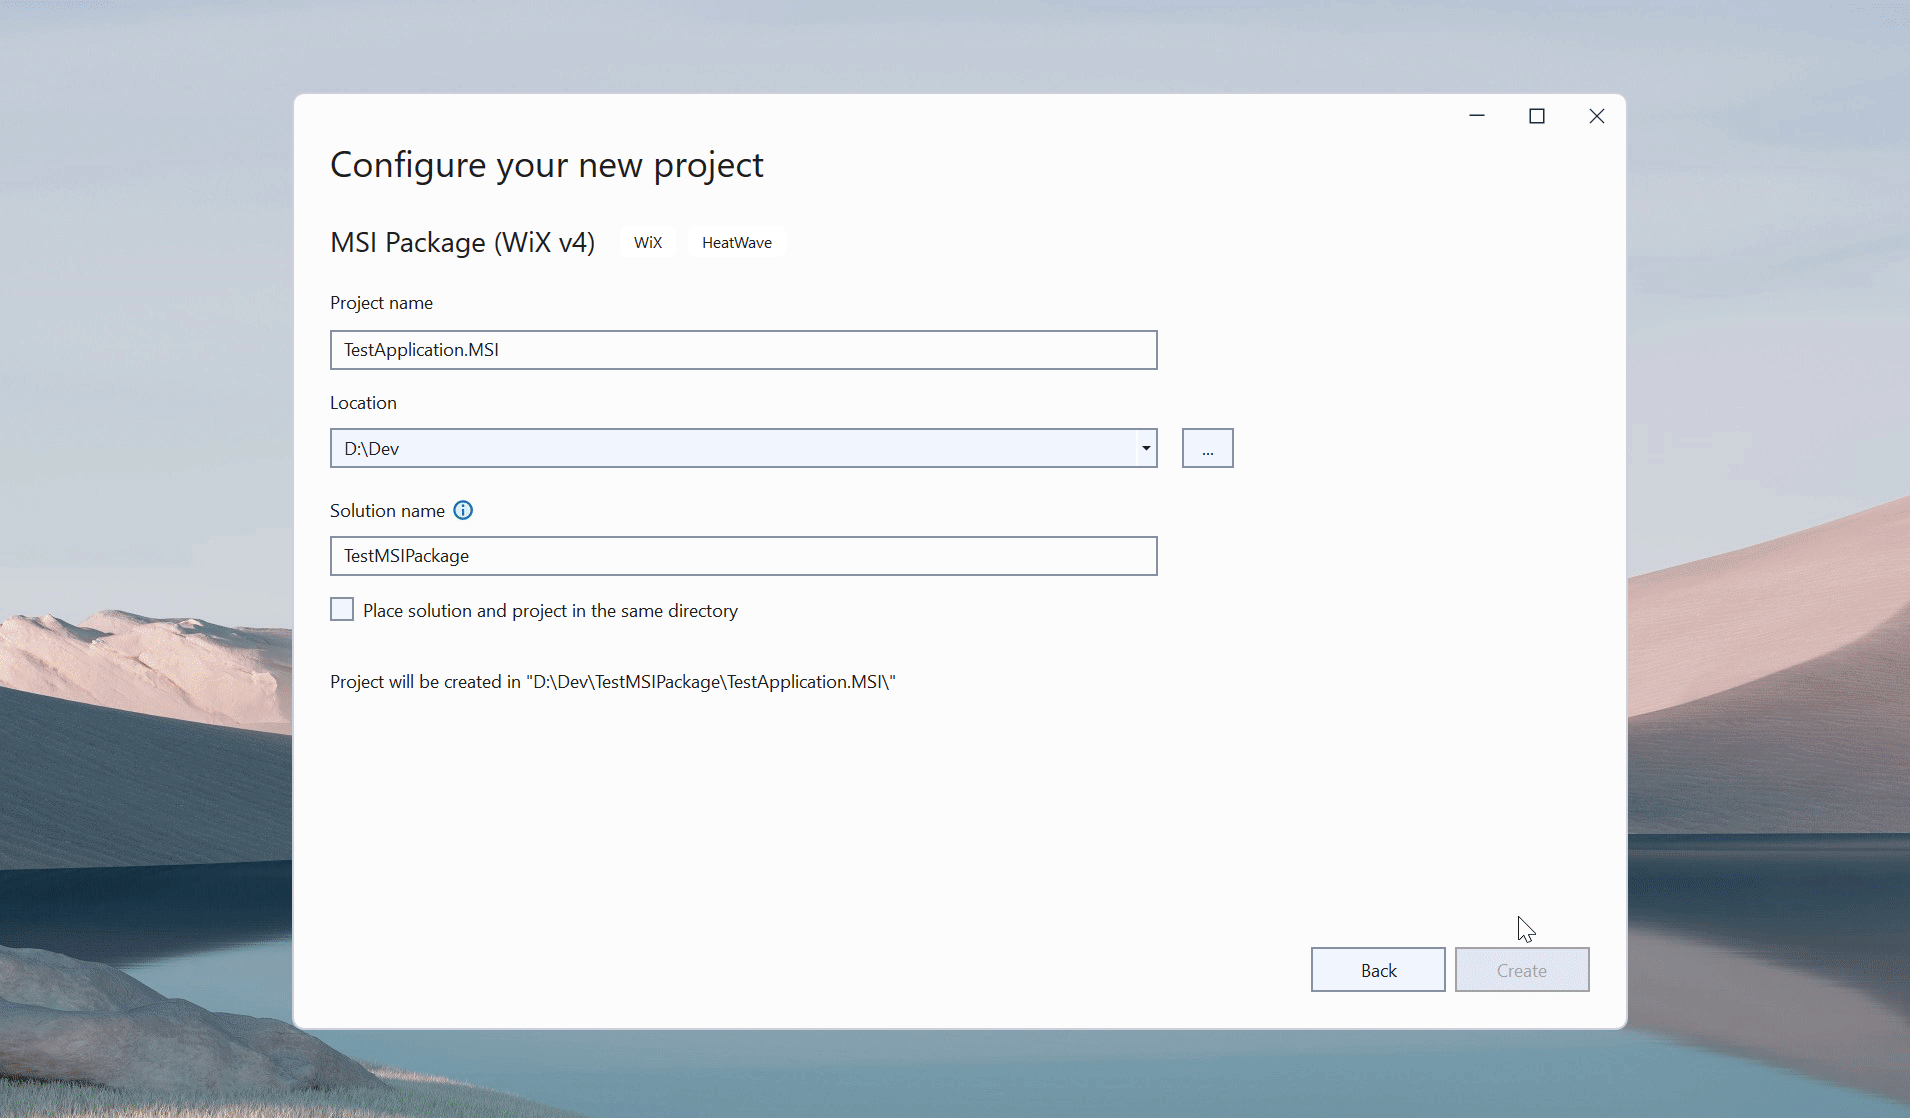
In next screen we define following screen.
- Project Name
- Location of Solution
- Name of Solution
Please see below 👇🏻 image for reference.
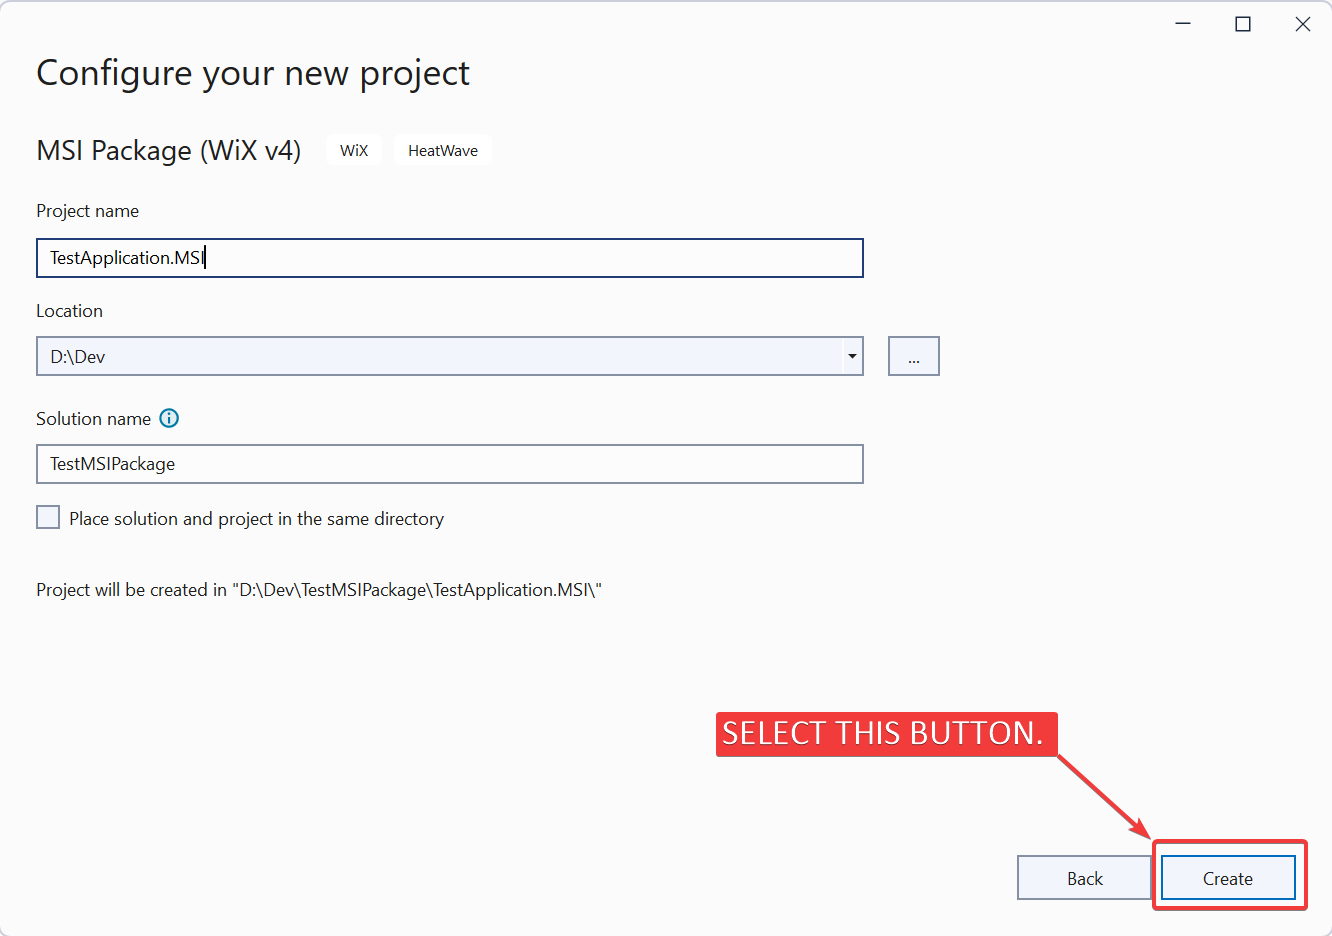
- Now select “Create” option as shown in below 👇🏻 image.
- This will create new Solution with Wix V4 project as shown in below 👇🏻 image.
That’s it!!!
In next article we will understand “File Structure of Wix V4 project”.
Hope this post helps you.
If you like the post then please share it with your friends also.
Do let me know by you like this post or not!
Till then, Happy learning!!!