Browse and Open Solidworks Document
In this post, I tell you about how to Browse and Open Solidworks Document using Solidworks C++ API from Visual Studio.
In this post, I am using Visual C++ in a C++/CLI project.
For more details, please visit .NET programming with C++/CLI .
Purpose of using a C++/CLI project is to use Solidworks C++ API functions from Prism WPF Application.
In short we have -
-
An WPF UI
-
A ViewModel class for our UI
-
A Solidworks C++ function invoke from a Prism command.
If you are confused, just watch the video first before try out anything.
This will give you an idea about what I am saying.
Then follow this post to write similar program at your end.
By following this article, you can able to Browse and Open Solidworks Document using Solidworks C++ API successfuly.
Prerequisite
For this post, we required Some prior knowledge of C++.
For more details about the prerequisite, please visit the Solidworks C++ API – Prerequisite post and watch the suggested videos before proceeding further.
Video of Code on YouTube
Please see below video on how to Browse and Open Solidworks Document using Solidworks C++ API from Visual Studio.
Browse and Open Solidworks Document
Please note that in the video, I just show how to do things.
Explaination of each line and why we write code this way is given in this article.
Create a New project
First, we will create a new project in Visual Studio 2019.
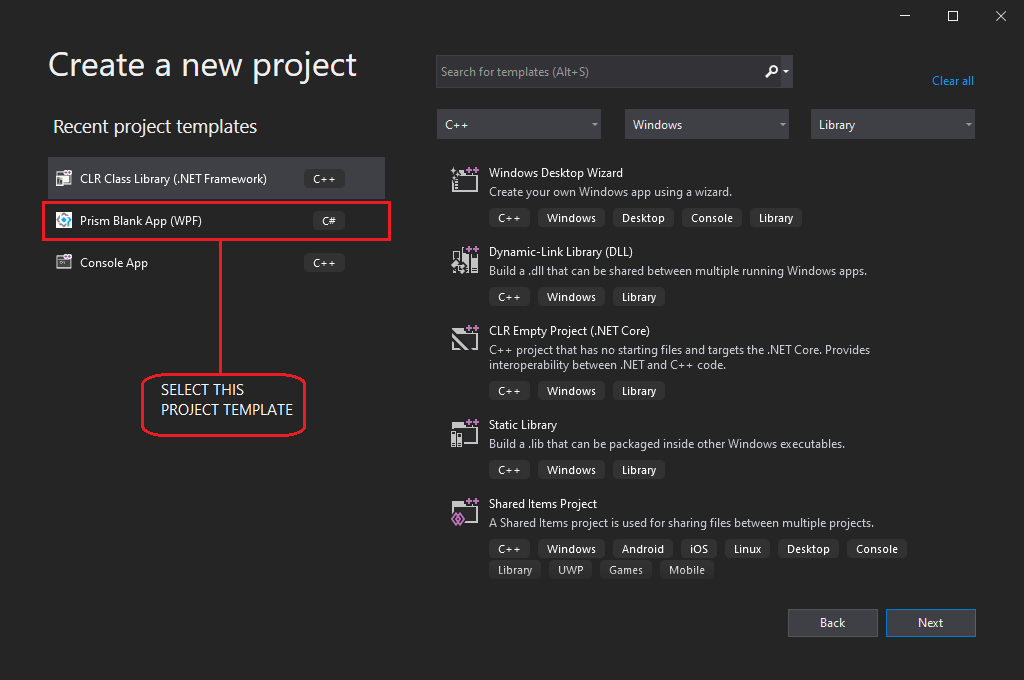
When Visual Studio 2019 open, we need to select “Create New Project” as shown in below image.

Now, from this new window, select Prism Blank App template as shown in below image.
Next, a new window open and here we need to configure our project.
In this window we give a name to our Prism project.
I will continue will default location and other options but if you want, you can change it.
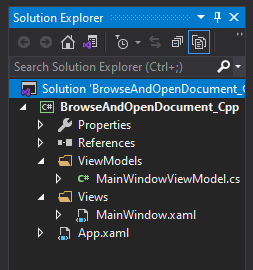
As shown in below image I have created a new project named BrowseAndOpenDocument_Cpp in Visual Studio 2019.
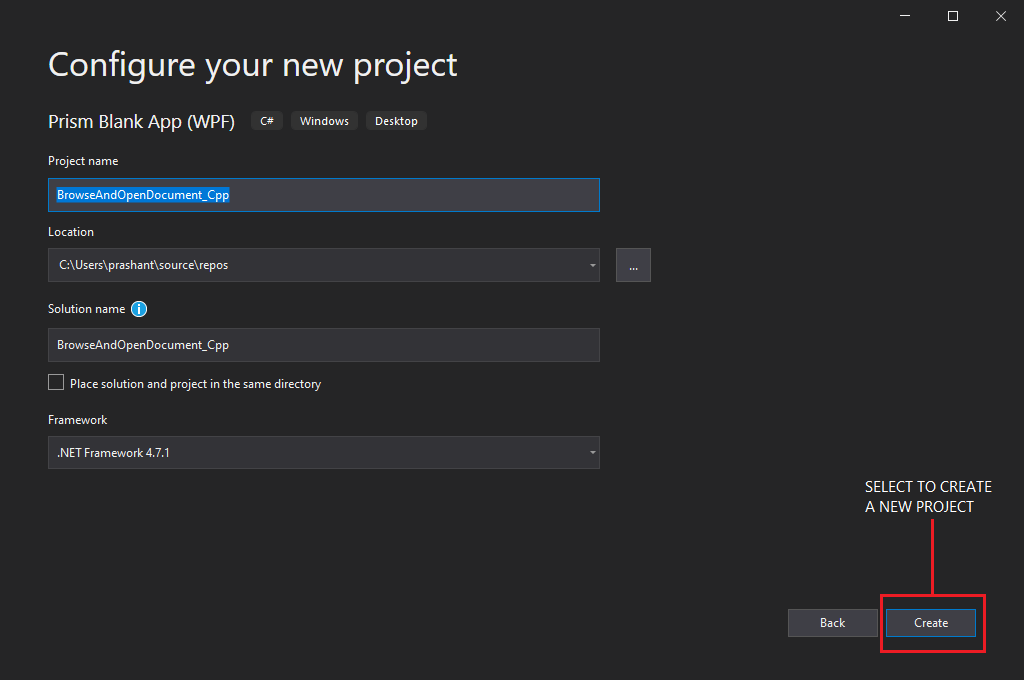
After giving project name we need to select “Create” button as shown in above image.
This will create another window as shown below.
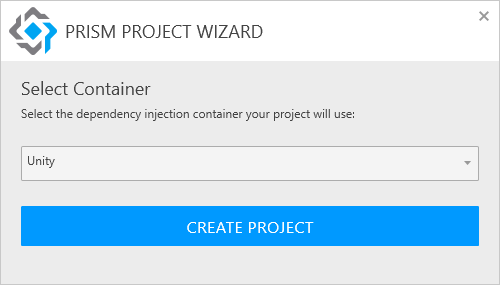
This window ask us to select “Dependecy Injection Container” for our Prism project
For our project we will continue with default “Unity” container.
Please do not worry about this container.
In future articles, I will explain and show how we can use it.
I want to keep this as beginner-friendly as possible.
So, don’t worry about this too much.
Creating UI
Now we need to create User Interface (UI) for our application.
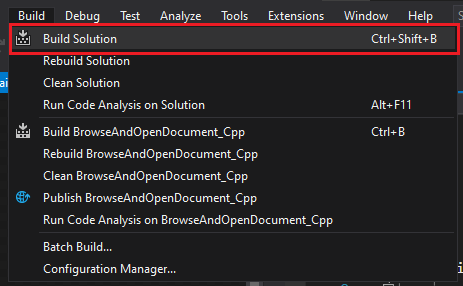
First we need to Build our solution so that any broken reference or anything missed we get at start.
To build our solution you can either use keyboard shortcut Ctrl + Shift + B or select “Build Solution” option from “Build” menu as shown in below image.
Update Xaml Code
Now we need to create UI by updating xaml code.
<Window x:Class="BrowseAndOpenDocument_Cpp.Views.MainWindow"
        xmlns="http://schemas.microsoft.com/winfx/2006/xaml/presentation"
        xmlns:x="http://schemas.microsoft.com/winfx/2006/xaml"
        xmlns:prism="http://prismlibrary.com/"
        prism:ViewModelLocator.AutoWireViewModel="True"
        Title="{Binding Title}"
        Height="200"
        Width="525"
        WindowStartupLocation="CenterScreen">

    <Grid Margin="25">
        <Grid.ColumnDefinitions>
            <ColumnDefinition Width="*" />
            <ColumnDefinition Width="15" />
            <ColumnDefinition Width="*" />
        </Grid.ColumnDefinitions>

        <Grid.RowDefinitions>
            <RowDefinition Height="30" />
            <RowDefinition Height="15" />
            <RowDefinition Height="30" />
            <RowDefinition Height="*" />
        </Grid.RowDefinitions>

        <TextBlock Grid.Row="0"
                   Grid.Column="0"
                   HorizontalAlignment="Center"
                   VerticalAlignment="Center"
                   FontSize="16"
                   FontWeight="Medium"
                   Text="Browse Solidworks Document" />

        <TextBox Grid.Row="0"
                 Grid.Column="2"
                 VerticalContentAlignment="Center"
                 Text="{Binding FilePath,
                                Mode=TwoWay,
                                UpdateSourceTrigger=PropertyChanged}" />

        <Button Grid.Row="2"
                Grid.Column="0"
                Grid.ColumnSpan="3"
                Content="Open Document"
                FontSize="16"
                FontWeight="Medium"
                Width="150"
                Command="{Binding OpenBrowseDocumentCommand}" />
    </Grid>
</Window>
Understanding Above Code
In <Window> tag we made 2 changes which are following :
-
Add
WindowStartupLocation="CenterScreen" -
Update
Height="200"
<Window> Tag
We add WindowStartupLocation="CenterScreen", so that when application start, it will open at center of screen.
We update Height="200", because default height is more than required.
Because of this we need to reduce the height.
<Grid> Tag
In <Grid> tag, we add Margin="25" property.
We add this property because we want a space aof 25 pixels around this grid.
Define <Grid> Columns
Inside this grid, we define Grid’s Columns as shown in below code:
<Grid.ColumnDefinitions>
  <ColumnDefinition Width="*" />
  <ColumnDefinition Width="15" />
  <ColumnDefinition Width="*" />
</Grid.ColumnDefinitions>
In above code, we had 3 columns.
1st and 3rd column have Width="*".
It means they get equal and remaining space.
2nd column has Width="15".
It means this column has fix Width space of 15 pixels.
Define <Grid> Rows
Inside this grid, we define Grid’s Rows as shown in below code:
<Grid.RowDefinitions>
  <RowDefinition Height="30" />
  <RowDefinition Height="15" />
  <RowDefinition Height="30" />
  <RowDefinition Height="*" />
</Grid.RowDefinitions>
In above code, we had 4 rows.
1st and 3rd rows have Height="30"
It means they have fix Height space of 30 pixels.
2nd row has Height="15"
It means it has fix Height space of 15 pixels.
4th row has Height="*"
It means this row get remaining available space.
Add <TextBlock> For Label
After defining grid’s columns and rows we add and <TextBlock> tag as shown below:
<TextBlock Grid.Row="0"
           Grid.Column="0"
           HorizontalAlignment="Center"
           VerticalAlignment="Center"
           FontSize="16"
           FontWeight="Medium"
           Text="Browse Solidworks Document" />
In above tag we define following properties:
Grid.Row="0" : This means it is positioned at 1st row.
Grid.Column="0" : This means it is positioned at 1st column.
HorizontalAlignment="Center" : This means it’s alignment in horizontal axis will be Center.
VerticalAlignment="Center" : This means it’s alignment in vertical axis will be Center.
FontSize="16" : This means Font size will be 16.
FontWeight="Medium" : This means Font Weight will be Medium (type of Semi-bold).
Text="Browse Solidworks Document" : In this property we define the text we want to see, which is Browse Solidworks Document.
Add <TextBox> For File Path
After defining TextBlock we add and <TextBox> tag to show Opened file path as shown below:
<TextBox Grid.Row="0"
         Grid.Column="2"
         VerticalContentAlignment="Center"
         Text="{Binding FilePath,
                        Mode=TwoWay,
                        UpdateSourceTrigger=PropertyChanged}" />
In above tag we define following properties:
Grid.Row="0" : This means it is positioned at 1st row.
Grid.Column="2" : This means it is positioned at 3rd column.
VerticalContentAlignment="Center" : This means it’s content’s alignment in vertical axis will be Center.
Text="{Binding FilePath, Mode=TwoWay, UpdateSourceTrigger=PropertyChanged}" : In this line we define Text.
Now let us break this property.
Binding FilePath : This Binds the Text property with a property named **FilePath**, which we define in MainWindowViewModel ViewModel class.
Mode=TwoWay : With TwoWay mode, UI can change viewmodel property and viewmodel property chage UI text property.
For more details about Mode, please
visit this Stack Overflow link
.
UpdateSourceTrigger=PropertyChanged : When the property changed in viewmodel, the text update in UI.
Add <Button> For Browse and Open
After <TextBox> for file path we add and <Button> tag as shown below:
<Button Grid.Row="2"
        Grid.Column="0"
        Grid.ColumnSpan="3"
        Content="Open Document"
        FontSize="16"
        FontWeight="Medium"
        Width="150"
        Command="{Binding OpenBrowseDocumentCommand}" />
In above tag we define following properties:
Grid.Row="2" : This means it is positioned at 3rd row.
Grid.Column="0" : This means it is positioned at 1st column.
Grid.ColumnSpan="3" : This means this button will overlap 3 columns.
Content="Open Document" : This property define the content we want to show in button.
In our case, we want to show a text of “Open Document”.
We can define images or links inside our button.
For more info you can use Google.
FontSize="16" : This means Font size will be 16.
FontWeight="Medium" : This means Font Weight will be Medium (type of Semi-bold).
Width="150" : This means Width of button is 150.
Command="{Binding OpenBrowseDocumentCommand}" : In MVVM, inplace of Click event, we use Command.
In our case we Bind OpenBrowseDocumentCommand from ViewModel with this button.
This means whenever we click this button, this command will execute.
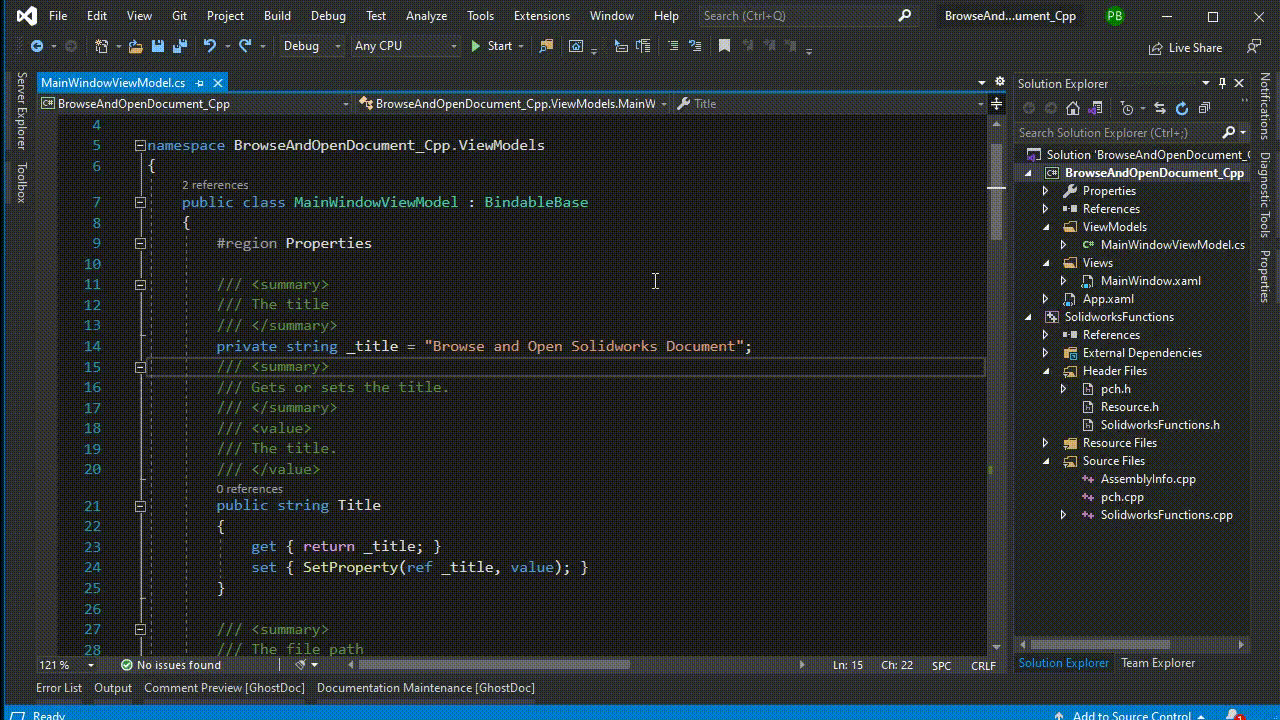
Update MainWindowViewModel
Now we need to update our MainWindowViewModel file for properties and Command.
Update Title Property
1st we update Title property as shown below.
/// <summary>
/// The title
/// </summary>
private string _title = "Browse and Open Solidworks Document";

/// <summary>
/// Gets or sets the title.
/// </summary>
/// <value>
/// The title.
/// </value>
public string Title
{
    get { return _title; }
    set { SetProperty(ref _title, value); }
}
In above code, I have updated _title field to "Browse and Open Solidworks Document".
This will be shown at the Window title of our application.
You noticed that I have added Comments also.
These comments helps you too understand the code.
Add FilePath Property
After this we need to add FilePath property as shown below:
/// <summary>
/// The file path
/// </summary>
private string _filePath;

/// <summary>
/// Gets or sets the file path.
/// </summary>
/// <value>
/// The file path.
/// </value>
public string FilePath
{
    get { return _filePath; }
    set { SetProperty(ref _filePath, value); }
}
In above code, we add Prism property with backend field using prop code-snippet.
There is nothing special about this Prism property.
Add Comment to Constructor
/// <summary>
/// Initializes a new instance of the <see cref="MainWindowViewModel"/> class.
/// </summary>
public MainWindowViewModel()
{

}
In above code, I have just added a comment to Constructor.
Add Browse and Open Solidworks Command
After Constructor, we add Browse and Open Solidworks Command using cmd code-snippet.
This snippet add following code .
/// <summary>
/// The open browse document command
/// </summary>
private DelegateCommand _openBrowseDocumentCommand;

/// <summary>
/// Gets the open browse document command.
/// </summary>
/// <value>
/// The open browse document command.
/// </value>
public DelegateCommand OpenBrowseDocumentCommand =>
    _openBrowseDocumentCommand
    ?? (_openBrowseDocumentCommand = new DelegateCommand(ExecuteOpenBrowseDocumentCommand));

/// <summary>
/// Executes the open browse document command.
/// </summary>
void ExecuteOpenBrowseDocumentCommand()
{

}
This snipped a DelegateCommand name OpenBrowseDocumentCommand.
DelegateCommand is present in Prism.Commands namespace.
This OpenBrowseDocumentCommand command has backend field named _OpenBrowseDocumentCommand.
This command execute a funtion named ExecuteOpenBrowseDocumentCommand().
Please watch the video, how I have added the command.
Also I have added Comments for better understanding.
Now our MainWindowViewModel looks like following:
using Prism.Commands;
using Prism.Mvvm;
using System.Windows;

namespace BrowseAndOpenDocument_Cpp.ViewModels
{
    public class MainWindowViewModel : BindableBase
    {
        #region Properties

        /// <summary>
        /// The title
        /// </summary>
        private string _title = "Browse and Open Solidworks Document";

        /// <summary>
        /// Gets or sets the title.
        /// </summary>
        /// <value>
        /// The title.
        /// </value>
        public string Title
        {
            get { return _title; }
            set { SetProperty(ref _title, value); }
        }

        /// <summary>
        /// The file path
        /// </summary>
        private string _filePath;

        /// <summary>
        /// Gets or sets the file path.
        /// </summary>
        /// <value>
        /// The file path.
        /// </value>
        public string FilePath
        {
            get { return _filePath; }
            set { SetProperty(ref _filePath, value); }
        }

        #endregion

        #region Constructor

        /// <summary>
        /// Initializes a new instance of the <see cref="MainWindowViewModel"/> class.
        /// </summary>
        public MainWindowViewModel()
        {

        }

        #endregion

        #region Browse and Open SolidWorks Command

        /// <summary>
        /// The open browse document command
        /// </summary>
        private DelegateCommand _openBrowseDocumentCommand;

        /// <summary>
        /// Gets the open browse document command.
        /// </summary>
        /// <value>
        /// The open browse document command.
        /// </value>
        public DelegateCommand OpenBrowseDocumentCommand =>
            _openBrowseDocumentCommand
            ?? (_openBrowseDocumentCommand = new DelegateCommand(ExecuteOpenBrowseDocumentCommand));

        /// <summary>
        /// Executes the open browse document command.
        /// </summary>
        void ExecuteOpenBrowseDocumentCommand()
        {

        }

        #endregion
    }
}
You can see from above code I have arranged properties, commands and Constructor in their separate regions.
This will help us to organize the code.
I also suggest to do this.
I have a little memory for retaining information so I depend upon on this type of things.
Add CLI/CLR C++ Project
Now we need to a CLI/CLR C++ Project for Solidworks functions.
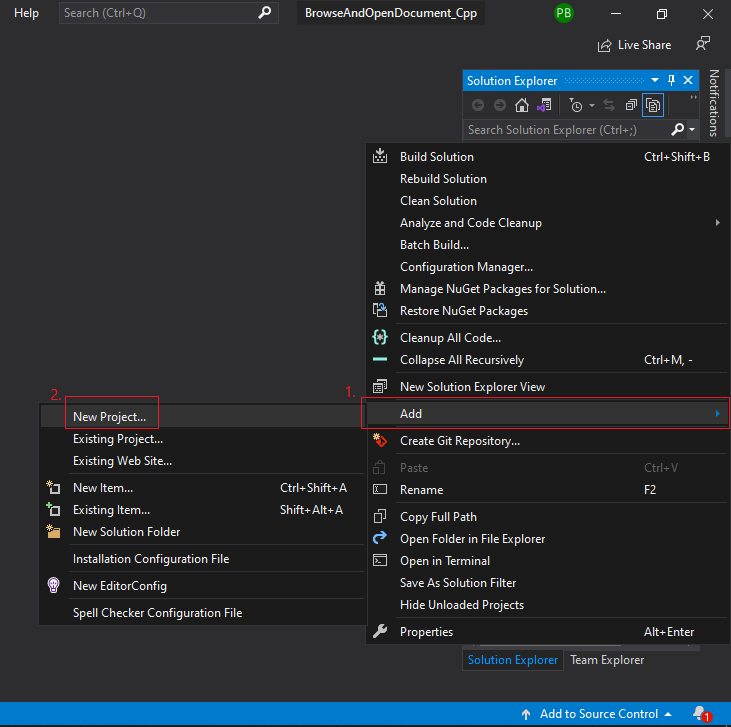
Click on our Solution “BrowseAndOpenDocument_Cpp” as shown in below image:
Right Click on the Solution then select Add -> New Project as shown in below image.
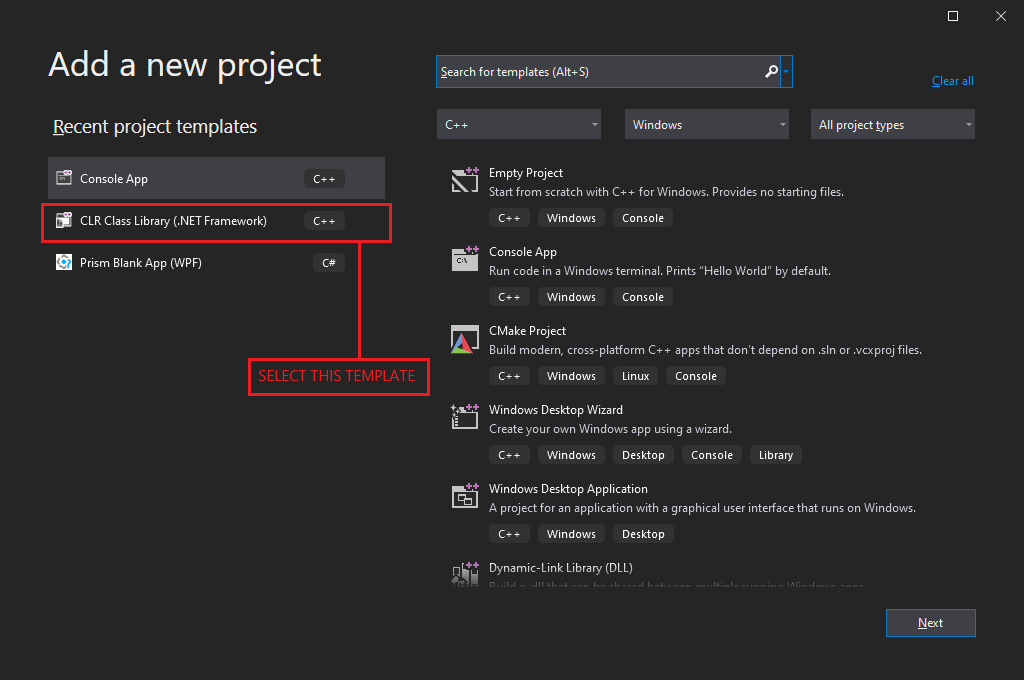
This will open a new Window as shown in below image.
From this window we need to select “CLR Class Library” as shown in below image:
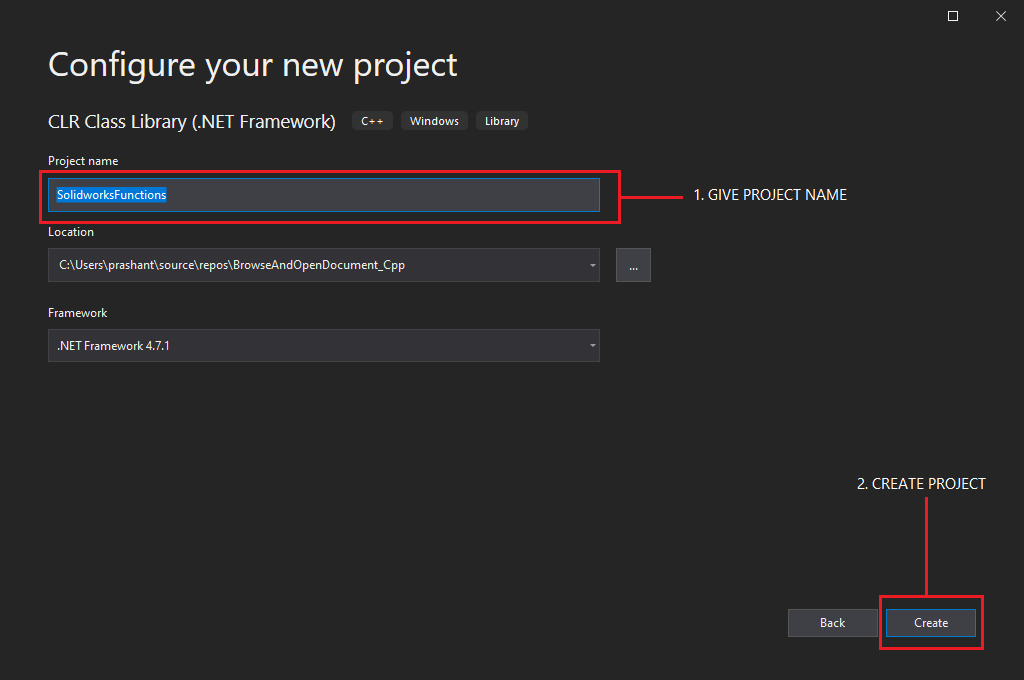
After clicking “Next” button a new “Configure your new project” Window appears.
In this window can define following things:
-
Project Name
-
Location
-
Framework
For our project we define only Project Name to SolidworksFunctions as shown in below image.
This will add a new project in our Solution as shown in below image:
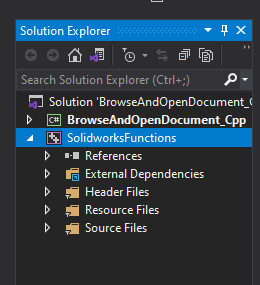
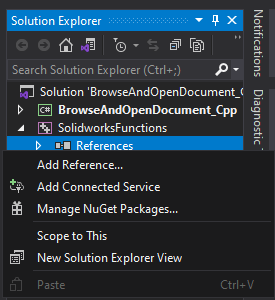
Add Solidworks Reference Files
Now we need to add Solidworks Introp Files as references.
For this we need to Right Click on Reference then select Add Reference as shown in below image:
This will open a new window as shown in below image:

From this window select “Browse” option then select “Browse” button as shown in below image:
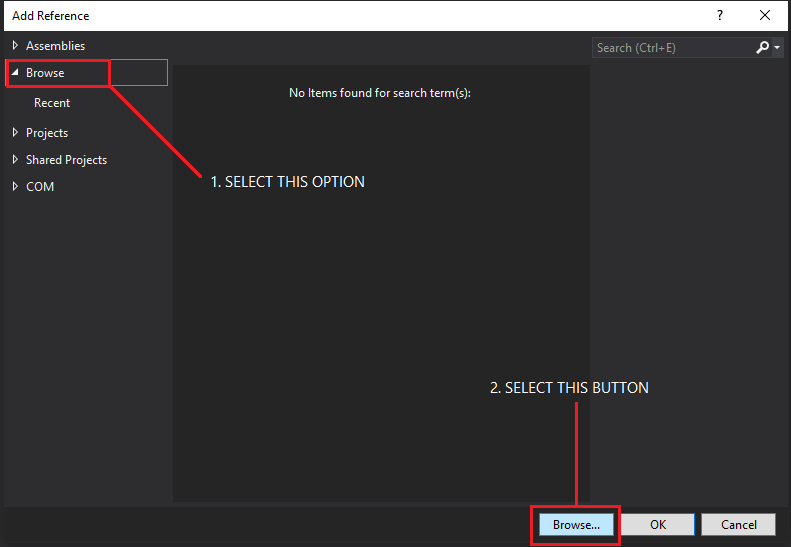
This will open a new File Browser window to select the file we want to add as a reference.
Please see below image for more details.
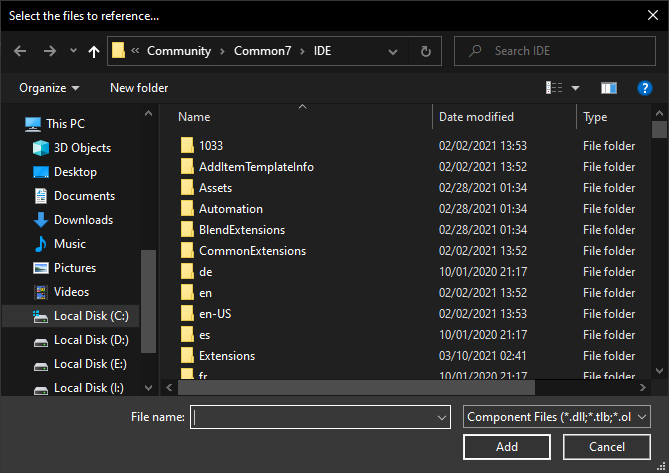
In above window you need to browse to folder path where Solidworks is installed.
If you have not changed installation path, then this folder path will be C:\Program Files\SOLIDWORKS Corp\SOLIDWORKS.
Inside this folder, we need to select 2 files.
-
SolidWorks.Interop.sldworks
-
SolidWorks.Interop.swconst
We can add one file at a time hence we need to do this 2 time.
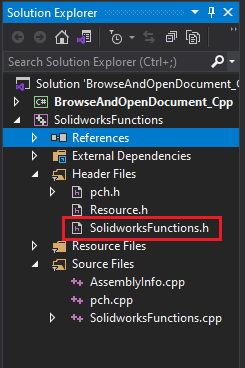
Update SolidworksFunctions Header File
Now we need to update the SolidworksFunctions.h header file as shown in below image.
Now I want to keep this very simple.
So I will move the code from SolidworksFunctions.h header file to SolidworksFunctions.cpp file.
Below is the code I will move.
using namespace System;

namespace SolidworksFunctions
{
    public ref class Class1
    {
        // TODO: Add your methods for this class here.
    };
}
Update SolidworksFunctions Cpp file
Now we need to update SolidworksFunctions.cpp file.
Please copy below code and paste in SolidworksFunctions.cpp file.
#include "pch.h"
#include "SolidworksFunctions.h"

using namespace System;
using namespace System::IO;
using namespace SolidWorks::Interop::sldworks;
using namespace SolidWorks::Interop::swconst;

namespace SolidworksFunctions
{
    /// <summary>
    /// Browse and open SolidWorks document
    /// </summary>
    public ref class BrowseAndOpenSolidworksDocument
    {
    public:
        /// <summary>
        /// Browses and opens a SolidWorks document.
        /// </summary>
        /// <param name="path">The selected file path.</param>
        /// <param name="errorMessage">The error message.</param>
        /// <returns>True if successful; otherwise, false.</returns>
        static bool BrowseAndOpen(String^% path, String^% errorMessage)
        {
            // SolidWorks application object
            ISldWorks^ swApp;

            // Create an instance of SolidWorks application
            // swApp = gcnew SldWorks();

            // If failed to open SolidWorks application
            if (swApp == nullptr)
            {
                errorMessage = "Failed to open SolidWorks.";
                return false;
            }

            // Make SolidWorks visible
            swApp->Visible = true;

            // SolidWorks file filter
            String^ fileFilter =
                "SOLIDWORKS Files (*.sldprt; *.sldasm; *.slddrw)|*.sldprt;*.sldasm;*.slddrw";

            String^ fileConfig;
            String^ fileDispName;
            int fileOptions;

            // Browse SolidWorks document
            path = swApp->GetOpenFileName(
                "Select File",
                "",
                fileFilter,
                fileOptions,
                fileConfig,
                fileDispName
            );

            // If browsing failed
            if (path == nullptr)
            {
                errorMessage = "Failed to browse SolidWorks document.";
                return false;
            }

            // Determine document type
            int documentType = 0;

            FileInfo^ fileInfo = gcnew FileInfo(path);
            String^ fileExtension = fileInfo->Extension->ToLower();

            if (fileExtension == ".sldprt")
            {
                documentType = (int)swDocumentTypes_e::swDocPART;
            }
            else if (fileExtension == ".sldasm")
            {
                documentType = (int)swDocumentTypes_e::swDocASSEMBLY;
            }
            else
            {
                documentType = (int)swDocumentTypes_e::swDocDRAWING;
            }

            String^ config = nullptr;
            int error;

            // Open selected file
            IModelDoc2^ swDoc = swApp->IOpenDoc5(
                path,
                documentType,
                (int)swOpenDocOptions_e::swOpenDocOptions_Silent,
                config,
                error
            );

            // If opening failed
            if (swDoc == nullptr)
            {
                errorMessage = "Failed to open SolidWorks document.";
                return false;
            }

            return true;
        }
    };
}
I have commented each line so that you can understand the code easily.
Update ExecuteOpenBrowseDocumentCommand method in MainWindowViewModel
Please copy and paste the below code into ExecuteOpenBrowseDocumentCommand method in MainWindowViewModel.cs file.
// Reference path variable
string path = string.Empty;

// Reference error message
string errorMessage = string.Empty;

// Get the status of SolidWorks Browse and Open function from C++ project
bool status =
    SolidworksFunctions.BrowseAndOpenSolidworksDocument
        .BrowseAndOpen(ref path, ref errorMessage);

// If there is any error
if (!status)
{
    // Inform the user and exit the function
    MessageBox.Show(
        errorMessage,
        "Error",
        MessageBoxButton.OK,
        MessageBoxImage.Error
    );
    return;
}

// Update file path
FilePath = path;
I have commented each line so that you can understand the code easily.
Now Build the Solution as shown in below image.
After Building Solution run the program by pressing F5.
Final Result
After running the program wait for few minute.
You will get result as shown in below image!!!
I hope this will helpful!!!
This is it !!!
We have completed our Browse and Open Solidworks Document program using Solidworks C++ APIs.
Hope this post helps you to start with Solidworks C++ API.
If you like the post then please share it with your friends also.
Do let me know by you like this post or not! I will continue creating Solidworks C++ posts.
Till then, Happy learning!!!